

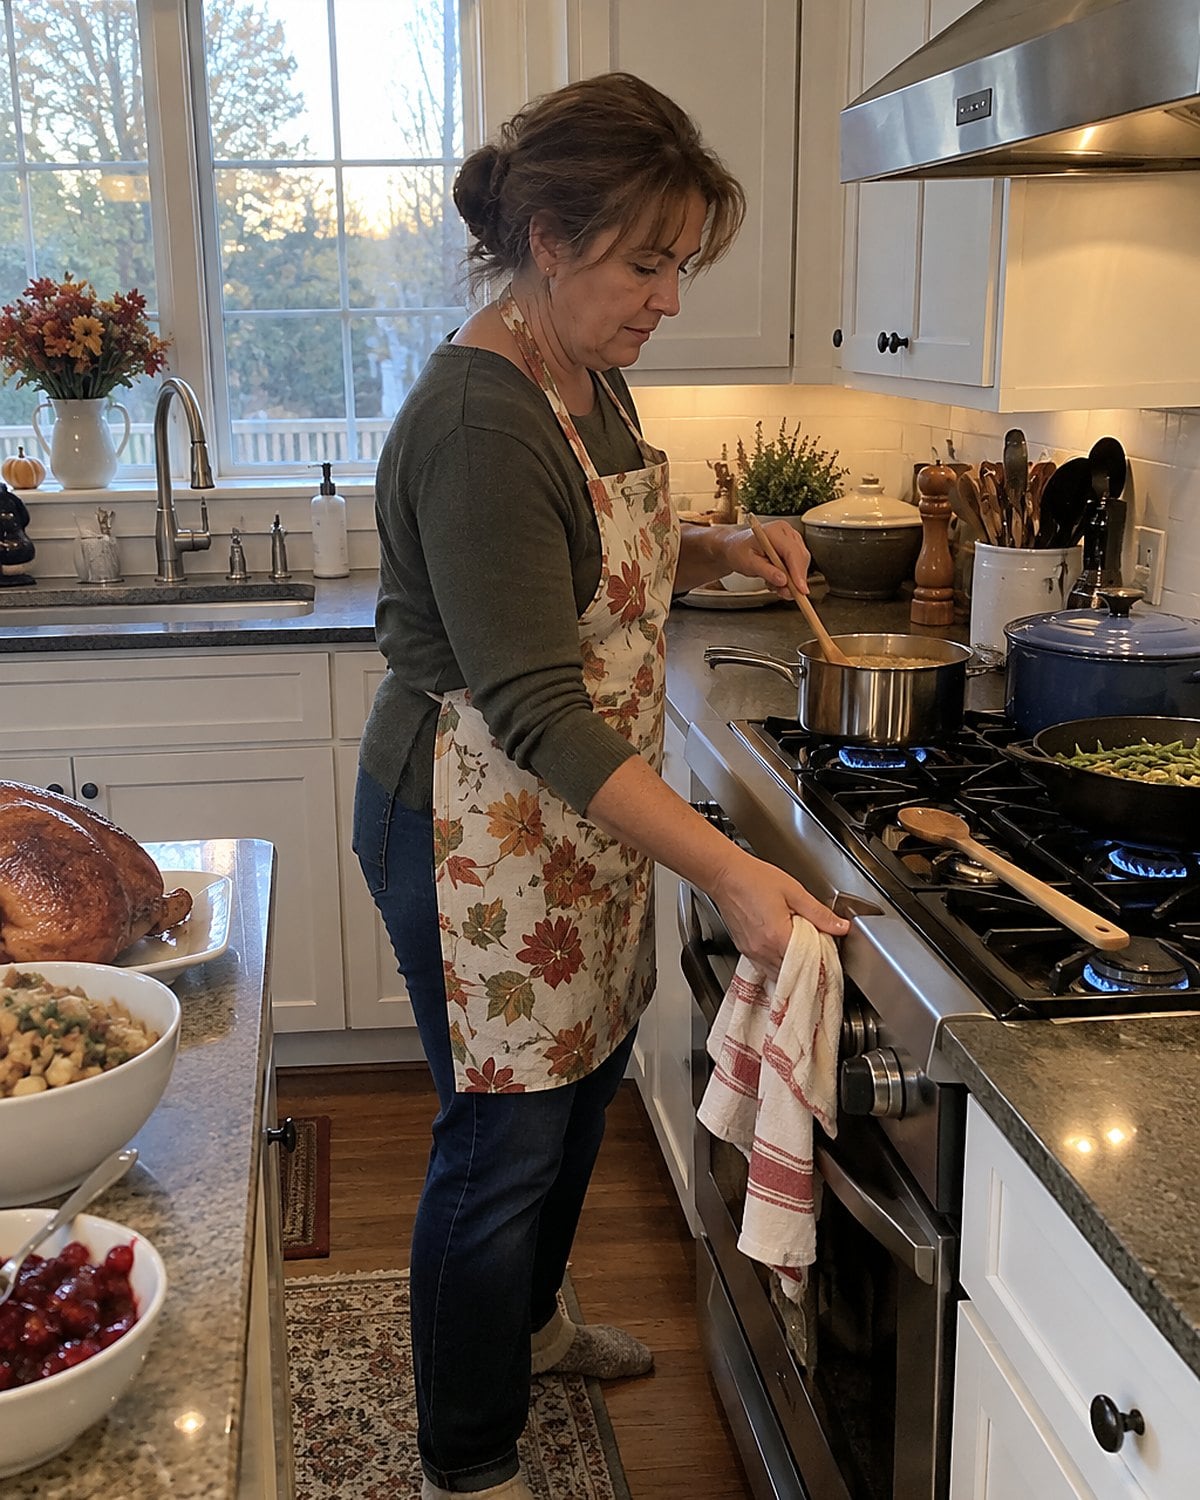
The paper crackles when you fold it back. Your mother knew what to do with the odd-shaped cut inside, and probably knew which burner ran hot. On Thursdays, liver and onions filled the kitchen before anyone asked what was for supper.
Now the counter holds sealed trays, and the butcher paper sits behind the glass. You know your way around a skillet. The missing piece is what each cut asks of you: a hard sear, a long simmer, a sharp knife, or the nerve to stop cooking before supper turns tough.
#26 The meaty soup bones behind the glass
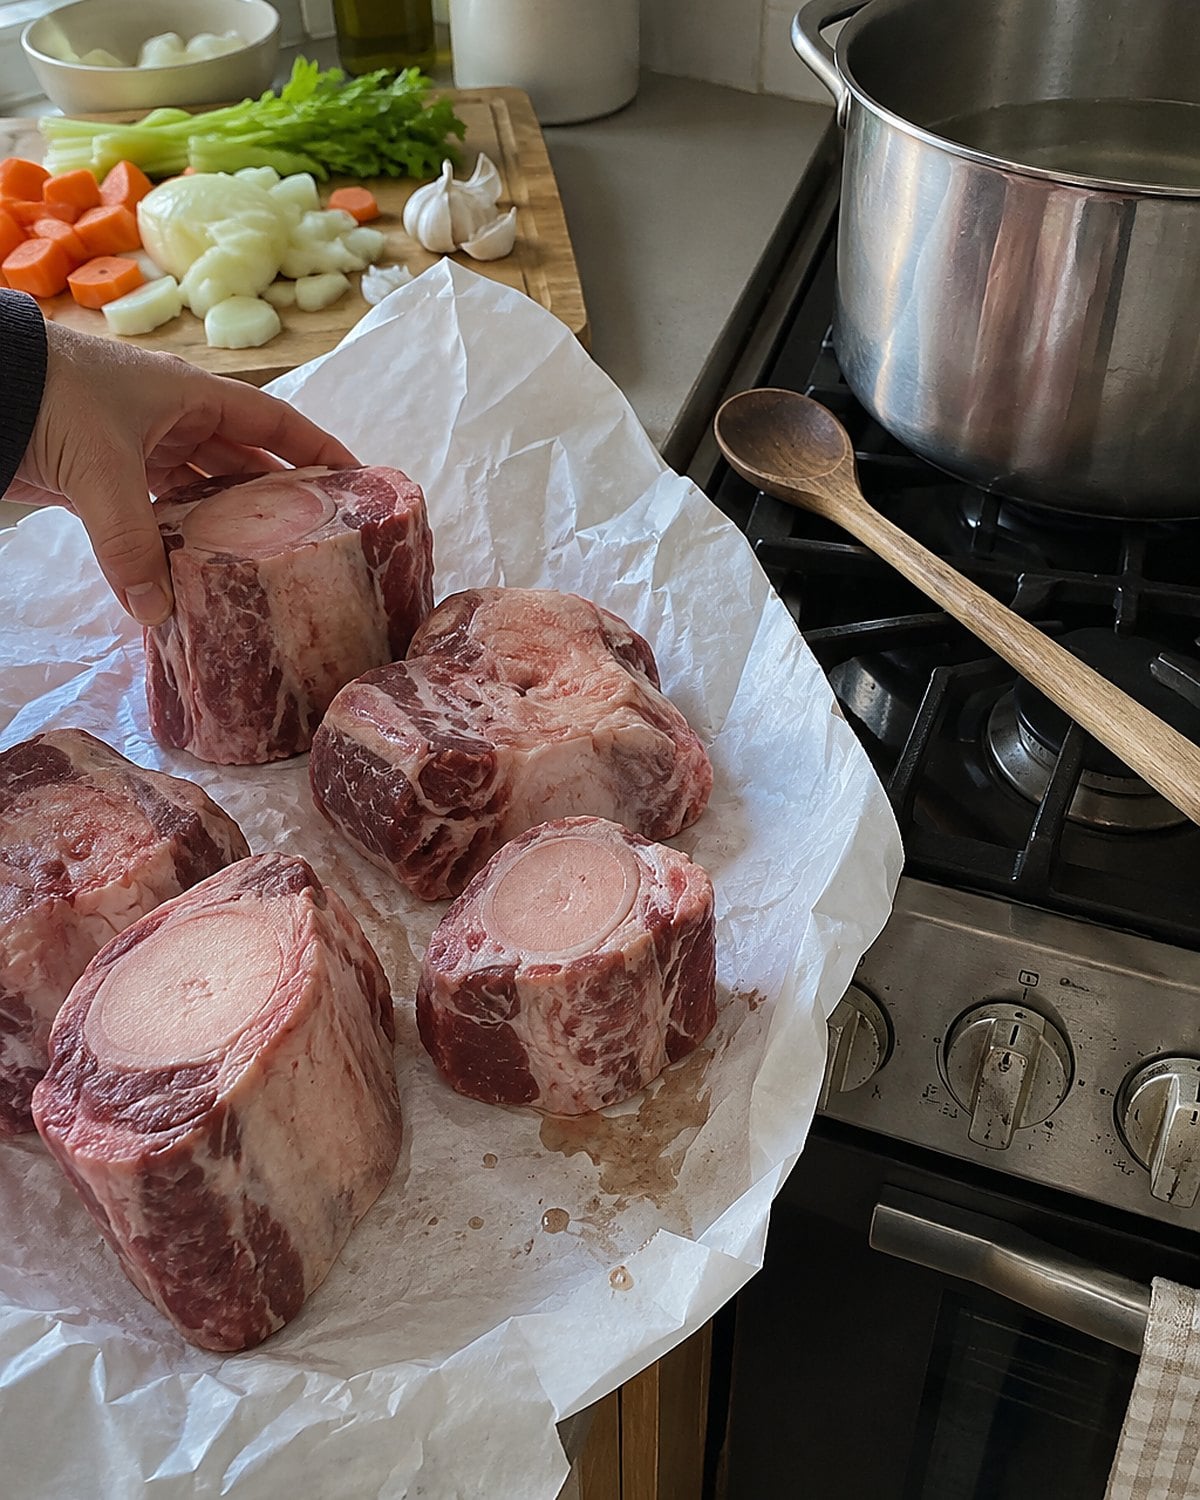
Ask for meaty beef soup bones, and look before they’re wrapped. Bare bones add flavor to a pot, but they don’t give you much for supper. Meat still clinging to the edges is what you want if the plan is soup with something to chew.
Brown the bones first. The dark bits left on the pot’s bottom dissolve into the broth when you add water and scrape. Bring the pot to a simmer rather than a hard boil; the gentler heat lets you skim the surface and keeps the liquid from reducing too fast.
Your mother’s stockpot earned its place because she kept checking it. Lift the lid, add water when needed, and pull the meat when it gives under a fork.
Cool the broth promptly in shallow containers, rather than leaving the full pot on the stove. At 40°F or below, use it within three to four days or freeze it. Check the USDA’s cold storage chart for broth and cooked-meat storage. Date the container before it disappears behind the milk.
#25 The pork steak with browned edges
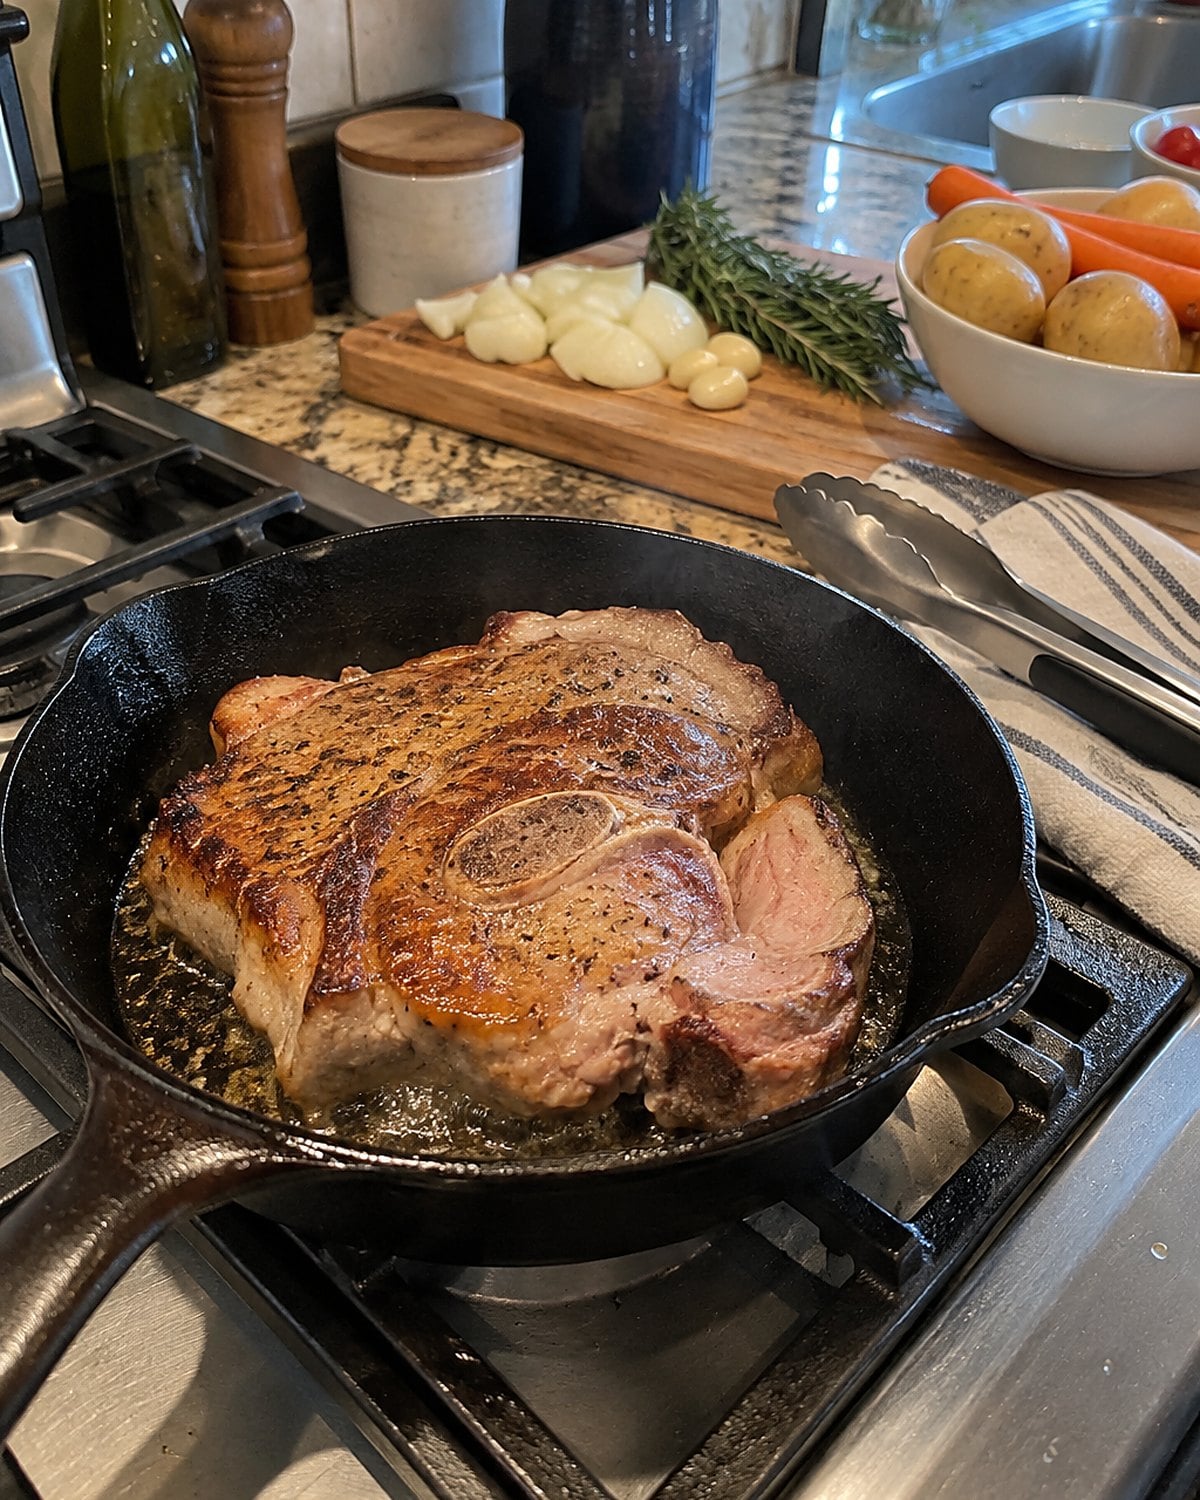
Pork steak looks like an oversized chop with untidy edges. It comes from the shoulder, so those seams of fat and connective tissue are part of the cut. Your mother knew which pan fit it because she had probably cooked it in that pan for years.
Give it room in a heavy skillet. If the pan is crowded, the surface steams instead of browning. Once the edges take color, lower the heat and cover the pan so the meat cooks through without scorching the outside.
For a shoulder steak sliced thin, that brief covered stretch leaves you with tender meat and browned edges. A thick steak needs longer cooking to soften its connective tissue. Ask the butcher how thick it was cut before deciding between a skillet and a covered pot.
Use a thermometer rather than judging by color. The USDA’s safe temperature chart lists 145°F with a three-minute rest for whole cuts of pork. Check the thickest part without touching bone.
A little vinegar stirred into the pan juices at the end cuts through the fat. Spoon those juices over potatoes, and the steak has its old job back.
#24 The oxtails in the deep pot
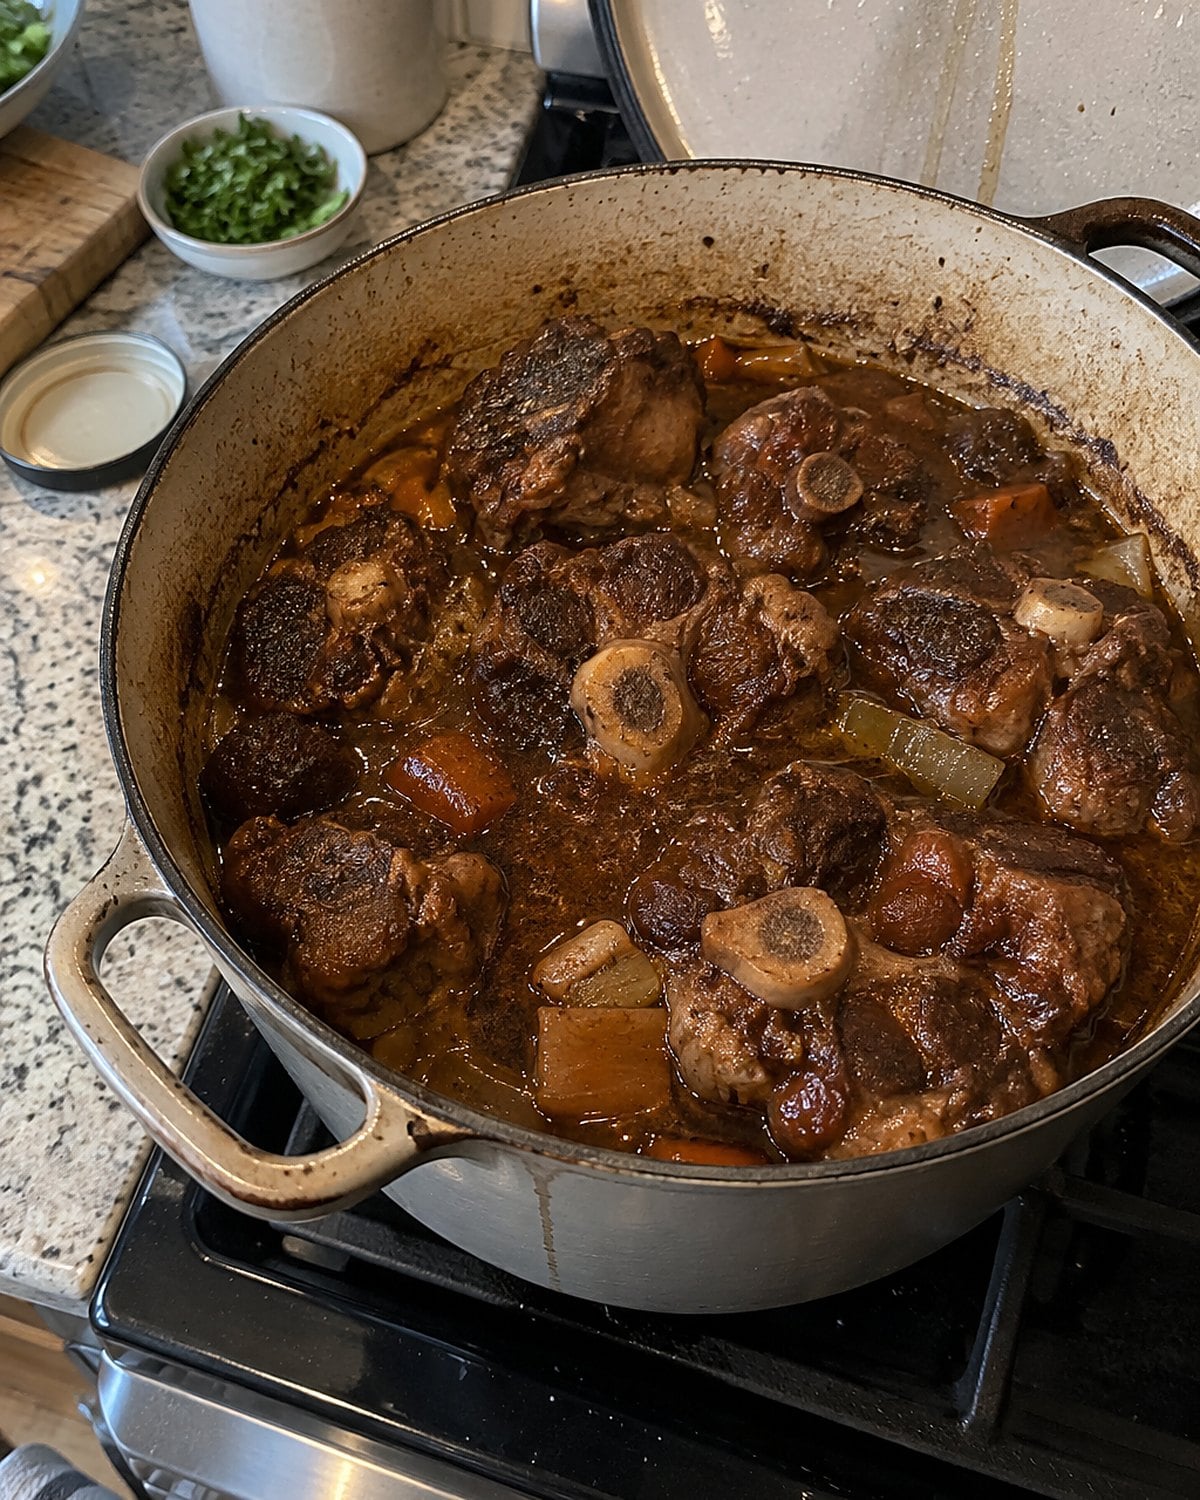
Oxtails leave the counter in knobby pieces, each with bone at its center. They ask for the afternoon, not the skillet you pull out at six. Brown them in batches so the pot develops a dark crust without crowding.
Next come onion, water or broth, and a lid. Keep the liquid at a low simmer. The meat is ready when it pulls from the bone with a fork.
An electric pressure cooker shortens the wait. Use the beef setting in your cooker’s manual, then check the meat after the pressure releases. If it still grips the bone, cook it longer. Your mother’s pot gave the same answer without a timer.
Strain the sauce if you want it smooth, or leave the softened onion where it is. Chill the finished dish, and the fat firms on top for easy lifting. Beneath it, the cooking liquid sets because connective tissue has turned to gelatin.
Warm that sauce back up and put it over rice. There’s a good reason oxtails were served with something ready to catch every spoonful.
#23 The blade roast under the label
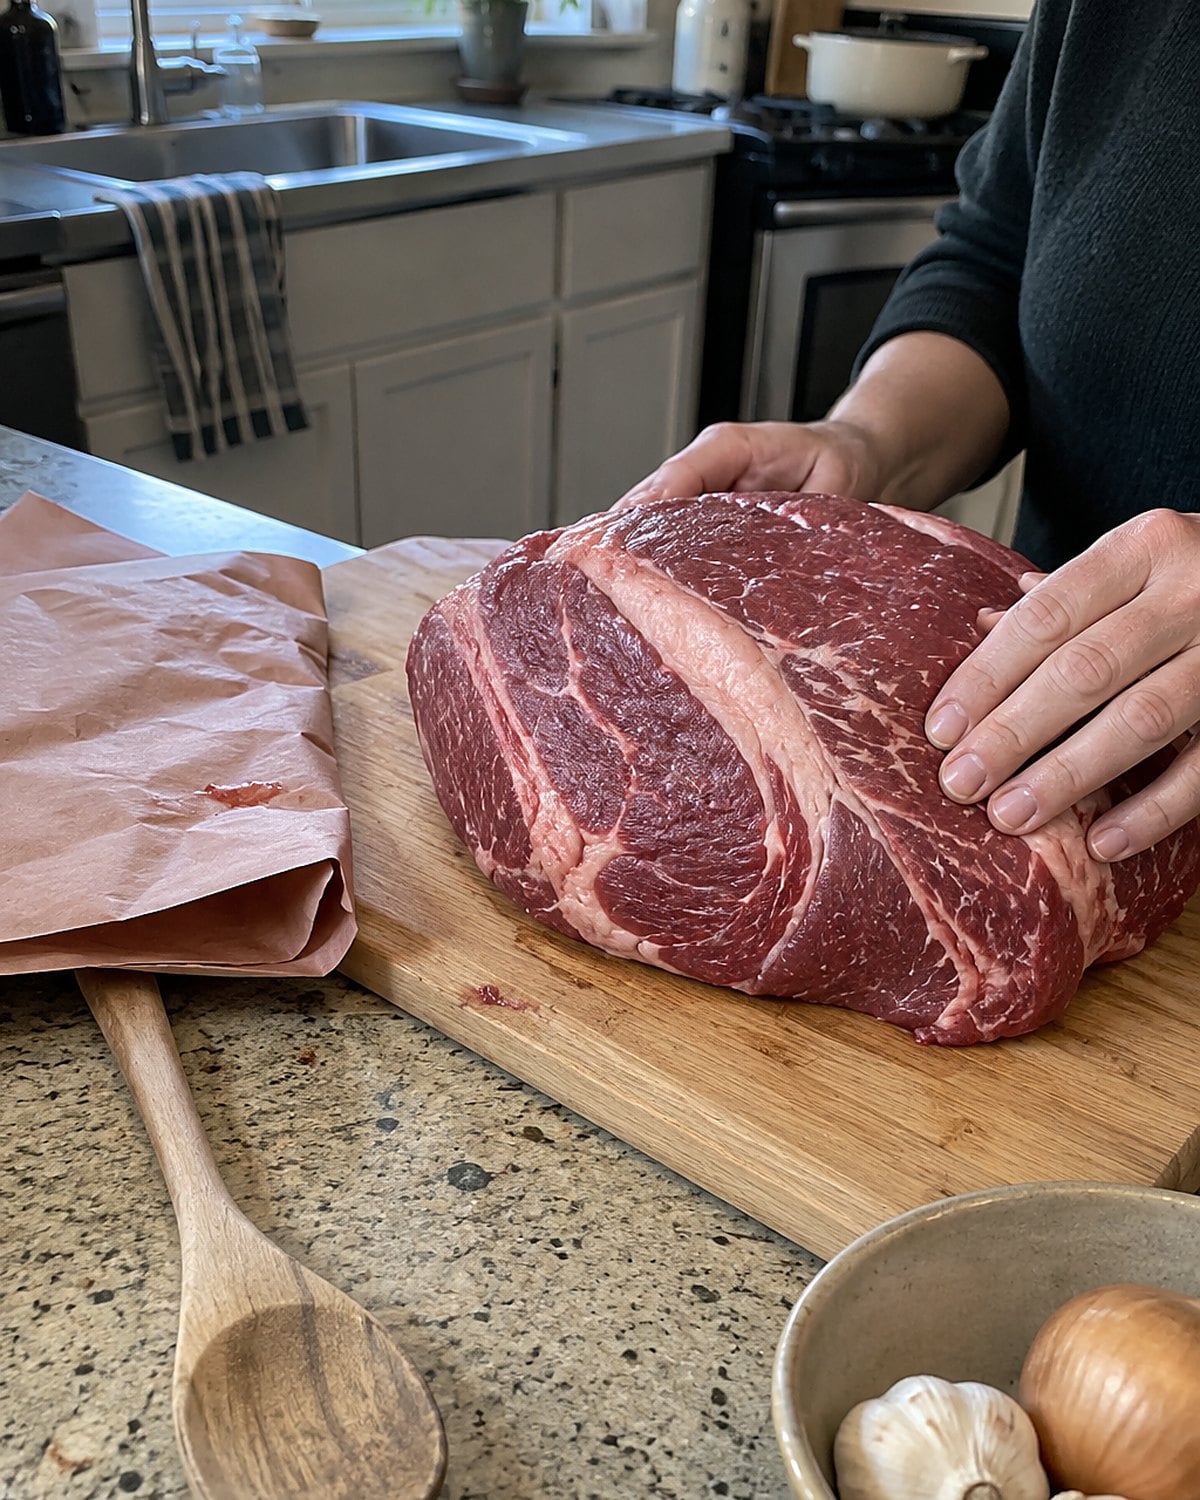
A beef blade roast has plenty of flavor and a strip of gristle that won’t become a neat slice by wishful thinking. At the counter, turn the package over. Look for the seam running through the meat, then decide whether you want a roast to carve or meat to pull apart.
For a covered pot, blade roast makes sense. Brown its broad sides first, add onion and a little liquid, then cover. Keep the heat low enough that the liquid barely moves. Fast boiling tightens the meat while the connective tissue still needs time.
Test with a fork near the seam. If the fork meets resistance, the roast needs more cooking. When it slips in easily, lift the meat out and let it settle before pulling or slicing across the grain.
That seam explains a counter puzzle. The butcher also sells flat iron steaks cut from the blade after the tough center has been removed. A flat iron belongs in a hot pan; a whole blade roast belongs under a lid. The names sound close, but the prep done behind the counter changes your supper.
#22 The rump roast for Sunday slices
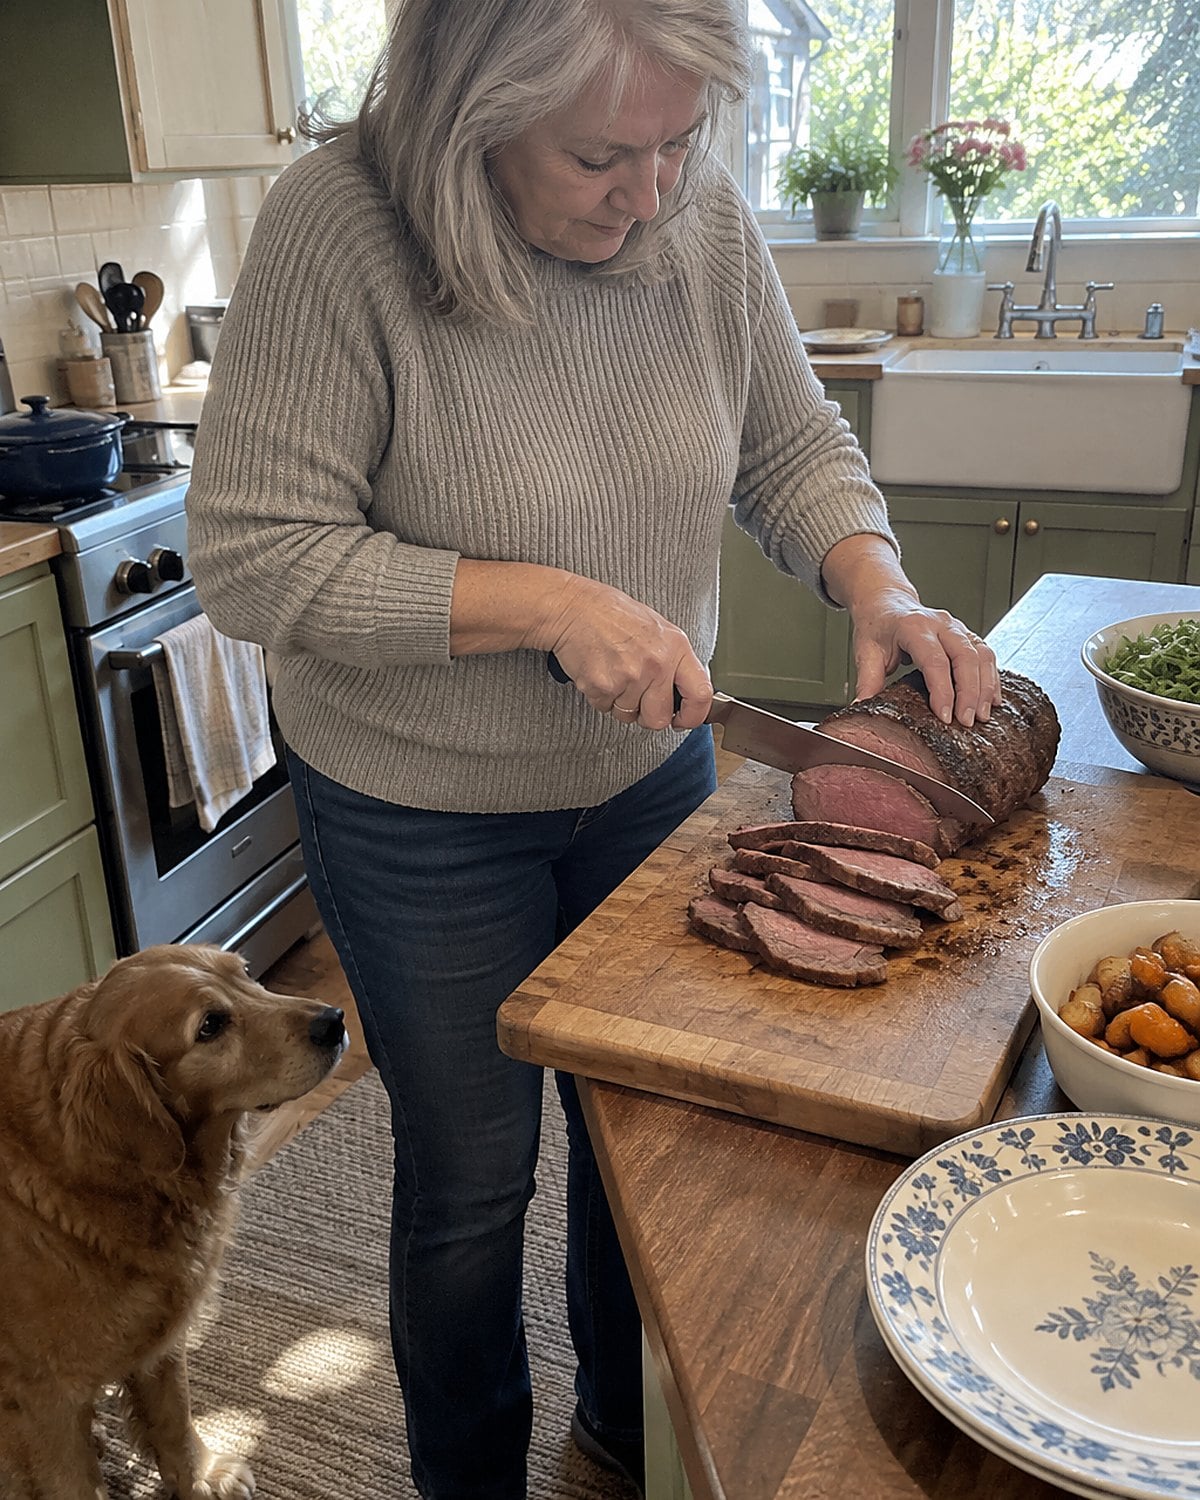
The roast came out, everyone hovered, and somebody asked for the end piece. A rump roast still earns that scene if you treat it as a lean cut. It won’t forgive an extra hour of cooking the way a chuck roast will.
Season it, roast it, and check its center with a thermometer. For a whole beef roast, the USDA lists 145°F followed by a three-minute rest. If your household prefers it cooked further, keep it in the oven and keep checking the center.
Then leave the knife alone for the rest. Cut across the grain into thin slices. Look at the direction of the muscle fibers before the first cut; shortening those fibers makes each bite easier to chew.
Save the pan juices. A spoonful over the slices does more work than a thick gravy poured over meat cut with the grain.
#21 The beef tongue on the lunch plate
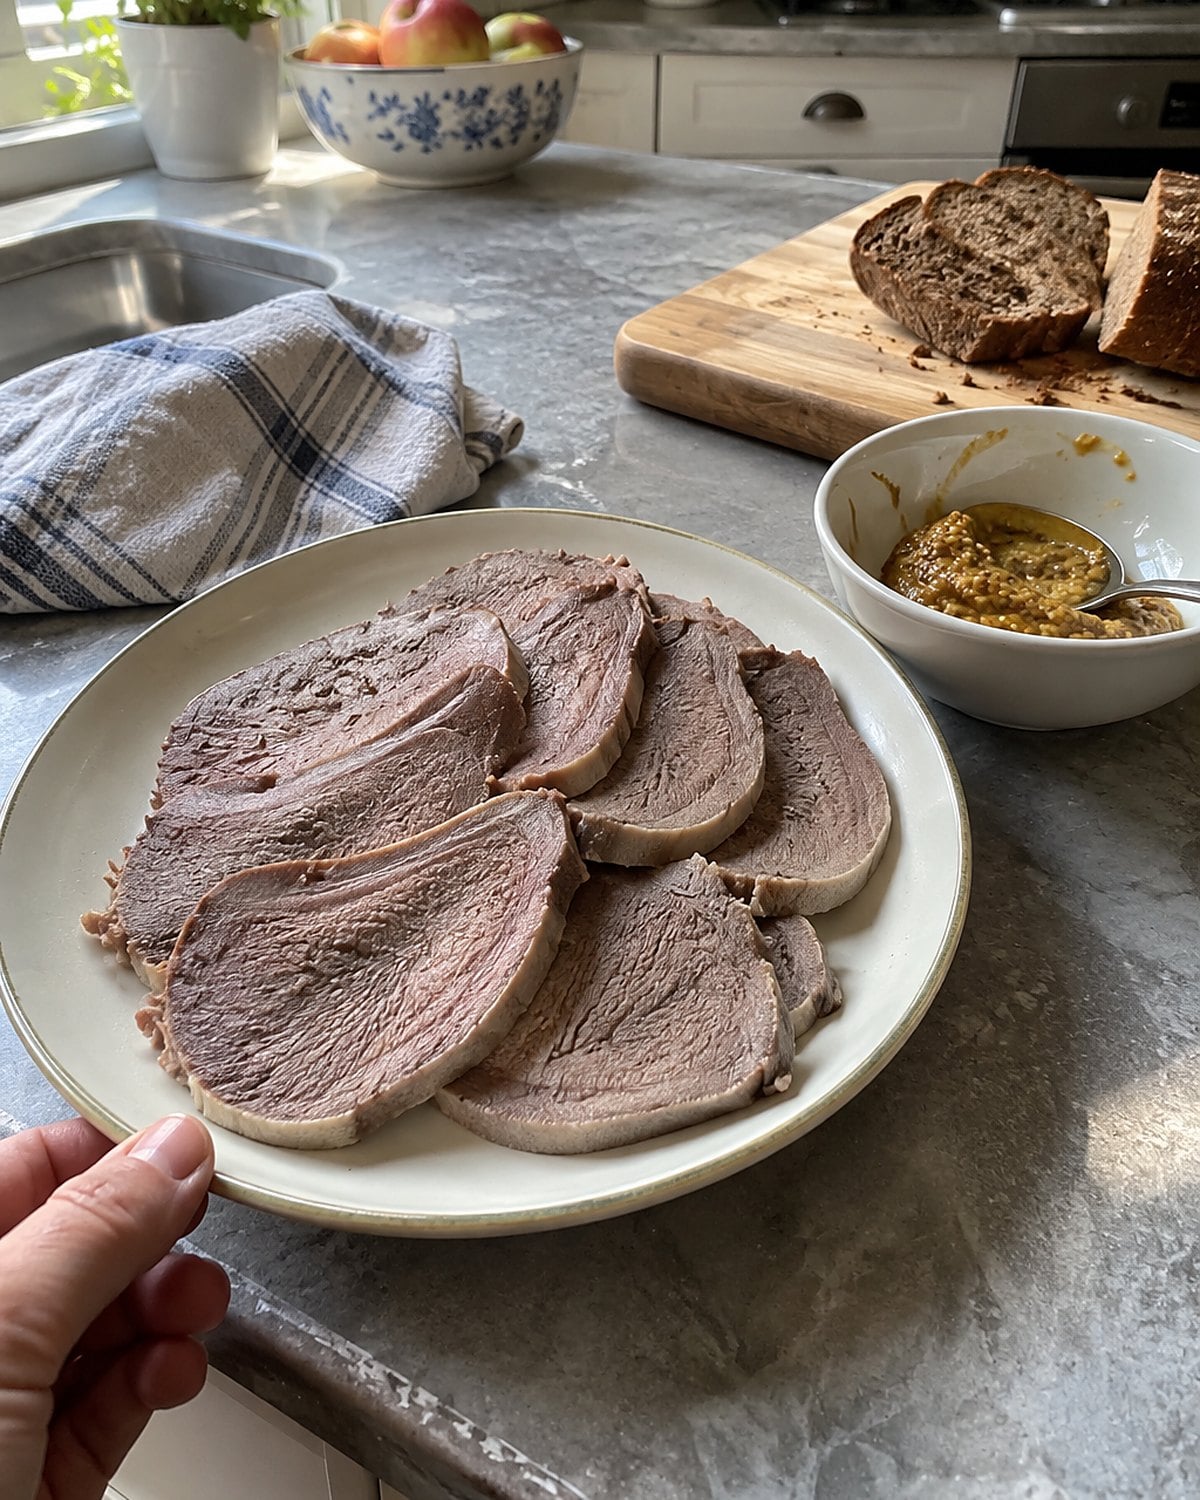
Tongue turns up at the deli counter in tidy slices, far removed from the raw cut under the butcher glass. If you’ve eaten it in a sandwich without giving it much thought, the home version is worth seeing through.
It needs moist heat and time. Simmer it with onion and peppercorns until a knife slides easily into the thickest part. While it’s warm enough to handle, peel away the outer skin. That step changes its look and texture completely; the skin isn’t the part you serve.
After cooling, slice the meat thinly across the grain. Put it on rye with mustard and pickles, or warm slices in the cooking liquid. The flavor is rich beef, and the texture stays firm enough for a clean slice.
Keep raw tongue away from anything you’ll eat without further cooking. Wash the board and knife after prep, before the rye and pickles come out. The sandwich tastes better when you aren’t juggling raw-meat cleanup alongside lunch.
#20 The knuckle bones for a wobbling broth
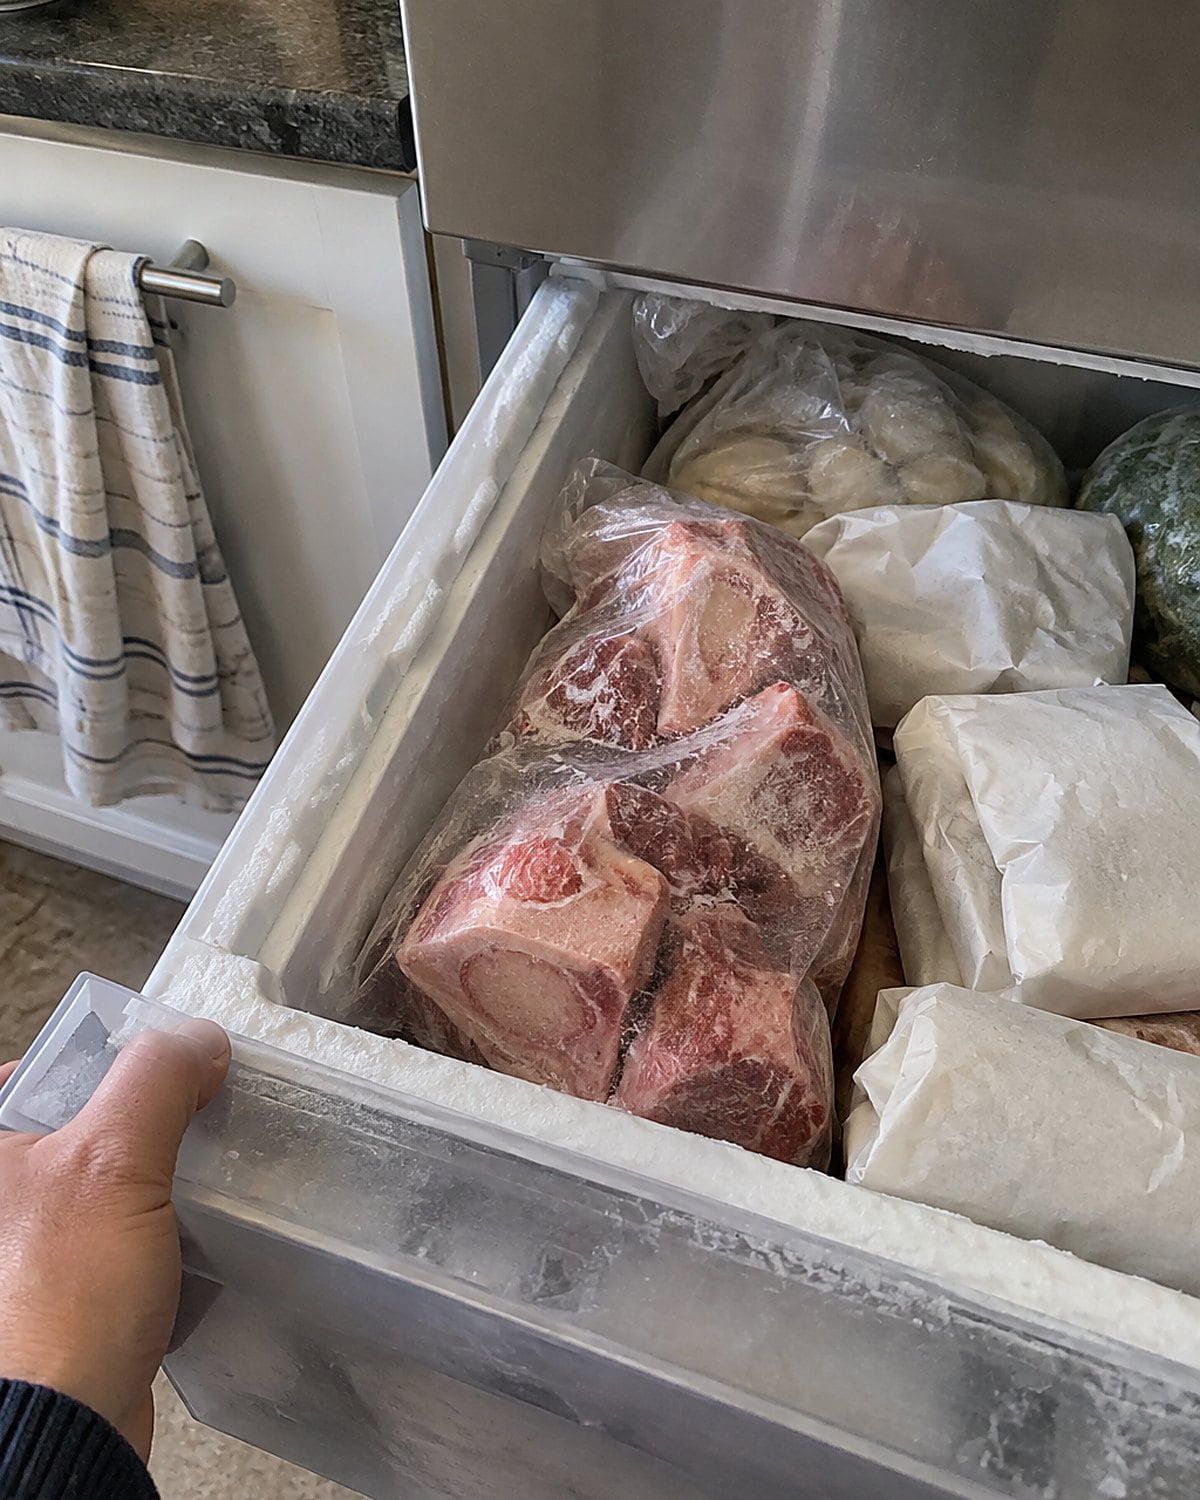
At the bottom of the freezer drawer, a bag of knuckle bones looks unpromising. In a pot, the joints give broth body. Once chilled, that broth has a wobble your spoon will find before you do.
Ask the butcher for beef knuckle bones cut to fit your stockpot. They’re for body, not a bowlful of meat. Roast them until browned, then move them to a pot with water and onion.
Keep the liquid at a simmer and skim the foam that gathers on top. The foam won’t ruin supper; removing it gives a clearer broth. For clearer stock still, pour it through a sieve without pressing on what’s left behind.
Cool it promptly in shallow containers. Once refrigerated, give it several hours to chill before looking for the wobble. Gelatin from connective tissue makes the broth set, then melt again when heated. A firm top tells you nothing about how long it has kept; use the date on the container.
The useful test comes in a mug. Warm a spoonful, taste it, and add salt only after you know how concentrated it is.
Try it: Instant Pot Beef Bone Broth
#19 The chicken backs in the roasting pan
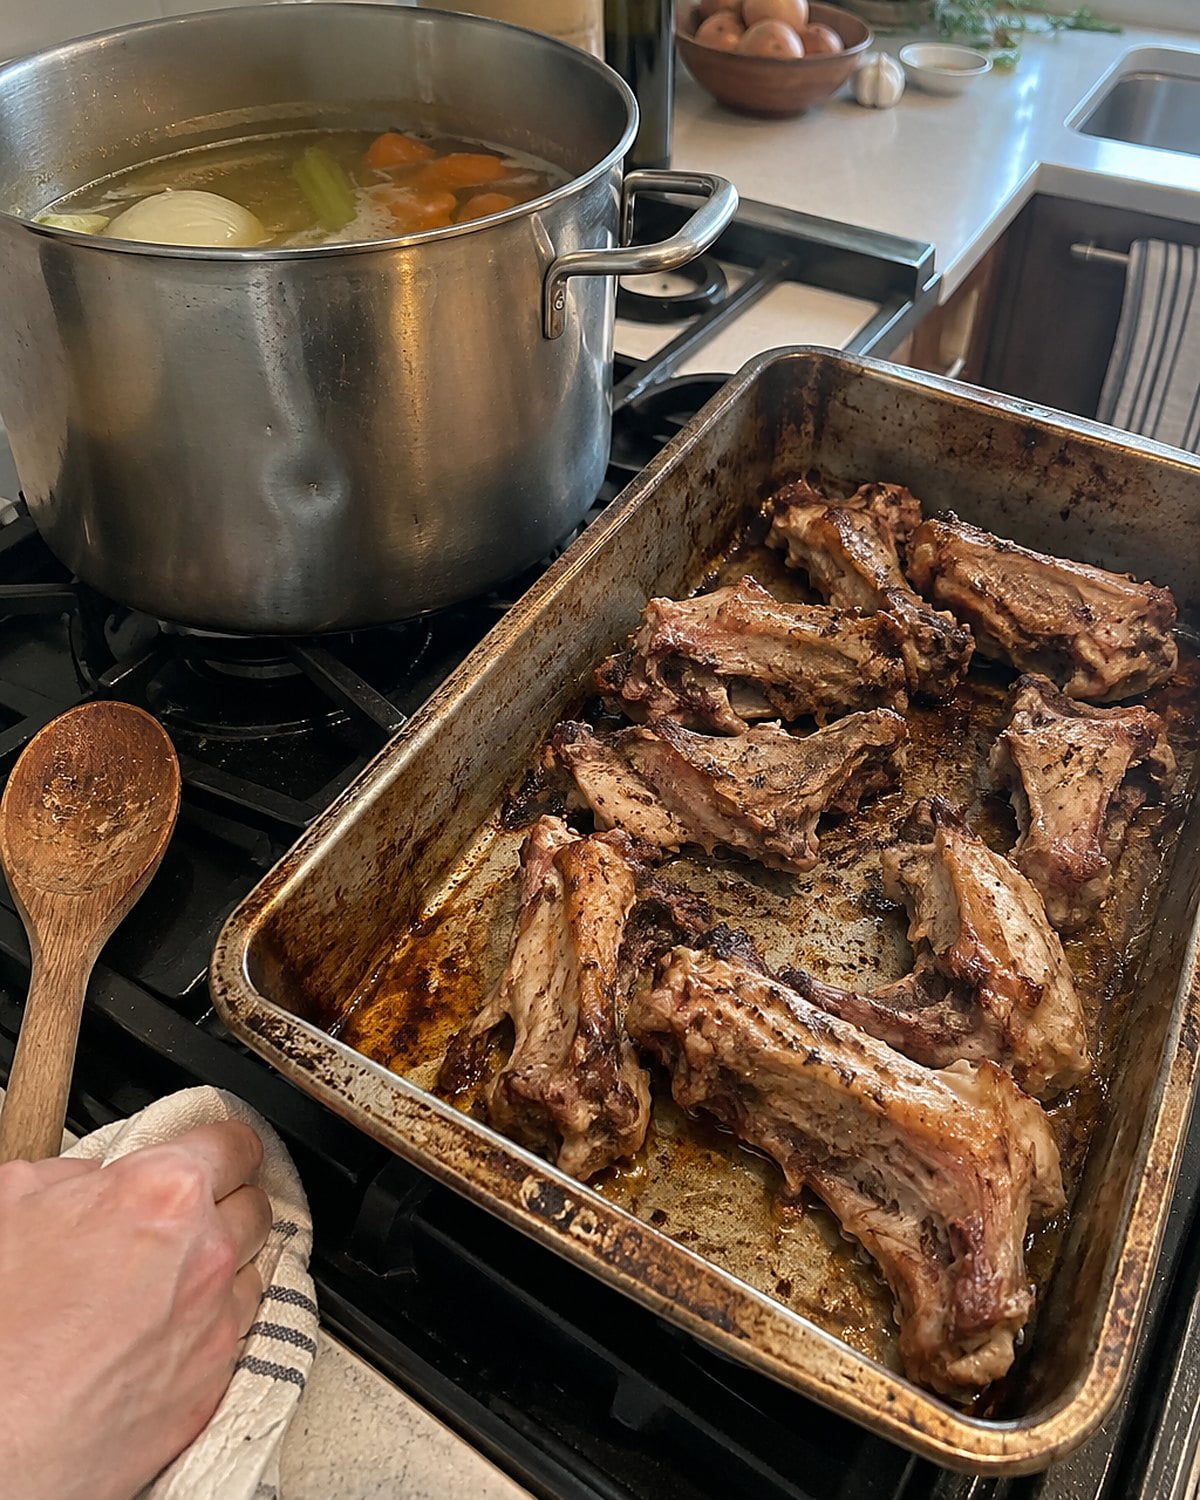
Chicken backs rarely make the pretty part of a butcher case. They’re bony, with pockets of skin and bits of meat that give a pot more flavor than their appearance suggests.
Spread them in a roasting pan until the skin takes on color. Pour a little water into the hot pan and scrape up what stuck. That browned coating belongs in the stockpot. Cover the backs with water, add an onion, and simmer rather than boil hard.
When the backs have given up their flavor, lift them out with tongs. Strain the stock through a sieve before you reach for a mug or a soup pot. Tiny bones are easy to miss if you try to eat the meat straight from the pot.
There’s no need to wash raw chicken. Splashing water spreads what you’re trying to remove. The CDC’s chicken preparation advice backs up the simpler move: keep the sink dry, then wash the tools and counter that touched the raw pieces.
Try it: Instant Pot Chicken Bone Broth In 3 Hours
 You might also like26 School Lunchbox Foods From the 1960s That Would Horrify a Parent Today
#18 The beef cheeks tucked near the roasts
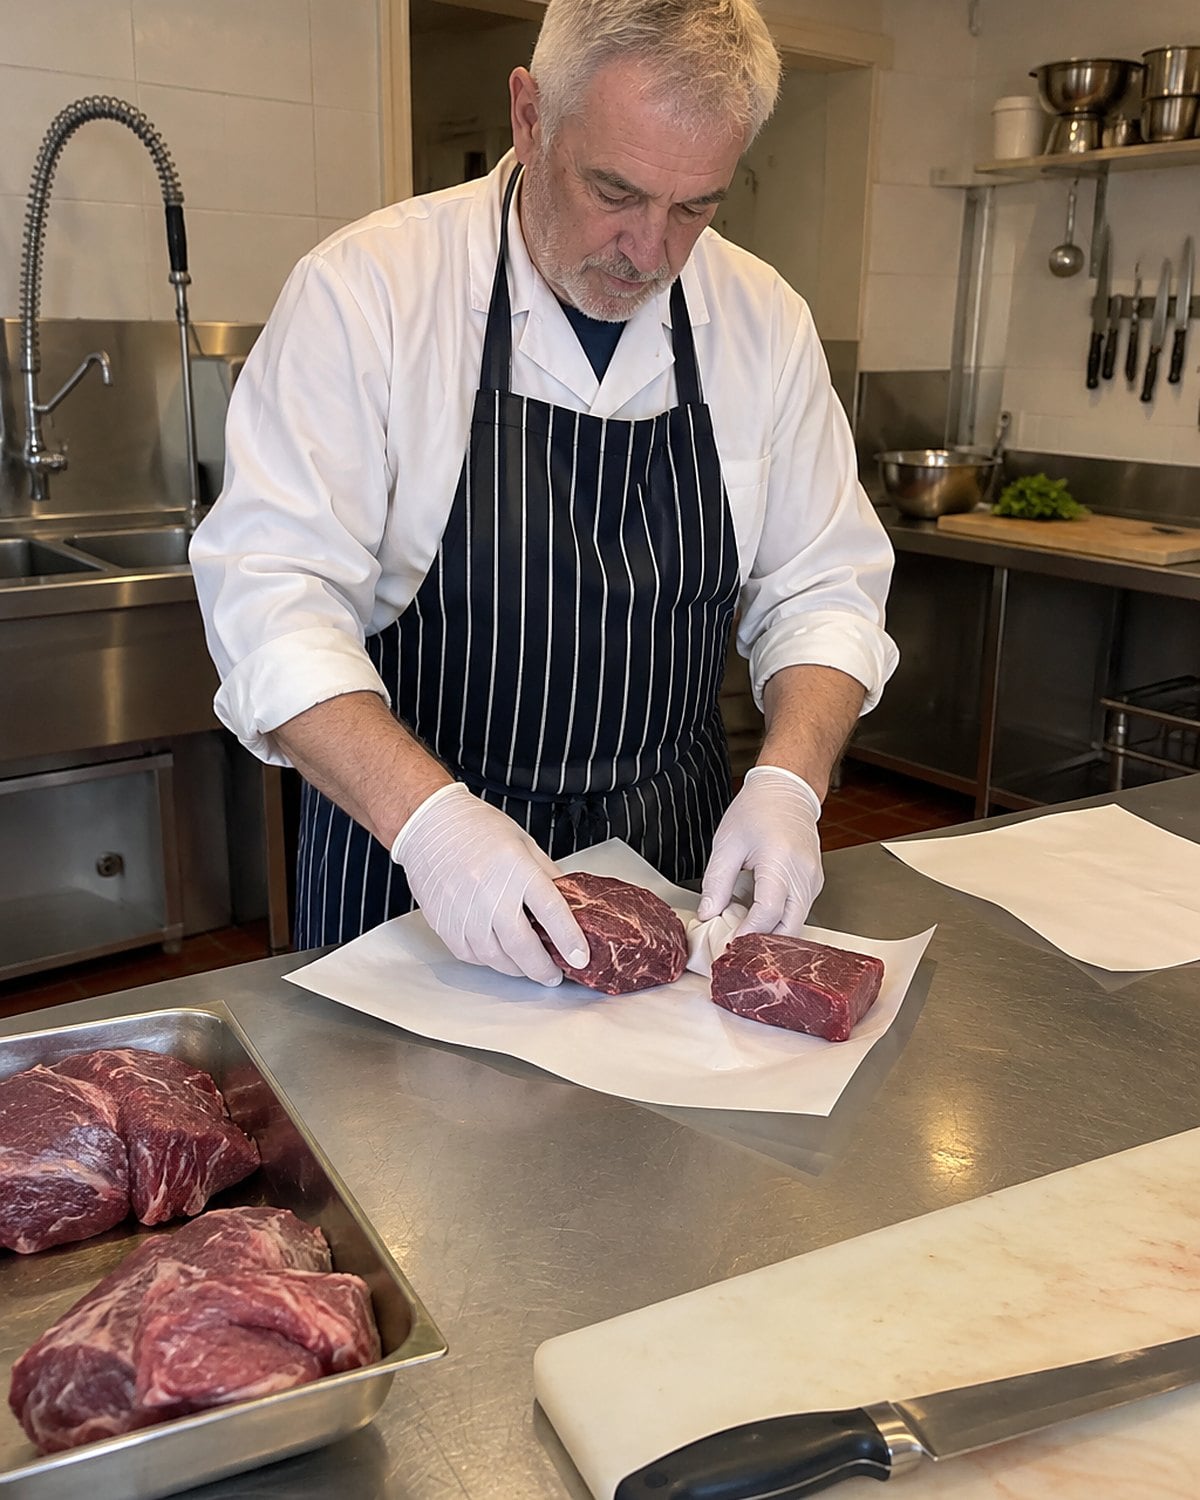
The butcher might have beef cheeks out of sight. Ask, “Do you have cheeks for braising?” That tells the person behind the counter what you plan to do and gives you a better answer than pointing at an unfamiliar package.
Cheeks are working muscles. Their firm connective tissue needs liquid, a lid, and patience. Brown them, add enough liquid to come partway up the meat, and cook at a low simmer. Turn them now and then.
At first a fork meets a springy wall. Later it slides in, and the meat breaks into moist pieces. That change is your signal, not the clock. Pull the cheeks into their sauce and spoon them over mashed potatoes.
If you’re cooking for a smaller table, freeze portions in the sauce. The freezer bag with a date on it beats finding an anonymous brown package when you want supper in a hurry.
Try it: Instant Pot Beef Cheeks (Served 4 Ways)
#17 The beef kidney under butcher paper
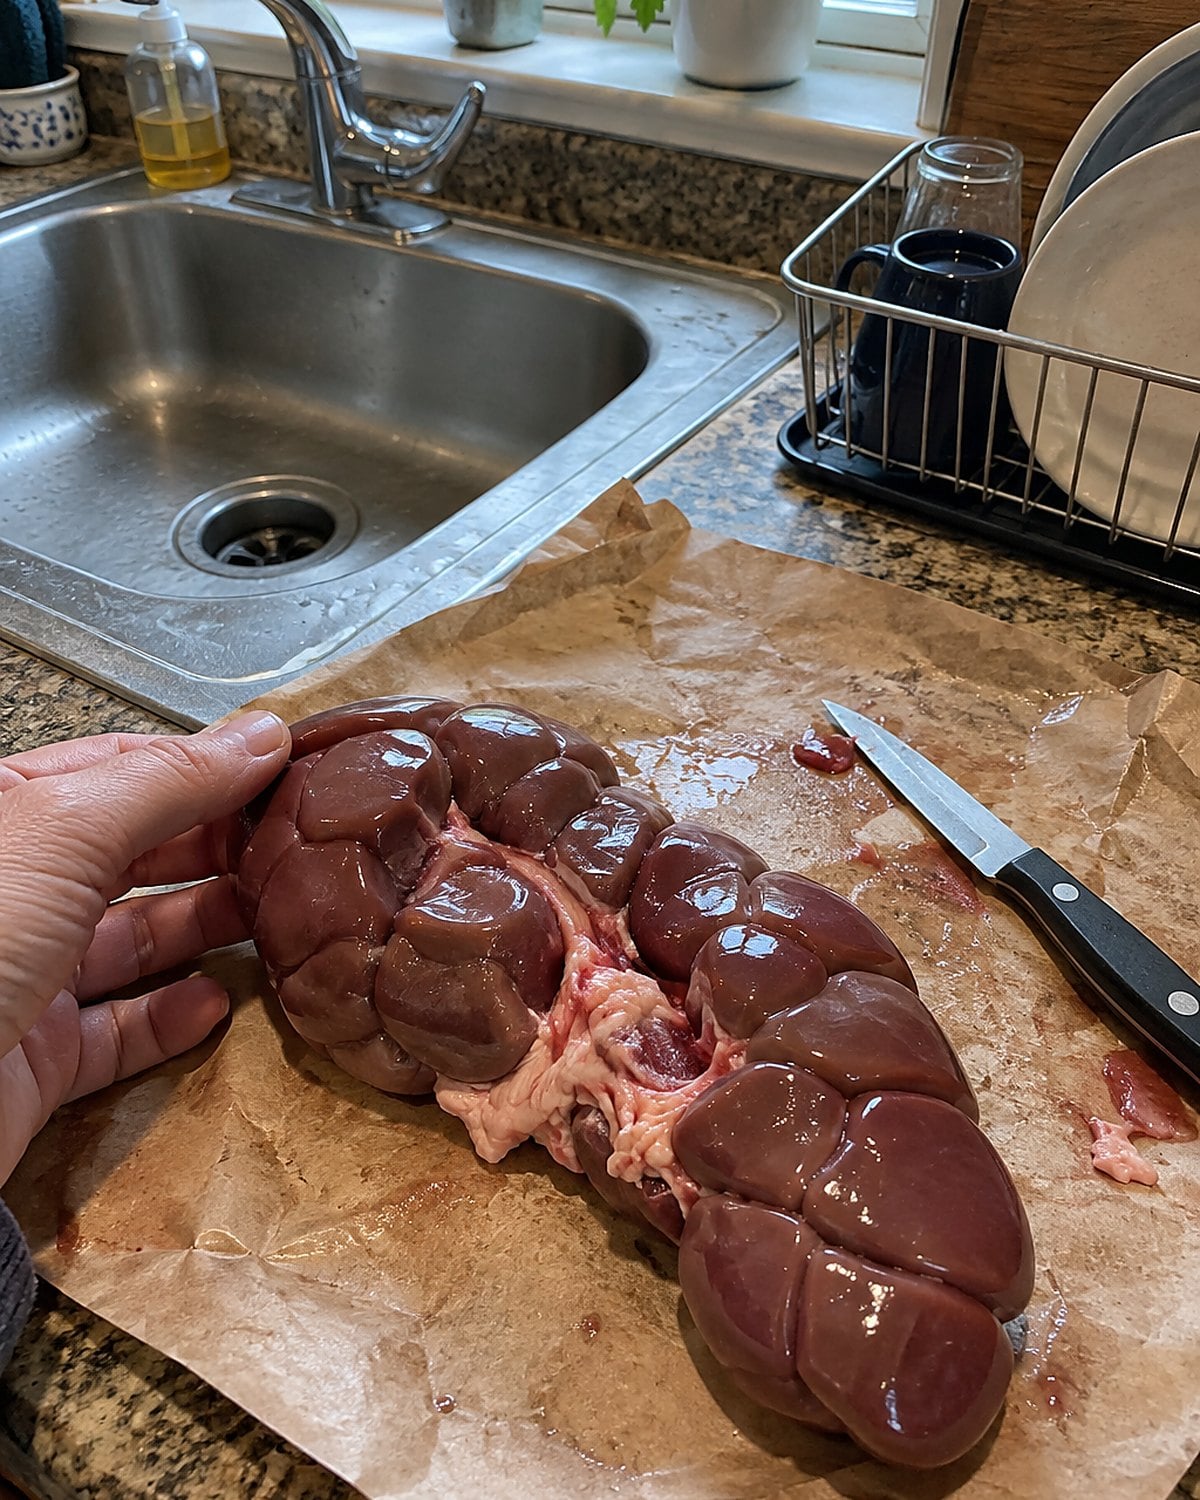
A kidney looks like a cut that needs a plan. Its firm, lobed shape gives you little clue about dinner. Ask the butcher to remove the tough center and outer membrane, then slice the trimmed kidney for you.
At home, cut away any firm white core still attached. Pat the pieces dry. A wet surface spits in a hot skillet and slows browning, so let the towel do its job while you set out the rest of supper.
Steak and kidney pie was one way to make a small amount go further. For a smaller trial, brown the kidney pieces, then finish them in a covered pan with onion and a little liquid. Keep a thermometer near the stove: the USDA’s organ-meat guidance lists 160°F.
Stir mustard into the pan juices after the meat is done. Taste a piece before you decide whether this cut belongs in a pie at your house.
#16 The frozen turkey necks for gravy
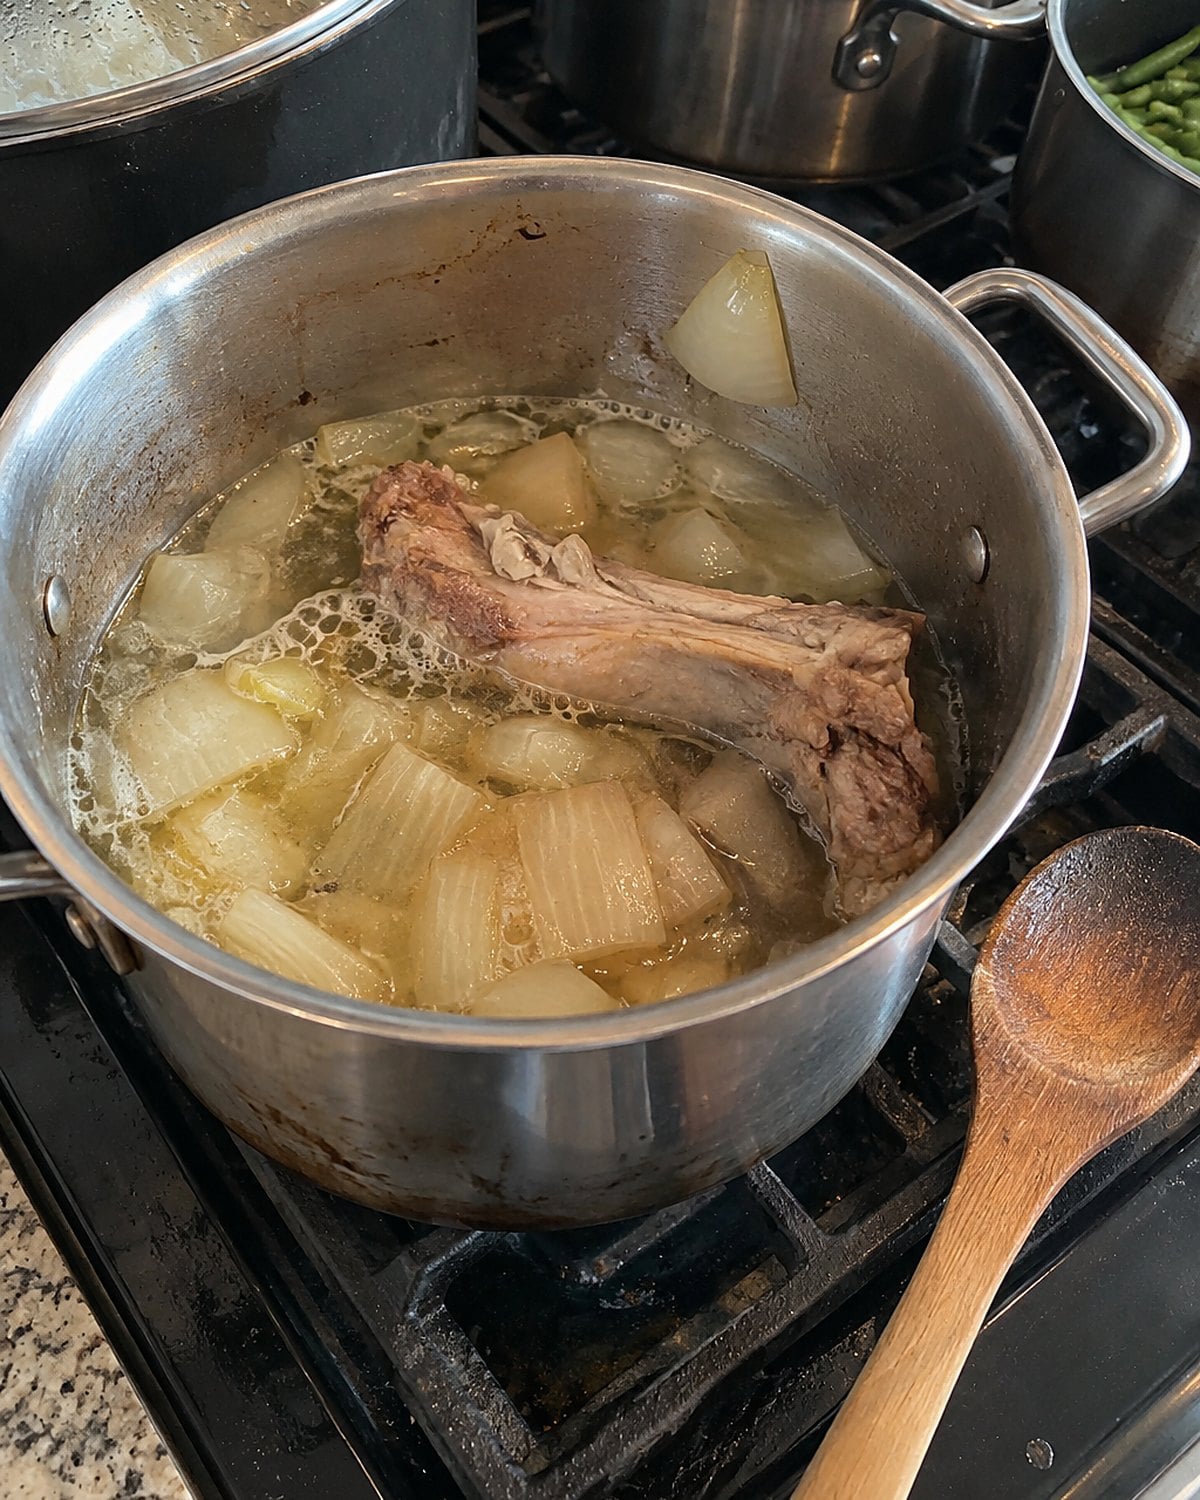
A turkey neck is easy to overlook until the roasting pan comes out and the gravy needs depth. Buy necks separately, or save the one from a whole bird. Keep it wrapped and chilled while you decide when to use it.
Brown the neck in a small pot with onion. Add water, simmer, then strain. The resulting liquid gives you something to stir into the roasting pan after the bird comes out. Scrape the browned bits before thickening the gravy.
Don’t set a frozen neck on the counter to thaw while the rest of Thanksgiving happens. Put it in the refrigerator to thaw. If time runs short, check the USDA’s turkey thawing guidance before choosing another method.
The neck isn’t a promise of a grand gravy. It’s the practical answer to a pan that needs more liquid, made before the guests ask when dinner starts.
#15 The chuck roast beneath the heavy lid
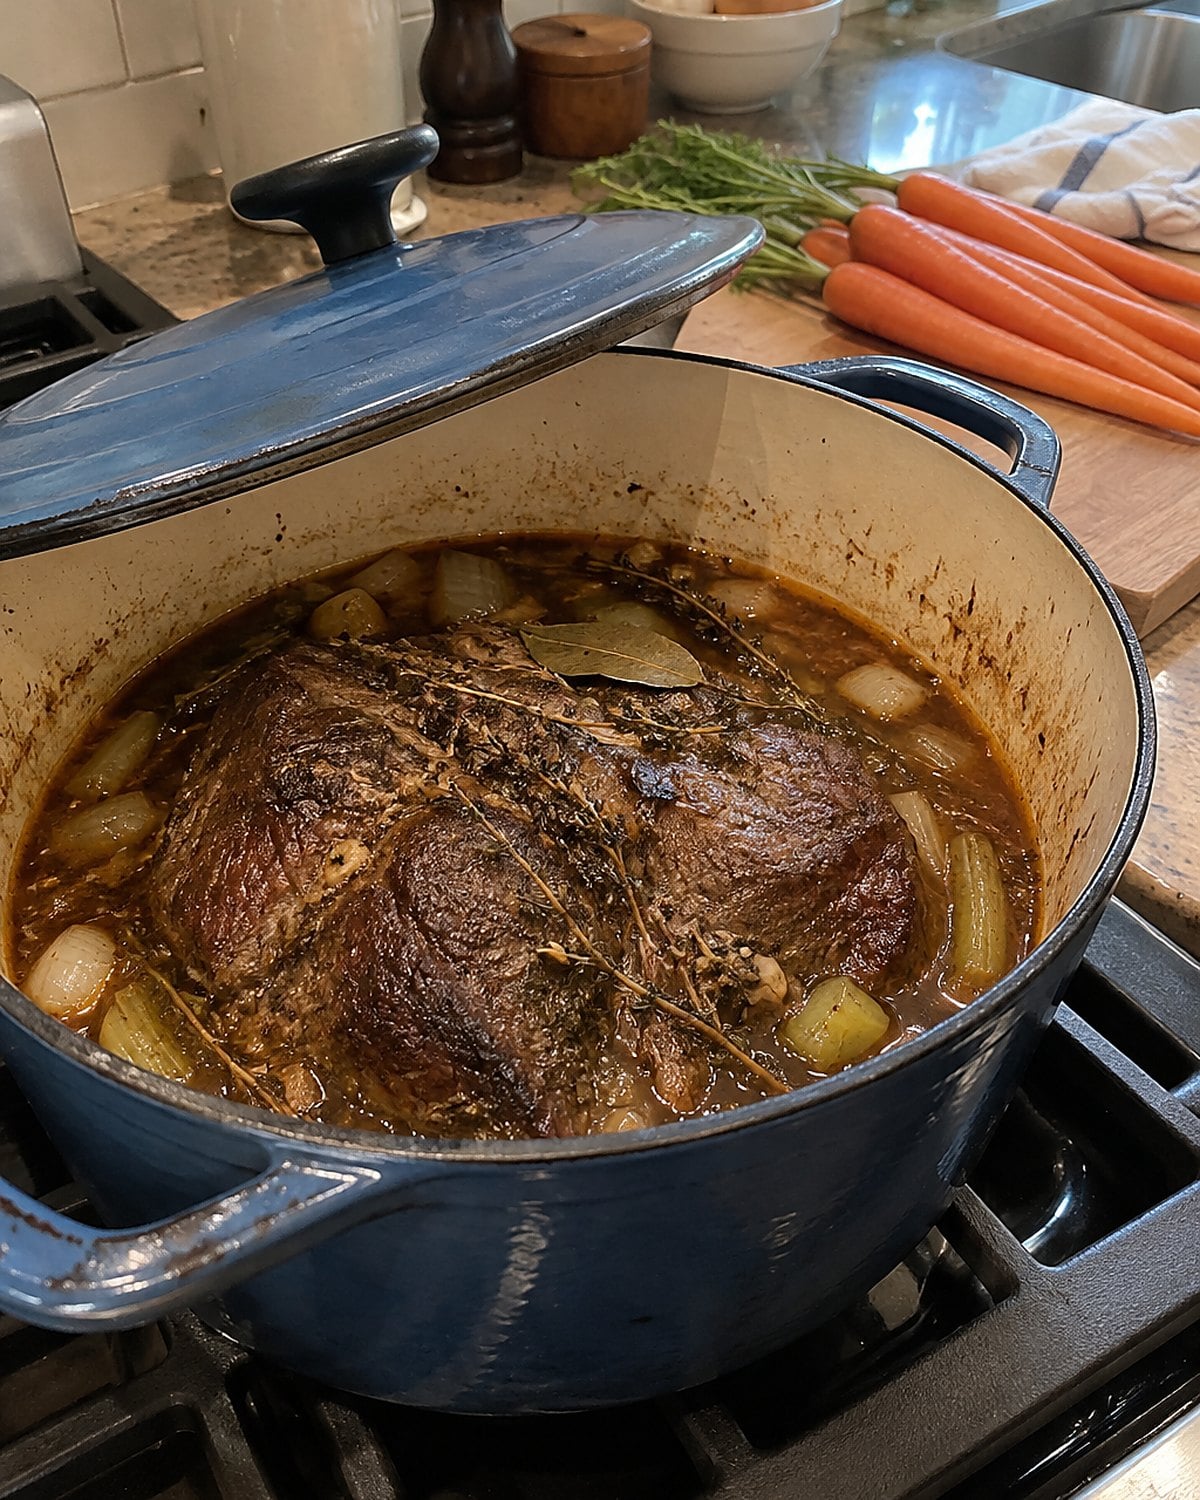
You probably know chuck roast, but it’s worth remembering why it worked in your mother’s Dutch oven. The meat has connective tissue and fat woven through it. Dry, fast heat leaves those parts stubborn. A covered pot gives them time to soften.
Brown the roast well on both sides. Take it out, cook onion in the same pot, and scrape the bottom when liquid goes in. Return the roast, cover, and keep the liquid at a low simmer. If the lid rattles hard, lower the heat.
Add potatoes and carrots later, after the meat has begun to soften. Put them in at the start and they’ll give up their shape before the roast is ready.
Try a fork near the center. Resistance means more time under the lid; easy separation means supper is close. Let the roast sit while you finish the vegetables. Then pull it into large pieces and spoon over the juices. That’s the pot roast worth making even when there are only two plates to fill.
Try it: Instant Pot Beef Pot Roast With Potatoes & Carrots
#14 The cross-cut shanks with round bones
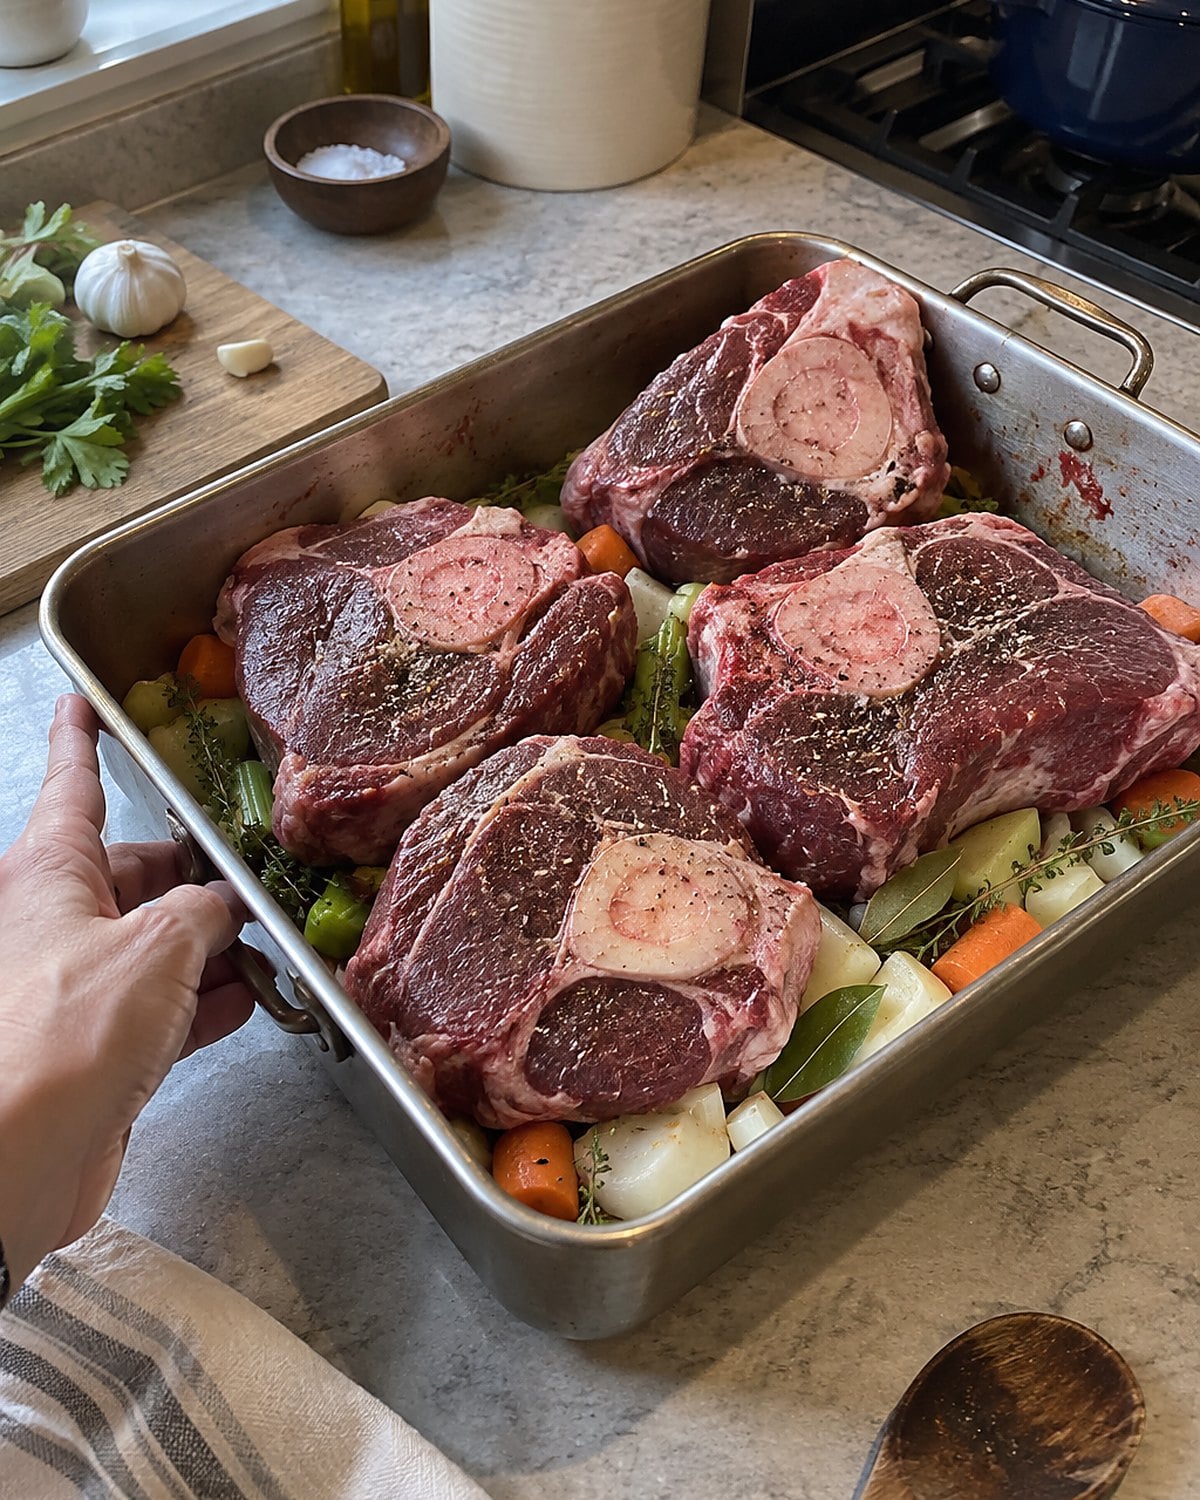
A beef shank sliced across the bone has a round of marrow at its center. It looks impressive in the case, but it’s one of the clearest cuts to cook: the tough muscle around that bone tells you it needs a long braise.
Brown each side, then add tomato, onion, and liquid. Cover and keep the heat low. The meat starts firm. By the time it’s ready, a fork separates it from the bone and the sauce has gained body.
Check for little bits of bone from the butcher’s saw. Wipe off visible fragments with a damp paper towel and discard it, then pat the shanks dry before browning.
Serve the shank whole over noodles if everyone wants the marrow, or pull the meat from the bone before it reaches the table. Either way, a spoon belongs nearby.
#13 The pickled pigs’ feet by the refrigerator door
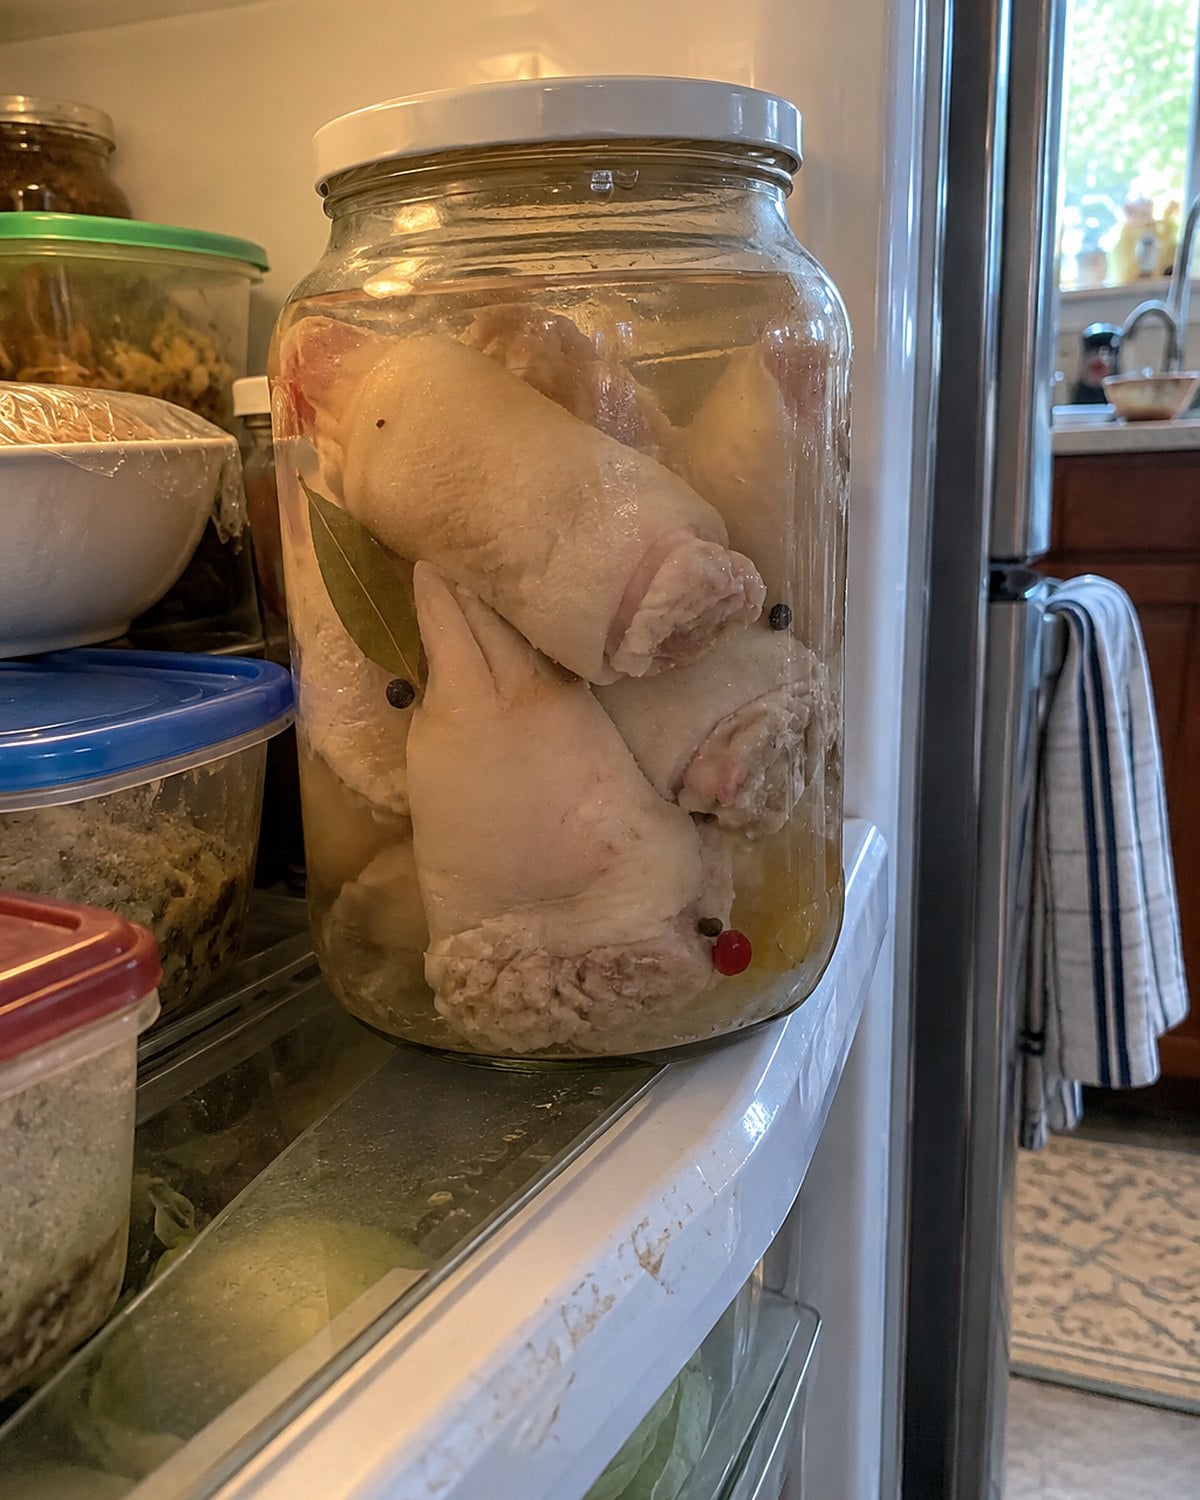
Your mother might have kept a jar near the back of the fridge, where the door jars couldn’t knock it over. Pickled pigs’ feet were a sharp, cold bite, served with crackers rather than turned into a main course.
At a butcher counter, raw pigs’ feet have a different job. Their skin and joints give body to a long-cooked broth. If you want the jarred version, buy it commercially prepared and follow the label for storage. Don’t treat a family note on a card as a safe canning method.
The National Center for Home Food Preservation publishes tested preservation methods. Check its instructions before preserving meat at home; vinegar taste alone doesn’t tell you a jar is safe.
For a supper experiment, start with the raw cut in a covered pot. Plan on several hours at a simmer, checking until the skin yields easily. Strain carefully for small bones.
A ladle of that broth gives a bean pot body without requiring anyone at your table to eat the feet.
#12 The marrow bones for toast
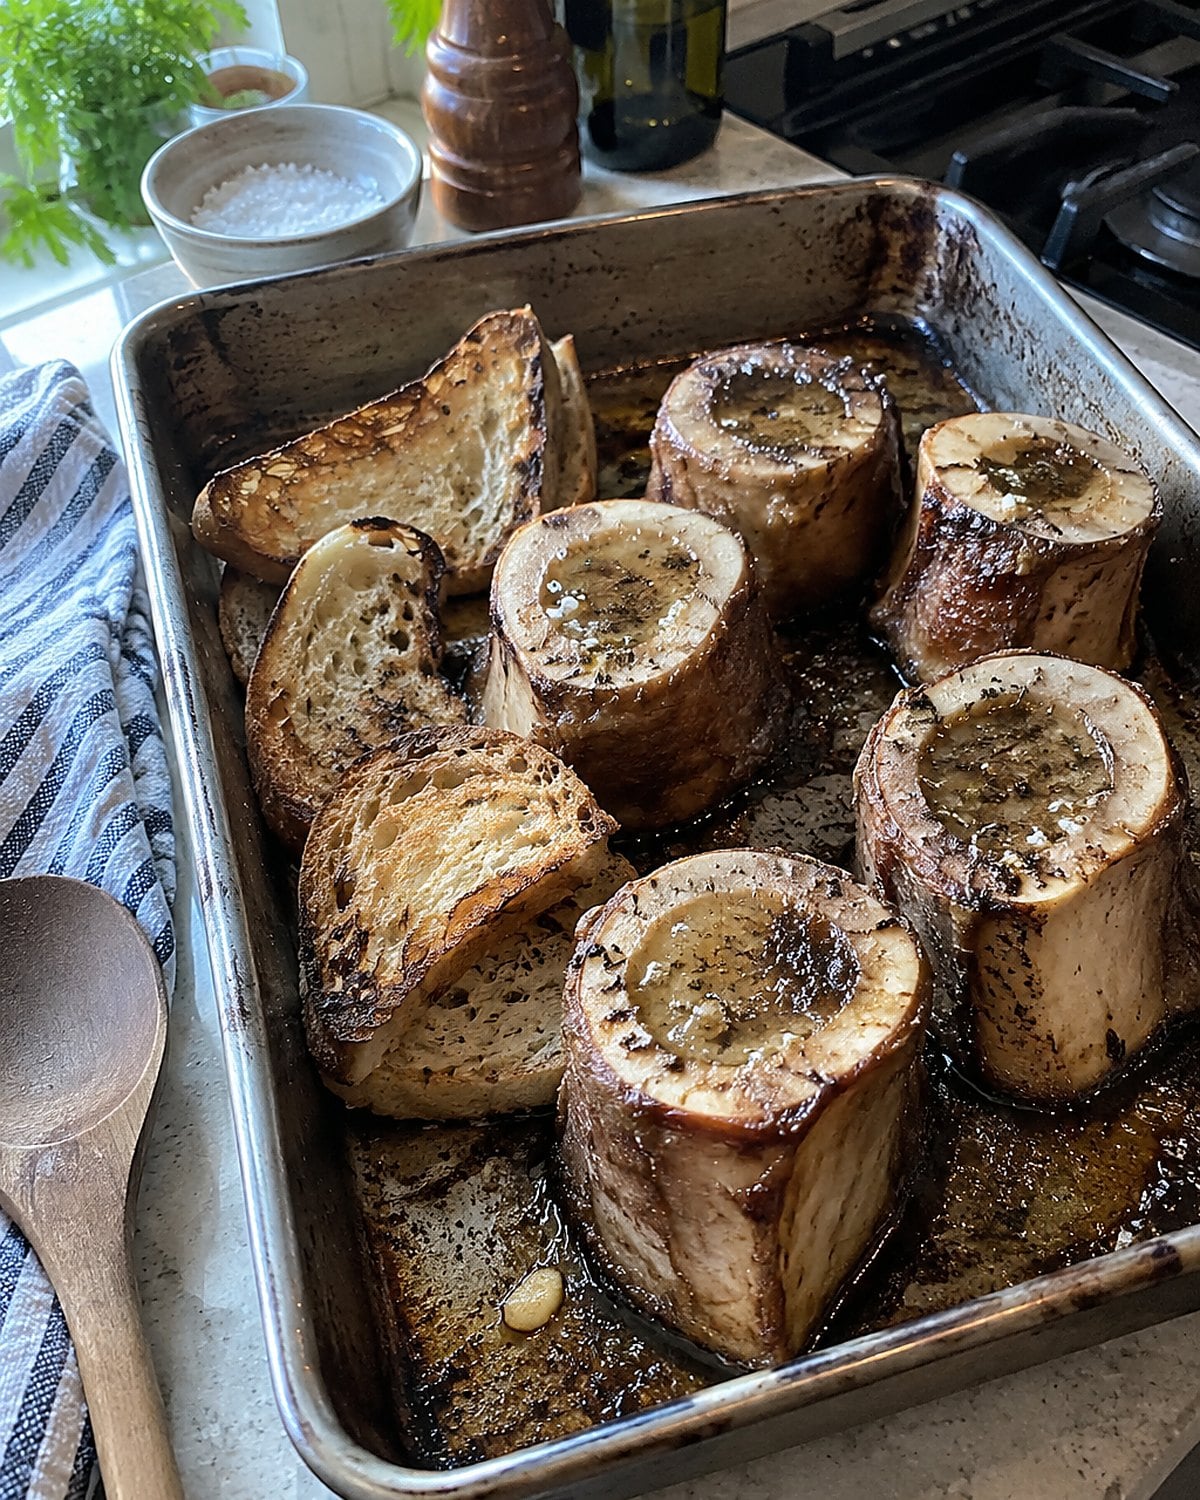
Marrow bones sat on butcher paper before they became a restaurant appetizer. At home, the pleasure is smaller and messier: a hot bone, a narrow spoon, and toast waiting beside it.
Ask for canoe-cut beef marrow bones, split lengthwise so you can reach the center. Put them cut side up on a rimmed pan and roast until the marrow loosens and bubbles. Watch the pan. Leave the bones too long and the marrow melts out, leaving little to scoop.
A spoonful on toast wants salt and something sharp, such as parsley with lemon. Without that sharp edge, the richness fills your mouth before the second bite.
Handle the hot bones with a towel, not your fingers. You’ve handled hotter pans than this, but the spoon has a habit of slipping when you hurry.
#11 The beef heart under butcher paper
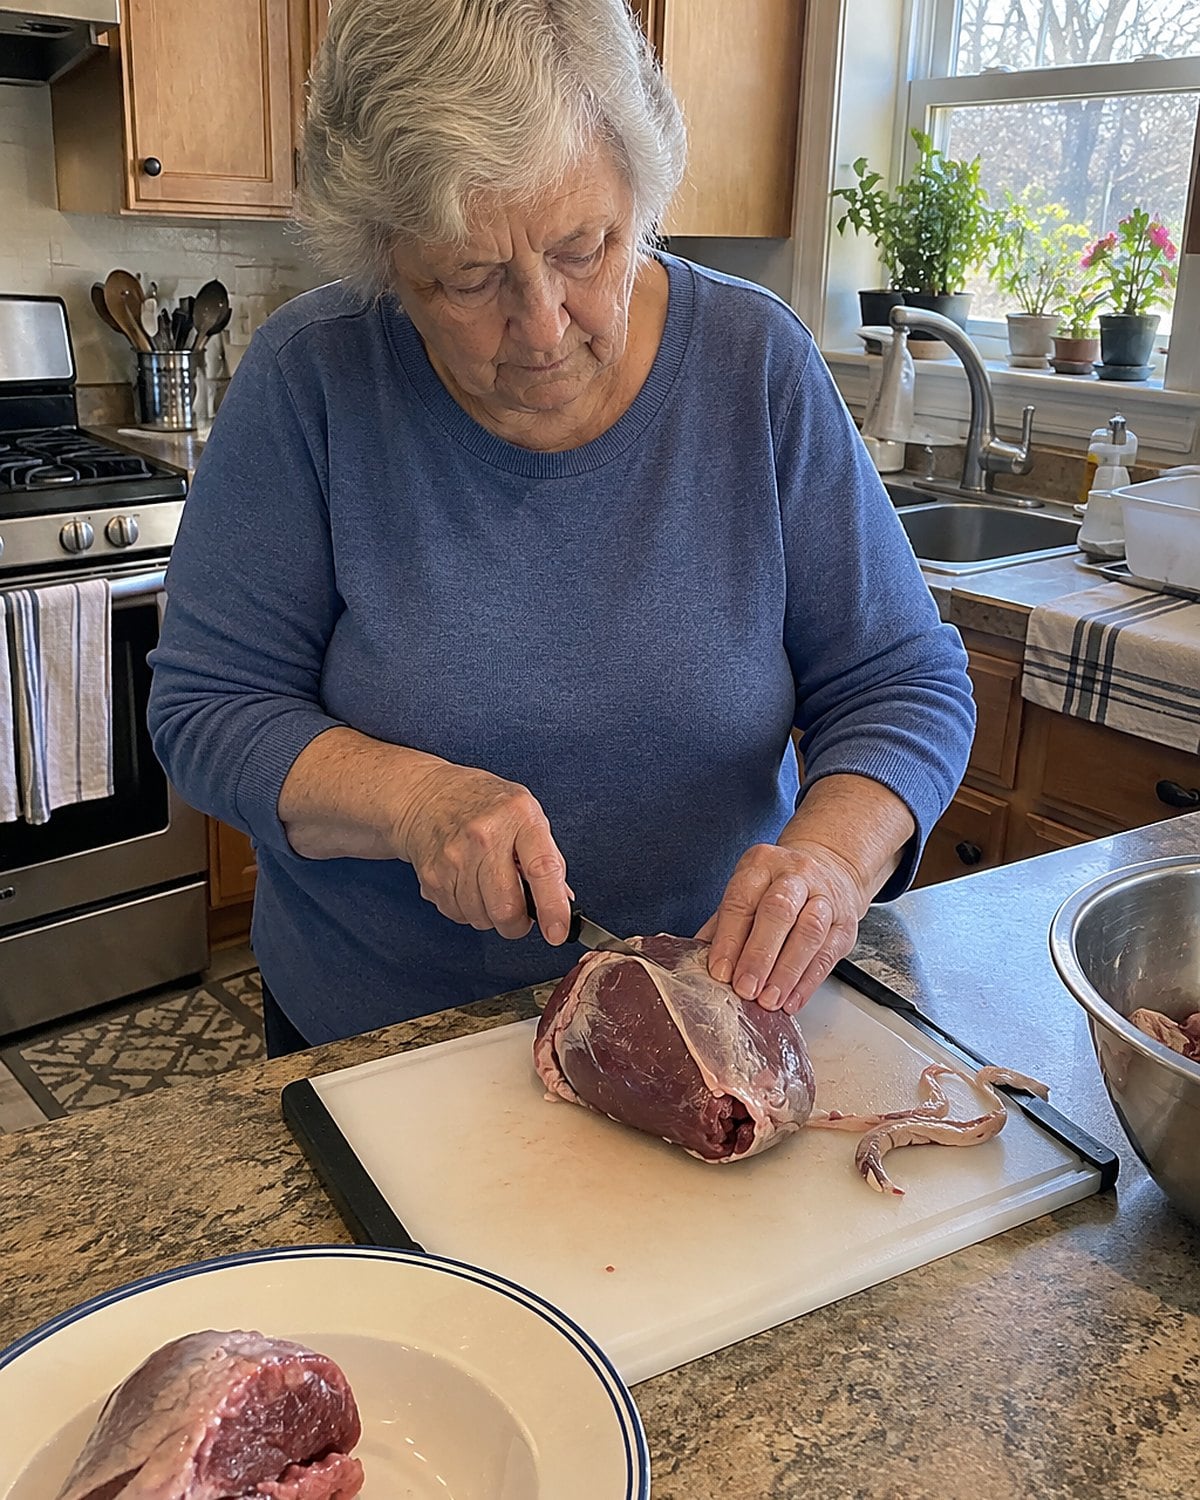
A beef heart is a dense muscle, not a mysterious substitute for steak. Open the paper and look for the pale membranes and firm tubes inside. Trim those away with a sharp knife before deciding how to cook it.
For a quick pan supper, slice the cleaned muscle thinly across the grain. Pat it dry and cook the slices in batches so the pan stays hot. Keep an eye on the thermometer: the USDA chart lists 160°F for organ meats. A quick sear alone isn’t a safety check.
For a long-cooked dish, cut the trimmed heart into chunks and give it a covered simmer with onion and tomato. The shape you cut determines what happens next, so decide before heating the pot.
If the trimming feels like more than you want to tackle, ask the butcher to clean it. That’s a sensible request, not an admission. You still get to choose how it reaches the table.
#10 The sweetbreads in a shallow skillet
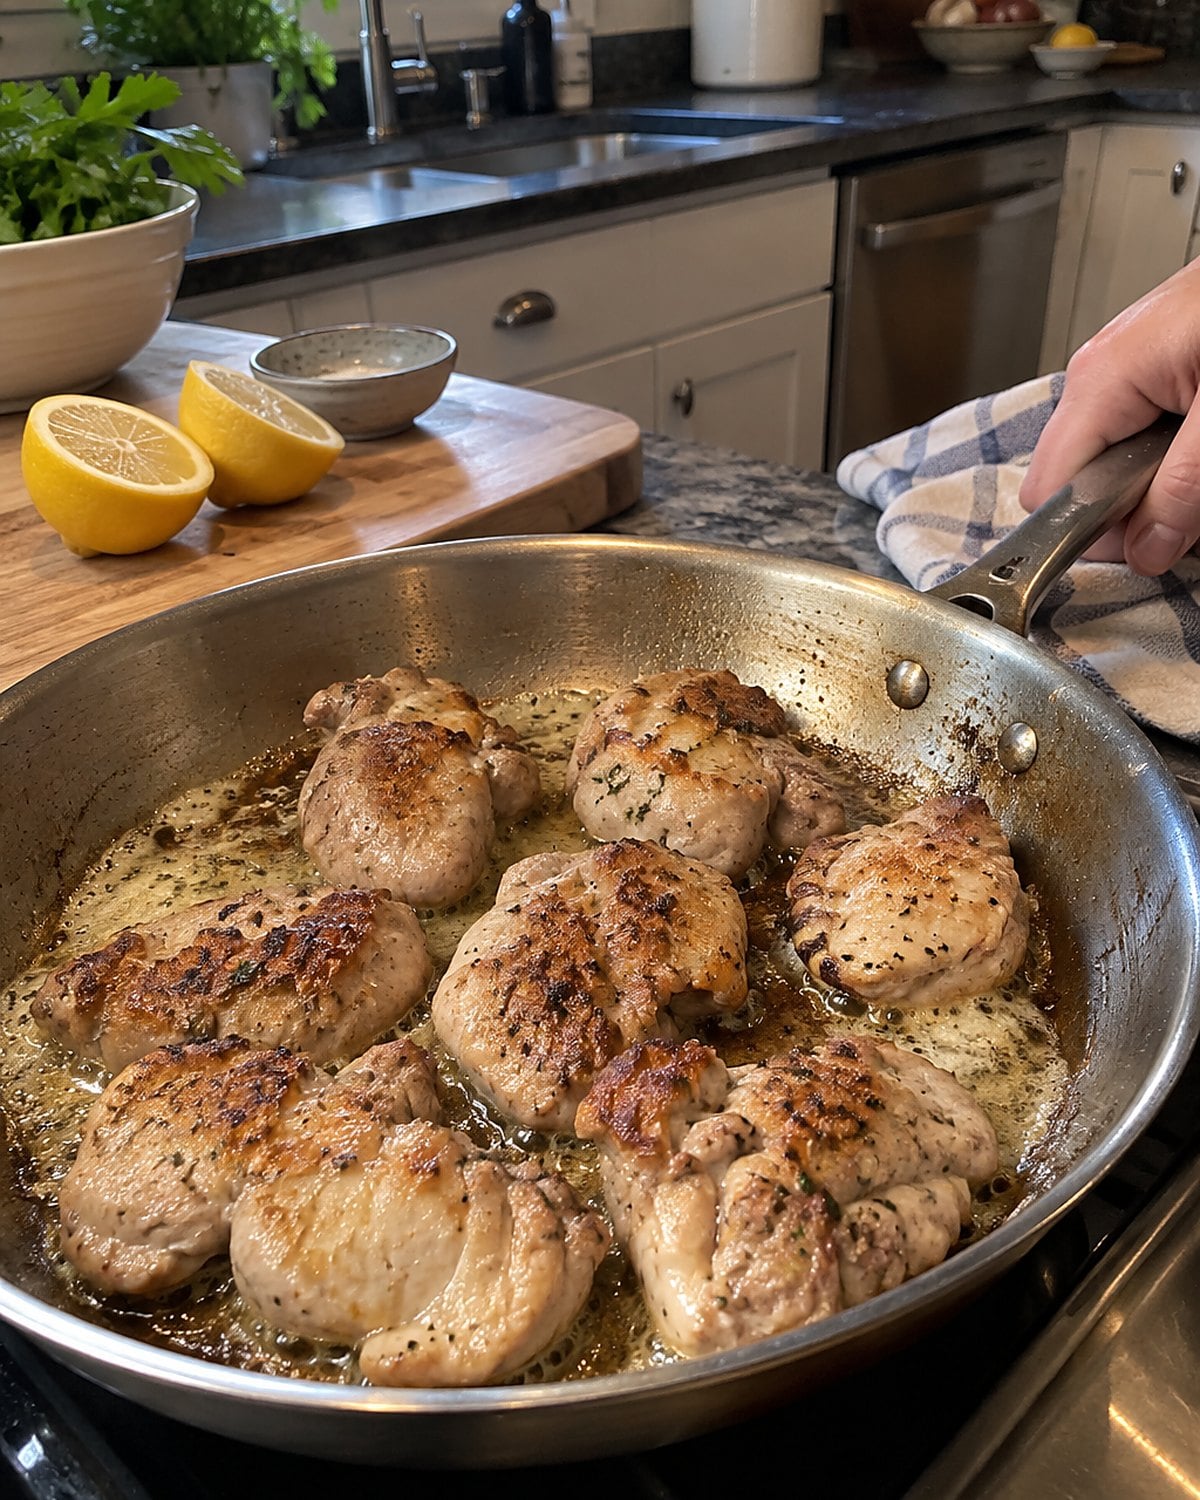
The membrane comes off before sweetbreads ever reach the pan. They’re the thymus or pancreas of a calf or lamb, and their name gives away nothing. Ask what the butcher has and whether the pieces have already been cleaned.
Poach the sweetbreads first, then cool them until you can handle them. Lift away the visible membrane and any firm bits. Press the cooled pieces briefly under a plate for a flatter browning surface.
That prep is the part your mother’s recipe card might have skipped. Once it’s done, dust the pieces with flour and brown them in a shallow skillet. You’re looking for a crust that holds together when you turn each piece, not a coating that falls into the fat.
Check the thickest part with a thermometer against the USDA’s organ-meat guidance of 160°F. Then taste a piece with lemon before adding sauce. The acid cuts the richness; you get to decide what else the plate needs.
Buy enough for a small trial, not a holiday table. The butcher can do some of the cleaning, but you’re the one who finds out whether you want to cook them again.
 You might also like27 Old-Fashioned Desserts That Deserve a Comeback
#9 The goose beside the holiday turkeys
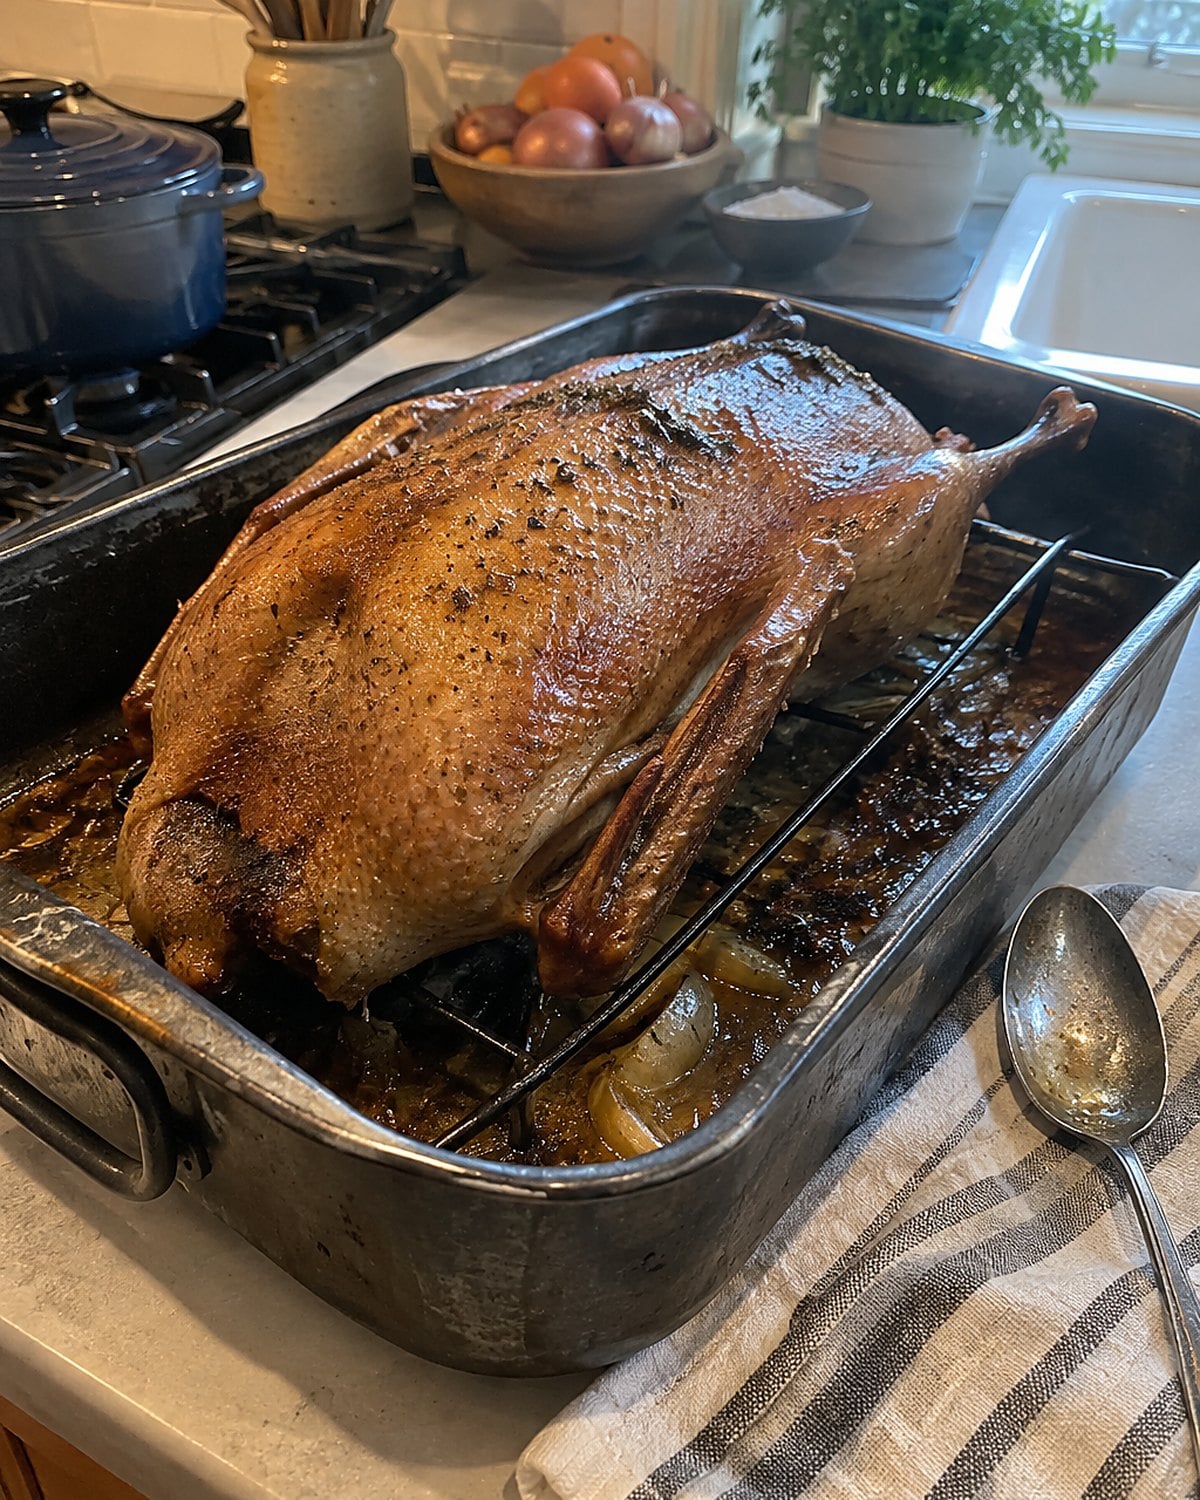
A goose takes up the oven and brings its own cooking fat. That was once reason enough to put it on a holiday table. It also means the roasting pan needs attention while other dishes fight for burner space.
Set the goose on a rack in a deep pan. As the skin renders, carefully spoon off fat so the pan doesn’t overflow. Keep drippings from the raw or partly cooked bird away from ready-to-eat food.
Prick the skin without stabbing into the meat. The goal is to let fat escape, not dry out the breast. Check the thickest part with a thermometer, away from bone. The USDA’s poultry chart lists 165°F.
Let the bird rest before carving. Its rich meat needs less on the plate than turkey does.
Tart fruit or braised red cabbage gives each bite a break. If the pan is getting crowded, deal with the fat before you deal with the side dishes. That’s the part of the old holiday routine worth copying.
#8 The corned beef in the spice pot
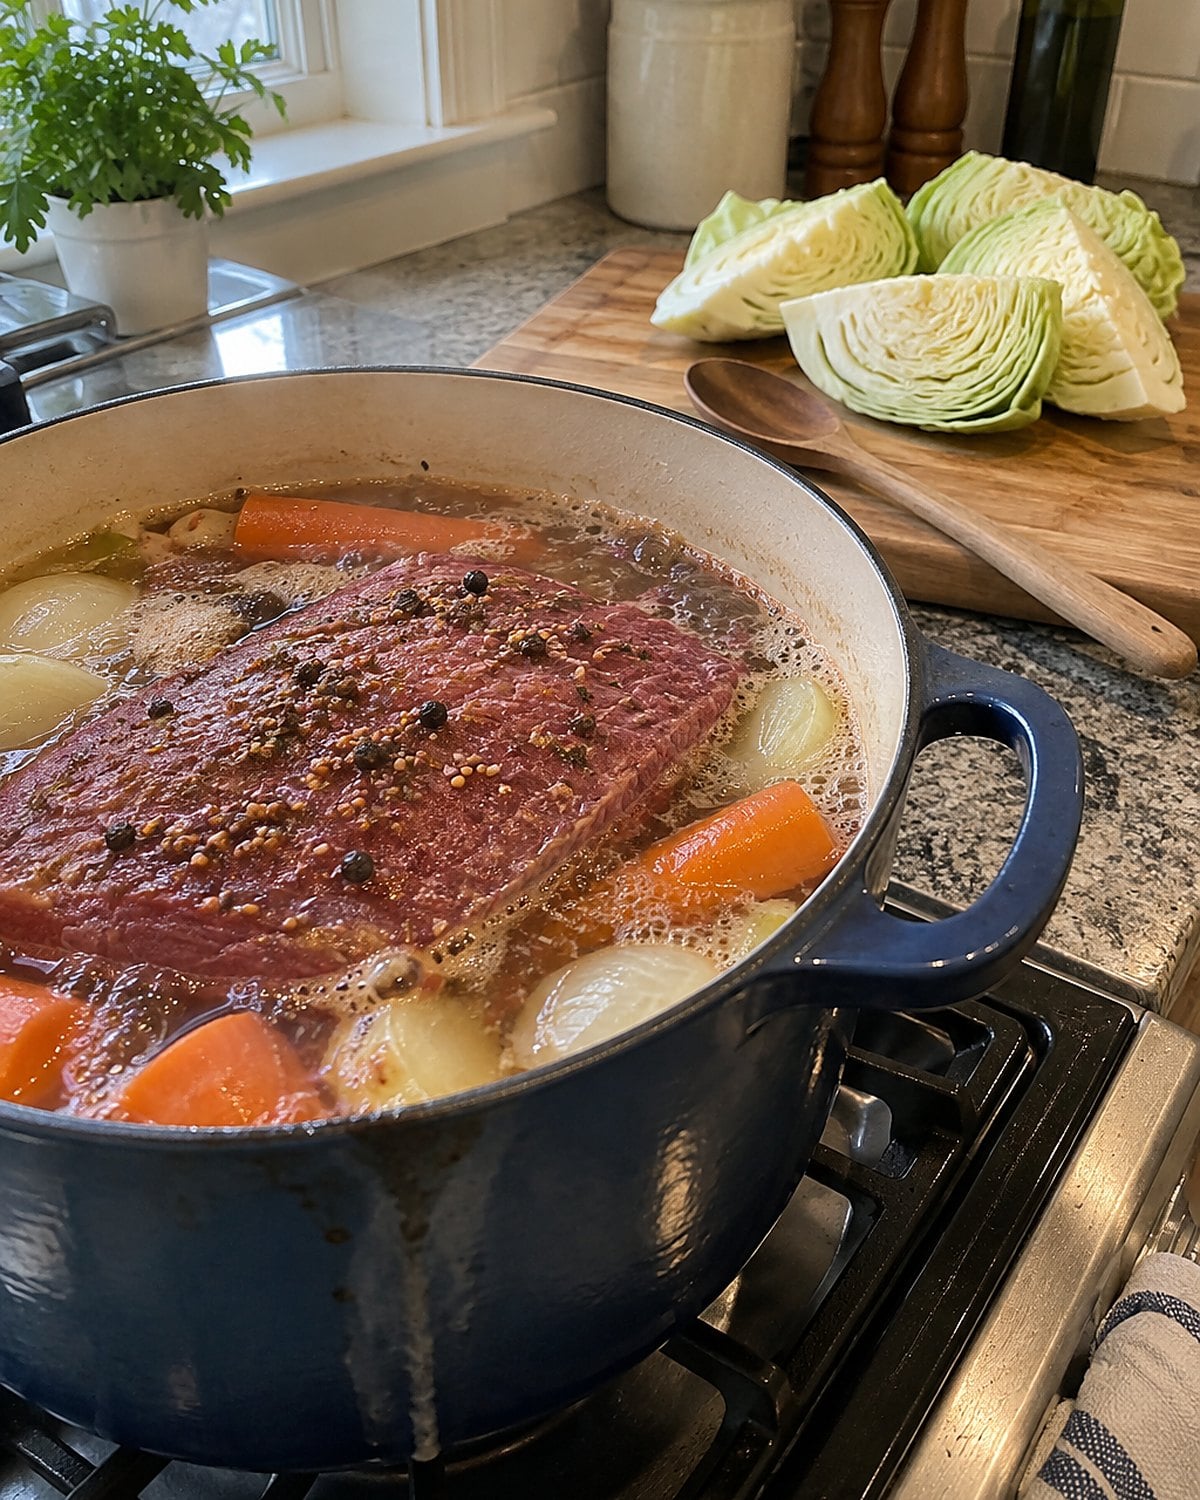
Corned beef comes cured and seasoned, but the little packet in the package doesn’t do all the work. The brisket still needs moist heat and enough time for a knife to slide in easily.
Put it in a pot with water and the included spices. Keep the simmer low. If you add cabbage at the beginning, you’ll lift out tired leaves while the beef still needs cooking. Wait until the meat is nearly tender, then add the vegetables.
There’s a useful pause before serving. Lift the beef, let it rest, and find the grain before slicing across it. Brisket fibers run in clear lines, and a cut made along them leaves long, chewy strands.
Taste a slice before you reach for salt. The cure has already done plenty of seasoning. Mustard on the table lets each person make the final call.
#7 The lamb shoulder chops in butcher paper
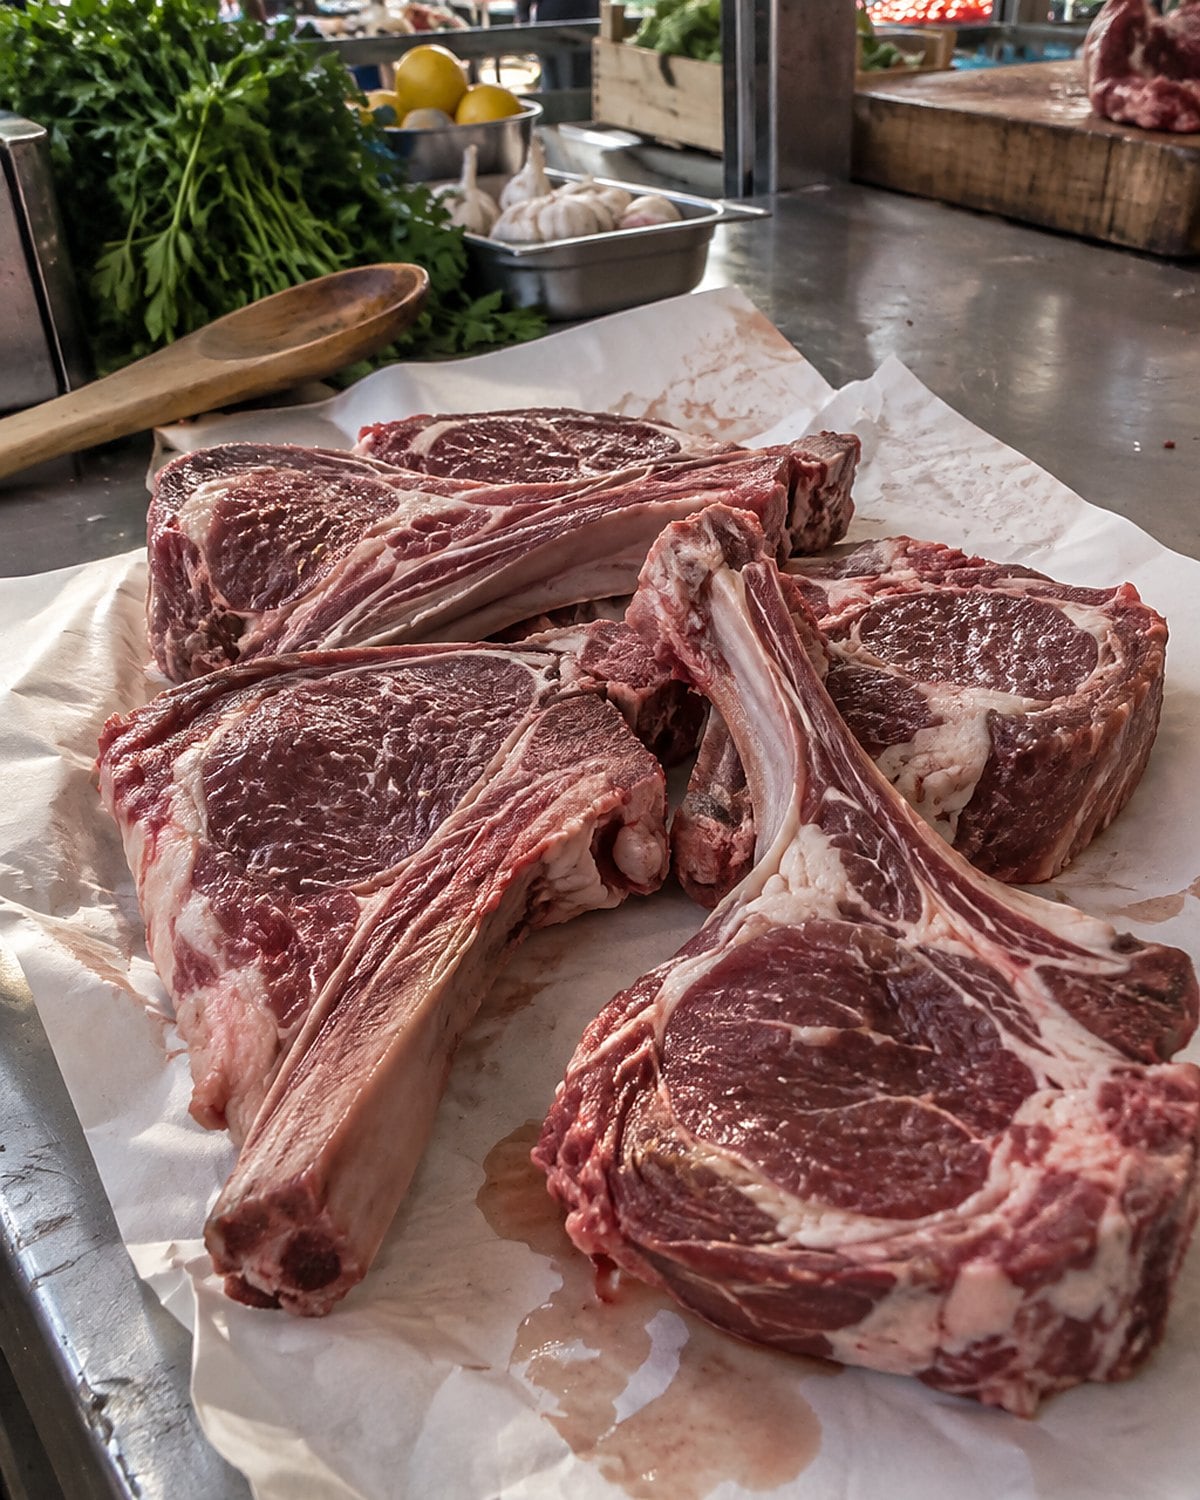
Lamb shoulder chops carry more connective tissue than the neat little loin chops in the next case. Ask the butcher for shoulder chops if you want a covered-pan supper, then check the thickness before you leave.
Brown the chops, set them aside, and soften sliced onion in the same pan. Add a splash of water, return the chops, and cover. A thin chop needs a shorter stay under the lid; a thick one needs longer. Test near the bone with a fork.
The USDA chart lists 145°F with a three-minute rest for whole cuts of lamb. Temperature gives you the cooking target; the fork tells you whether the shoulder’s connective tissue has softened enough to enjoy.
Finish with lemon or vinegar and the pan juices. That sharp note matters when a cut brings its own fat. If your mother used mint jelly, you know the role it played. You can put it on the table, too, and let everyone decide.
#6 The veal breast with a pocket
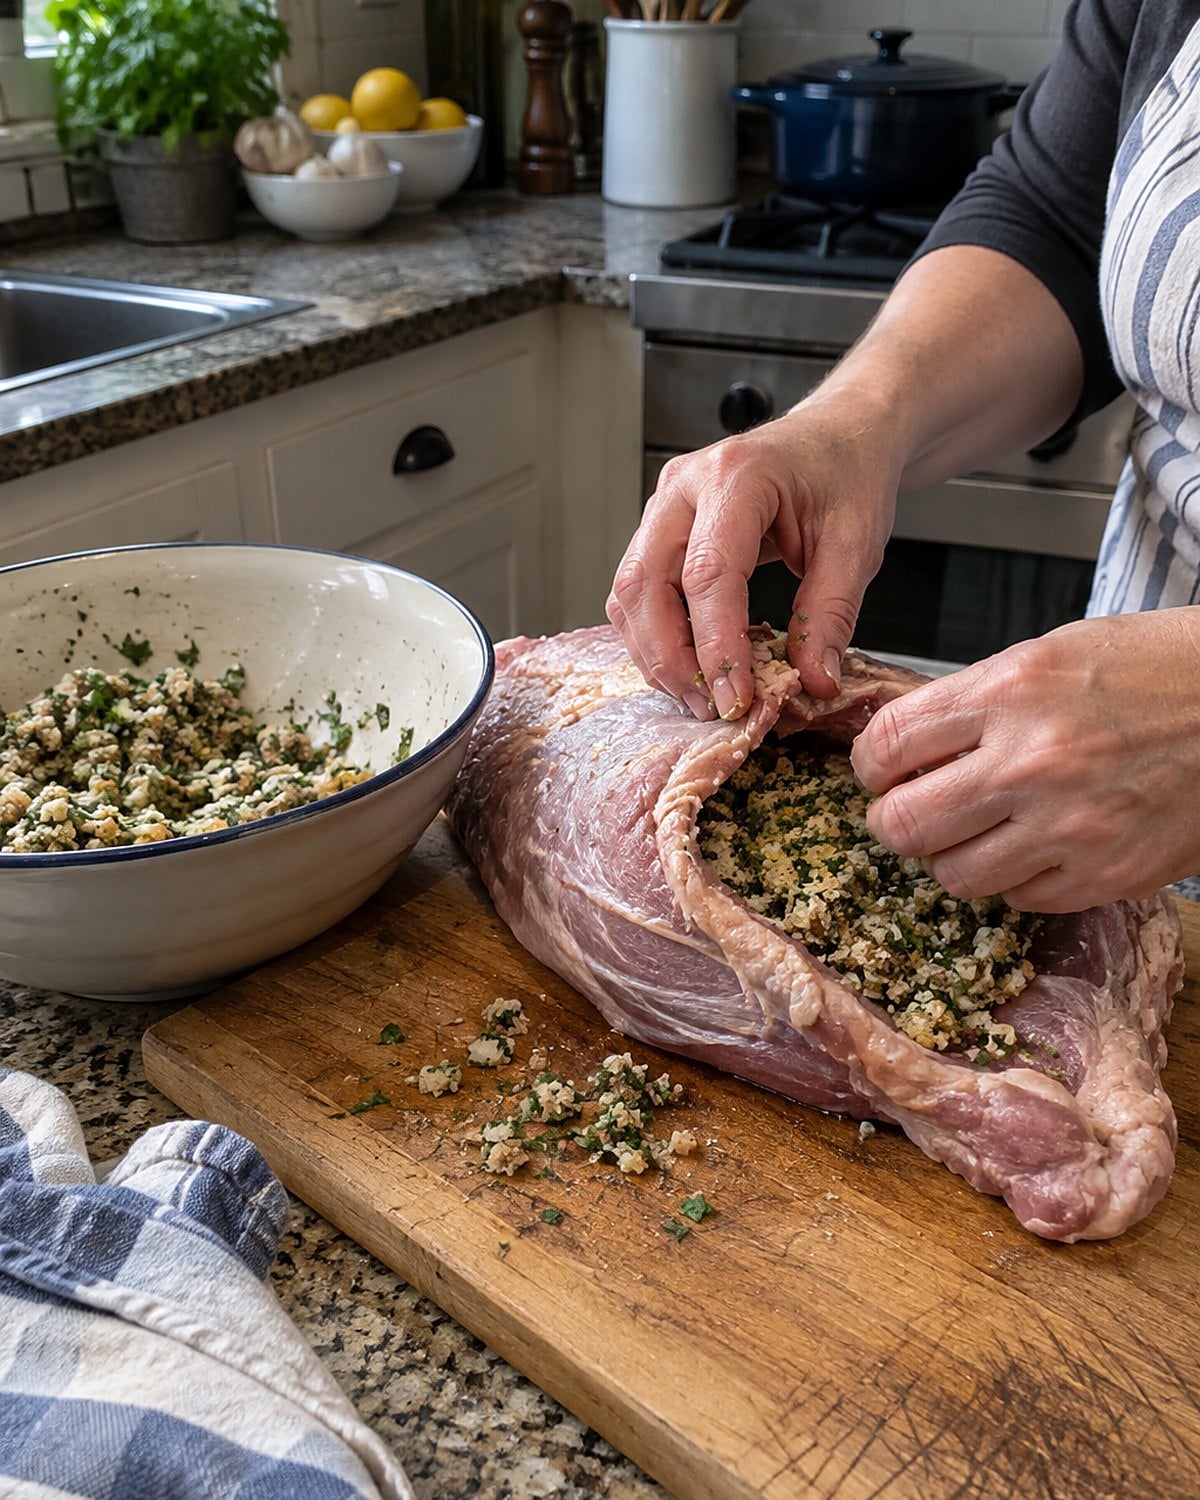
At the market counter, veal breast looks like a wide, flat cut with bones along one edge. Some butchers cut a pocket for stuffing. Ask for the pocket only if that’s the supper you have in mind; the plain cut also braises well.
For a stuffed breast, keep the filling loose. Pack it tightly and it expands into a dense block as it cooks. Sew or skewer the opening, set the meat in a roasting pan, and use a thermometer in both the meat and the center of the stuffing.
The USDA’s stuffing guidance calls for 165°F at the stuffing’s center. For the meat itself, follow the whole-cut temperature and rest guidance. Those are two separate readings, and neither comes from the browned top.
Carve at the counter, where you have room for a board and a good knife. The bones make table carving a nuisance.
#5 The fresh sausage in its casing
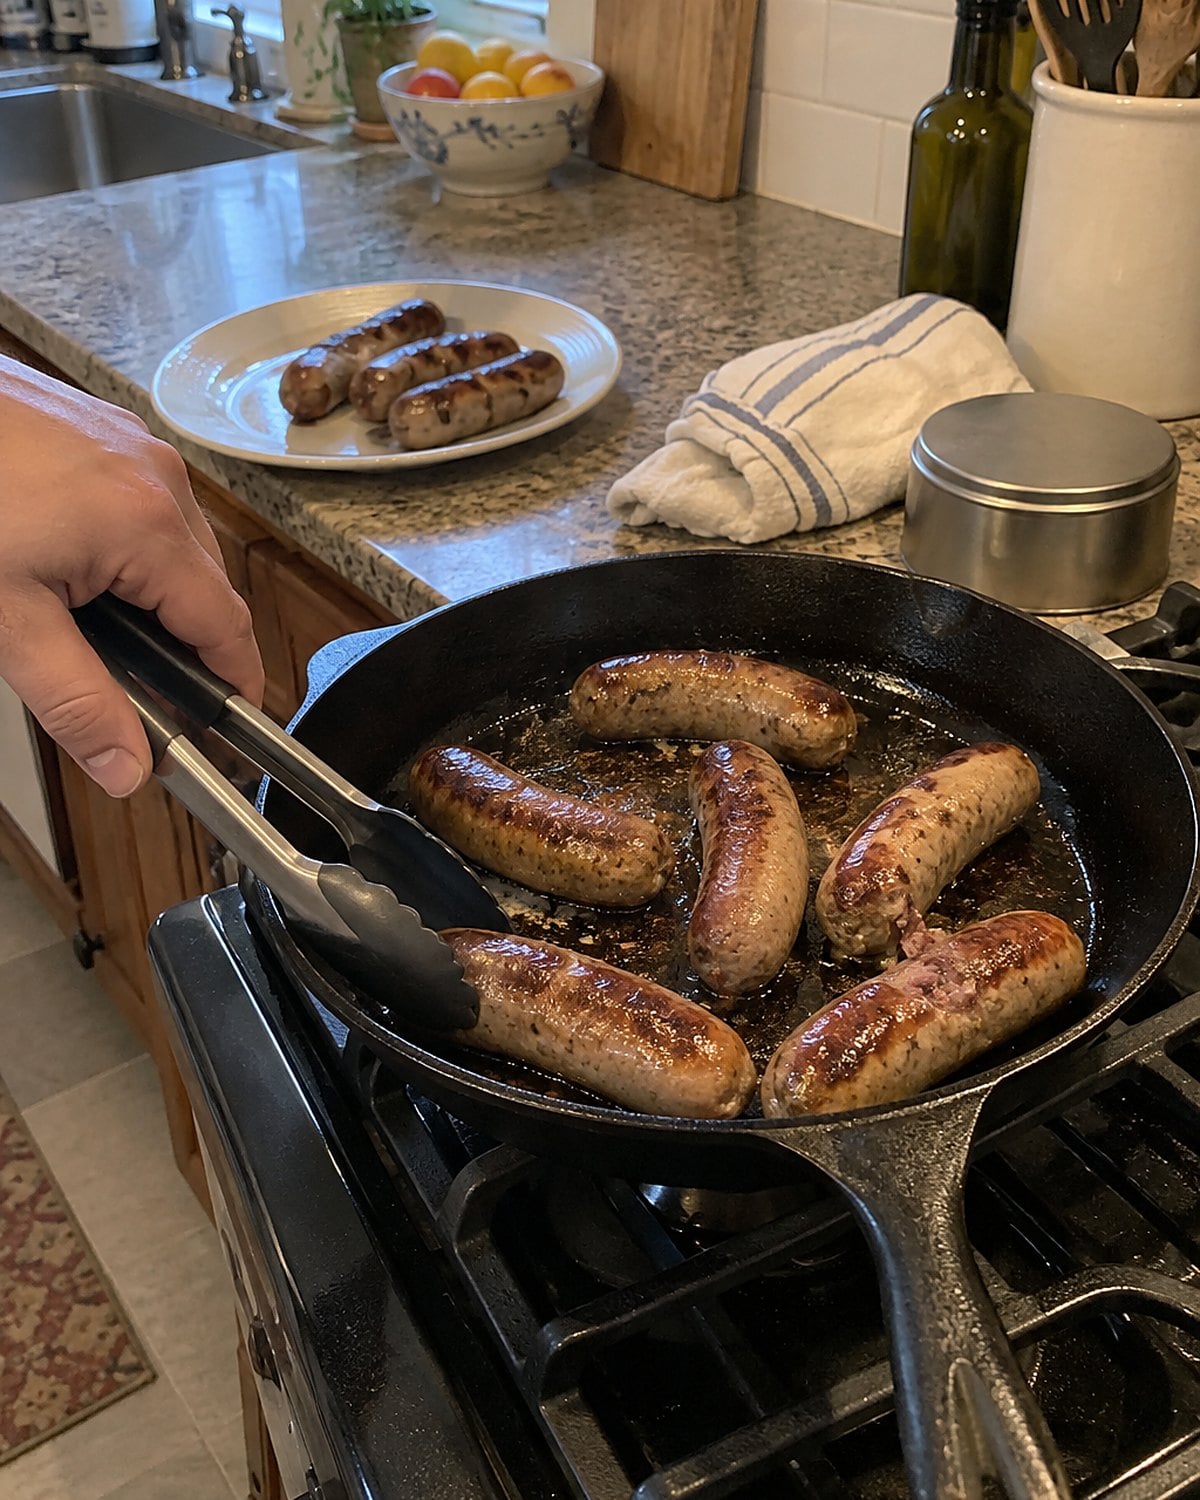
The church cookbook says to fry the sausage until brown. It leaves out the part where your mother lowered the flame after the casing took color.
A fresh sausage link has raw meat inside, even when its outside looks ready. Brown it over moderate heat, then give the center time to cook without burning the skin. Use a thermometer through the end of the link. The USDA chart lists 160°F for ground meat and 165°F for ground poultry.
Don’t prick the casing all over. Those holes let flavorful juices run into the pan before you’ve had a bite. Turn the links with tongs rather than a fork.
Ask what meat went into a butcher-made sausage. The answer tells you which thermometer target to use, and it gives you a clue about its seasoning. Slice a cooked link into beans, or put the whole thing beside fried potatoes. The browned bits left in the skillet deserve an onion.
Try it: Instant Pot Curried Sausages & Peas
#4 The smoked ham hock for beans
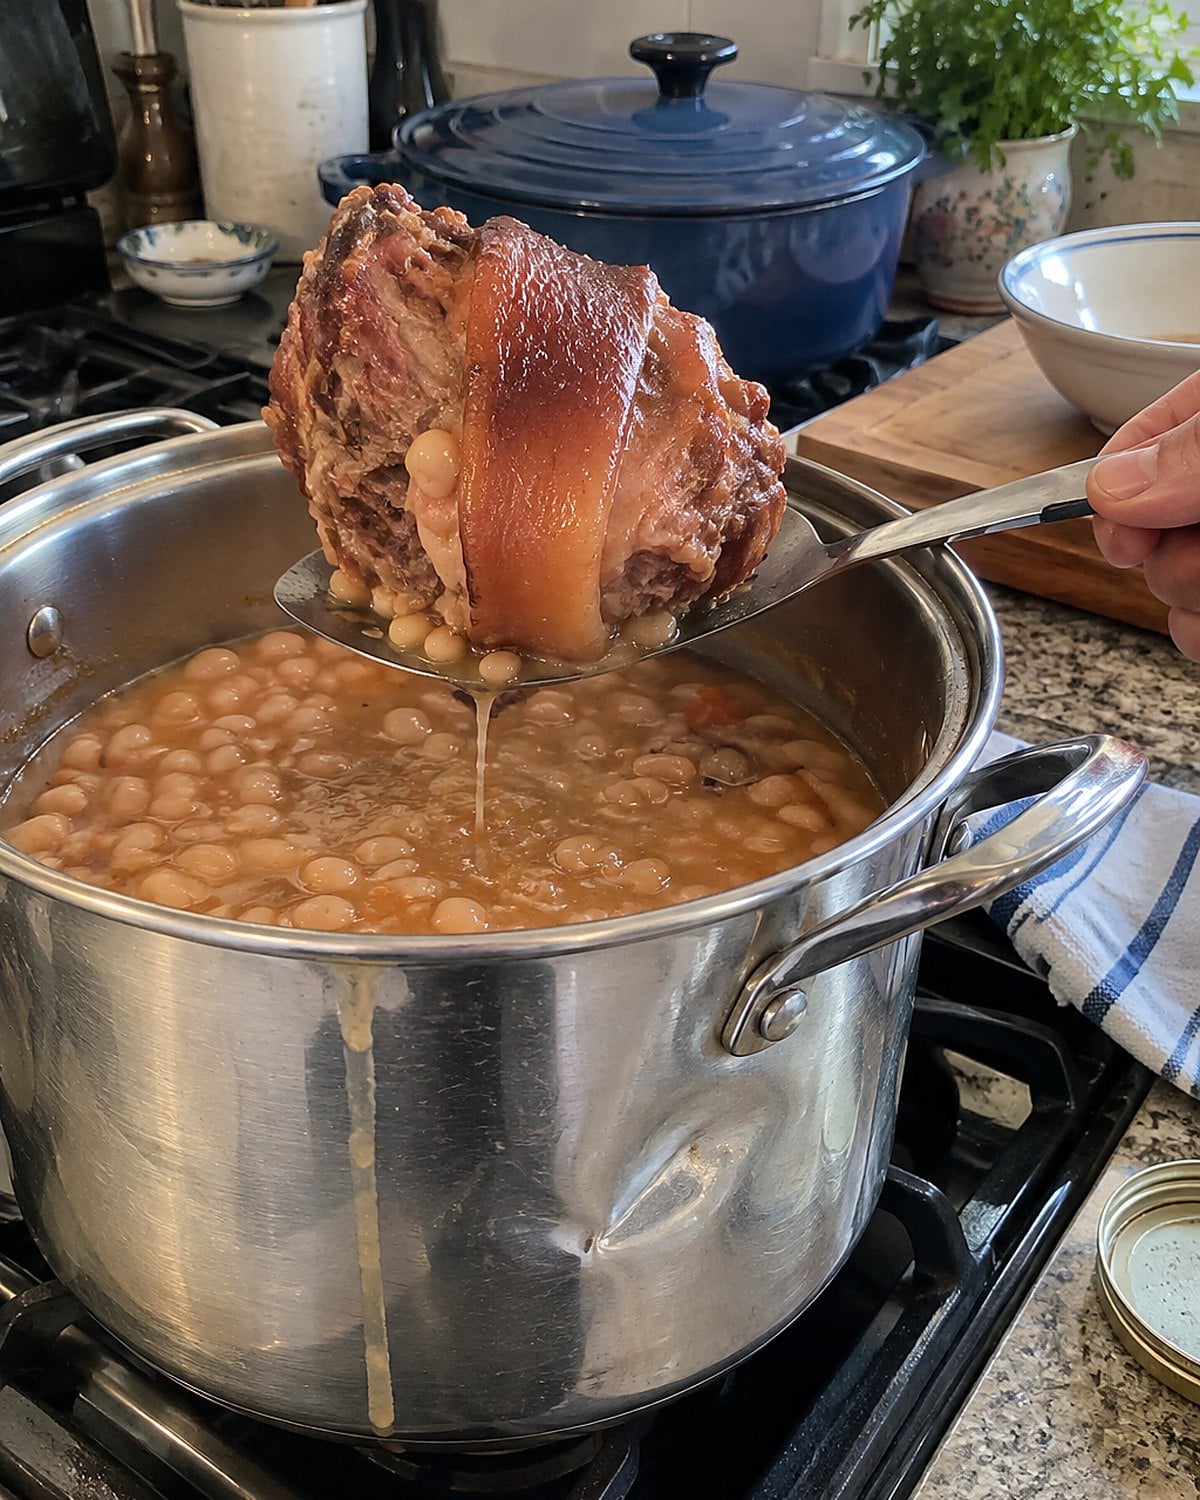
A smoked ham hock has a plain assignment: lend smoke, salt, and body to a pot of beans. It isn’t built to give everyone a tidy slice of meat.
Start the beans with water and onion. Add the hock, then let the pot simmer until the beans are tender. Pull out the hock, cool it enough to handle, and pick off the meat. Stir that meat back in and discard the bone and skin.
Taste the beans before salting. The hock has already seasoned the liquid, and the amount it gives varies from one piece to another. A splash of vinegar at the end wakes up a pot that tastes flat.
If the hock is labeled “fully cooked,” that describes the hock, not the beans. Let the beans reach the tenderness you want. The spoon will tell you more than the label.
Try it: Instant Pot Ham And Beans
#3 The fatback in the freezer drawer
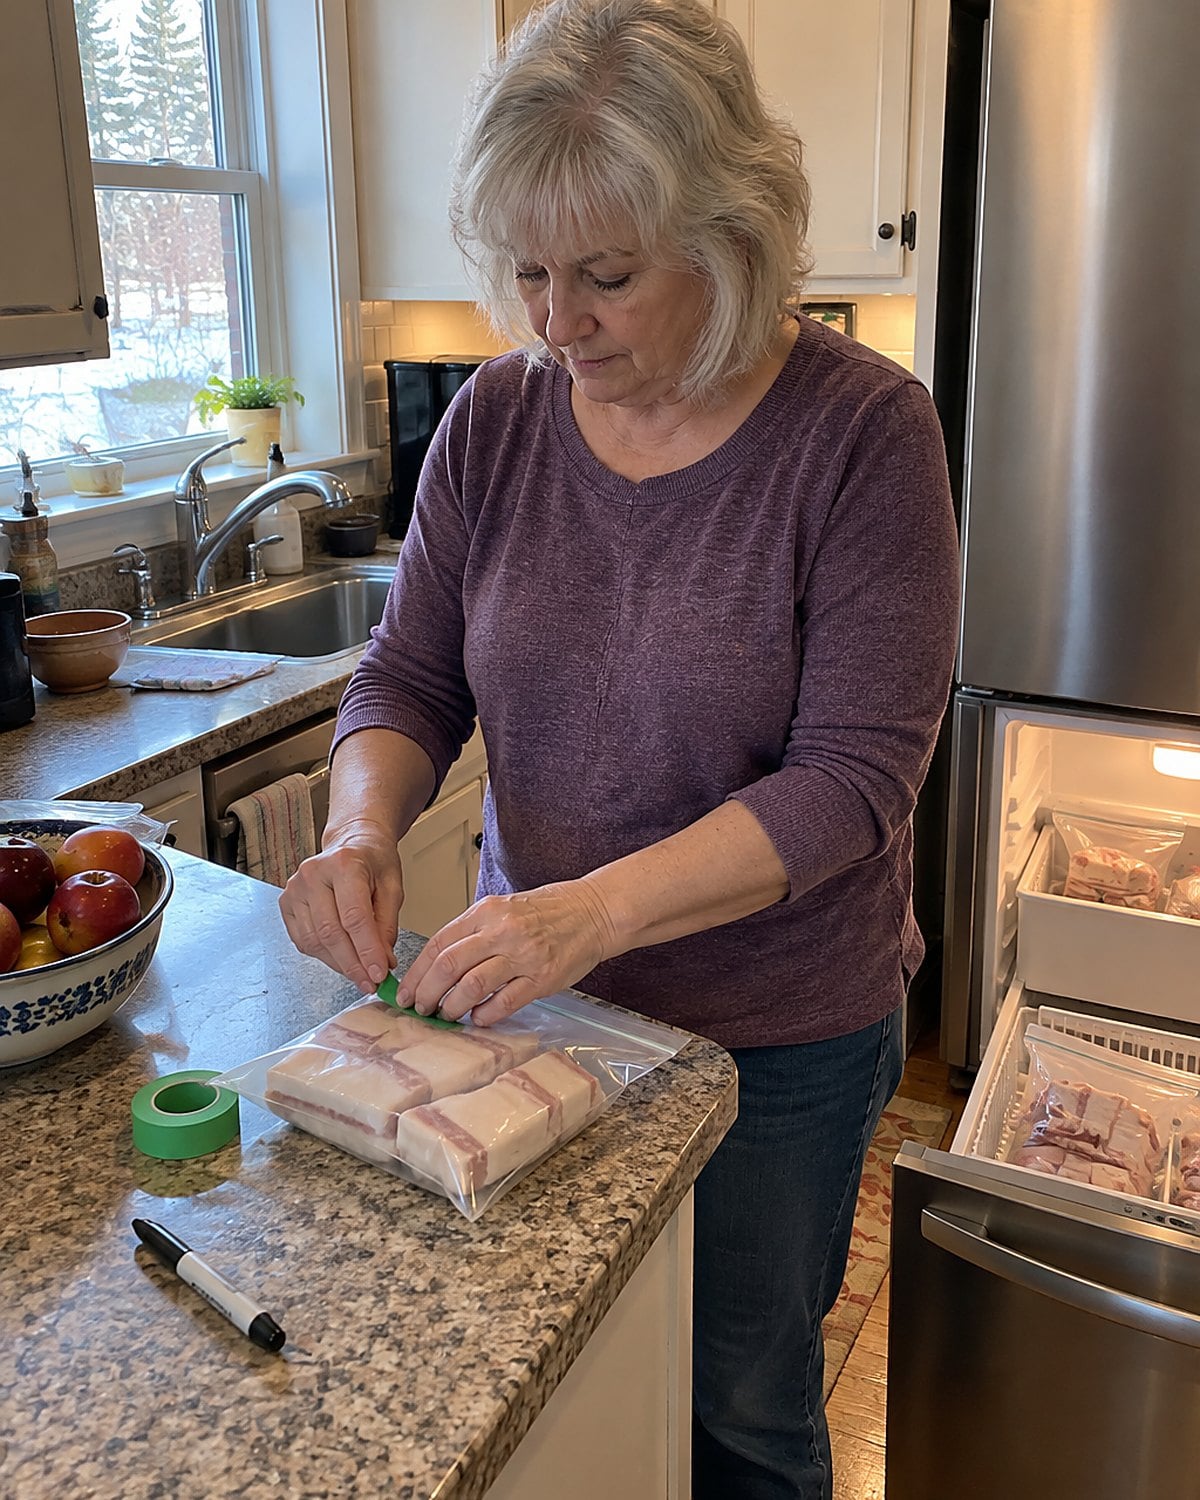
Fatback is firm pork fat from beneath the skin. A small piece once went into the bean pot or under greens, then the rest went back into the freezer drawer. Its job was to give lean ingredients a little richness.
Ask for plain fatback if you don’t want salt pork. Salt pork is cured with salt, so it changes how you season the rest of the dish. At home, write “fatback” on the freezer bag. The pale blocks look remarkably alike once their wrappers are gone.
Dice a small piece and put it in a cool skillet. As the pan warms, the fat melts and the pieces brown. Cook onion in that rendered fat, then add the beans or greens. You’ll taste what the fat did without needing a large piece in the bowl.
Keep raw pork and its cutting board away from ready-to-eat food. The CDC’s four food safety steps are handy when you’re doing several jobs at once: clean, separate, cook, and chill. Then put the remaining fatback away with its name still visible.
#2 The flat iron steak from the blade
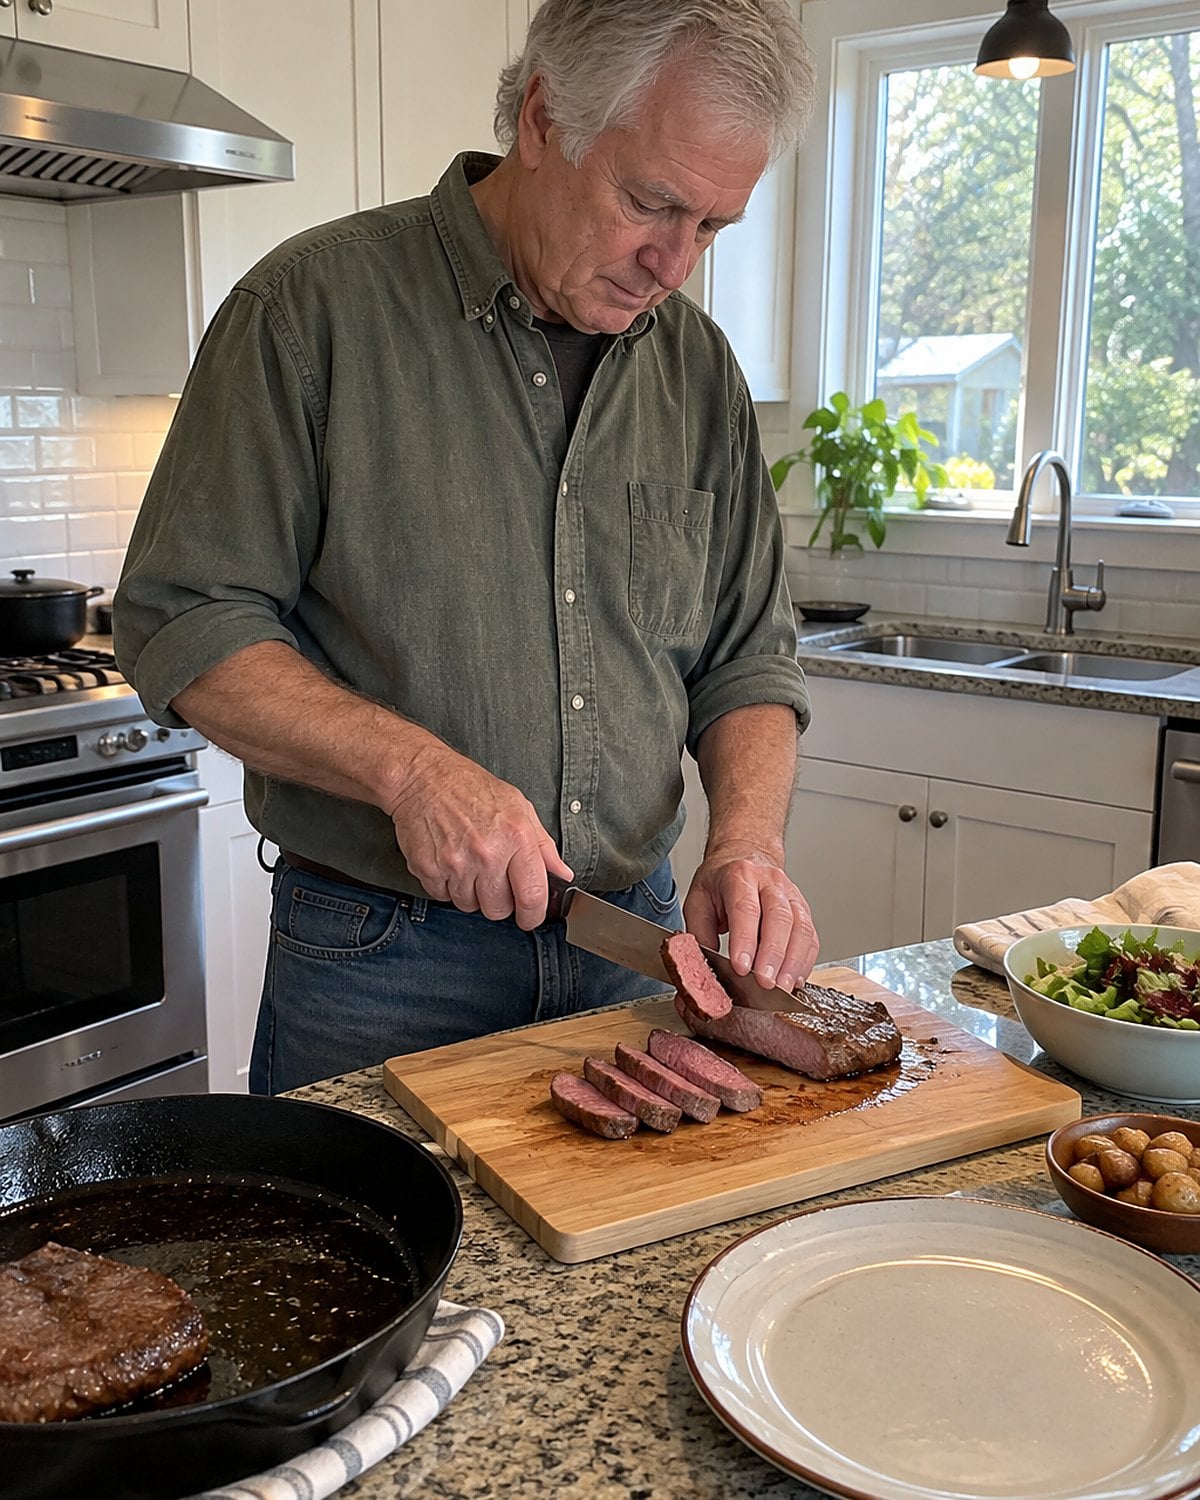
Here’s the cut that saves a weeknight when you want beef without a covered pot. Flat iron steak comes from the shoulder blade area, after the butcher removes the tough seam. Look at the surface: it’s flat, thin, and crossed by visible grain.
Get the skillet hot, dry the steak, and give it room. Flip when the underside has browned rather than tugging at it every few seconds. Use a thermometer in the thickest part; the USDA lists 145°F and a three-minute rest for whole beef cuts.
The knife matters as much as the pan. Find the direction of the fibers and slice across them. If the steak has been cut into sections, check the grain on each one before slicing.
Put those slices over warm potatoes or a salad. What the butcher removed made quick cooking possible. Your part is to keep the knife crossing the grain.
#1 The Thursday liver and onions skillet
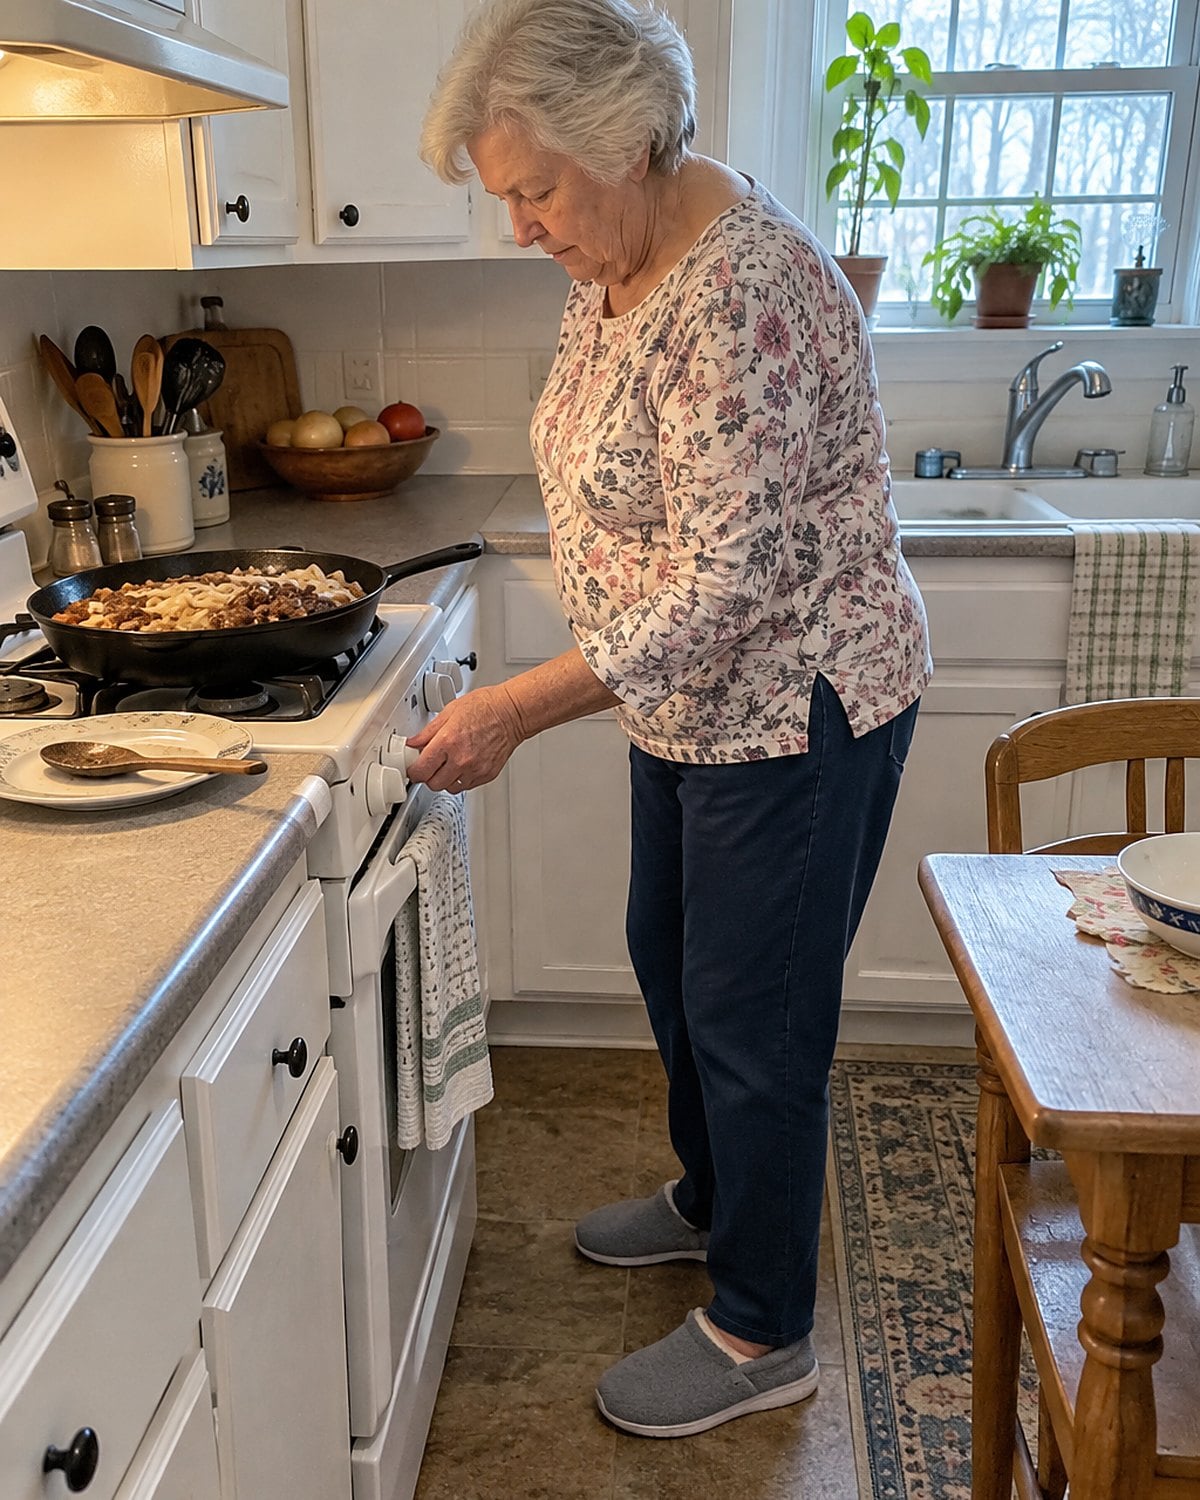
There’s the old Thursday smell: onions browning in fat, the skillet hot before the meat comes near it. If you haven’t cooked liver yourself, start by asking for thin, even slices of beef liver. Ask the butcher to remove any visible membrane.
Set the onions going first. Move them when they’re brown and sweet, and give the skillet a moment to regain heat. Pat the liver dry. A light dusting of flour helps it brown and gives the pan juices something to cling to.
Cook the slices without piling them up. When you turn them, look for browned edges rather than pressing out the juices. Check the thickest part with a thermometer. The USDA’s organ-meat guidance calls for 160°F.
Return the onions at the end. Add a little water to the pan and scrape with a wooden spoon, then spoon the juices over both. Taste before adding salt. A dash of vinegar or lemon belongs there if the pan tastes too rich.
Make only what you want tonight. Liver is a quick skillet supper, not a roast that improves while it waits. If you’ve carried a gray, tough Thursday dinner in your memory for years, this is the one to cook with your own hand on the burner knob.
Keep reading
 27 Dishes From Church Suppers That Nobody Makes Anymore
See all 27 →
More you’ll remember
 27 Things That Were Always on the Table in the 1960s and Never Are Now
 24 Casseroles That Fed America in 1975 and Disappeared Without a Funeral
 27 Dishes Your Mother Made From Nothing That You've Never Managed to Copy
The bottom line
Your mother bought cuts for the pot she had and the time she could give them. Some went under a lid; others needed room in a skillet. The cut tells you which, once you know where to look.
The prepared version of you has asked the butcher one clear question, checked the thickness, and cleared a spot for the thermometer. Which cut do you remember seeing in your kitchen but never learned to ask for?
Leave a Reply