

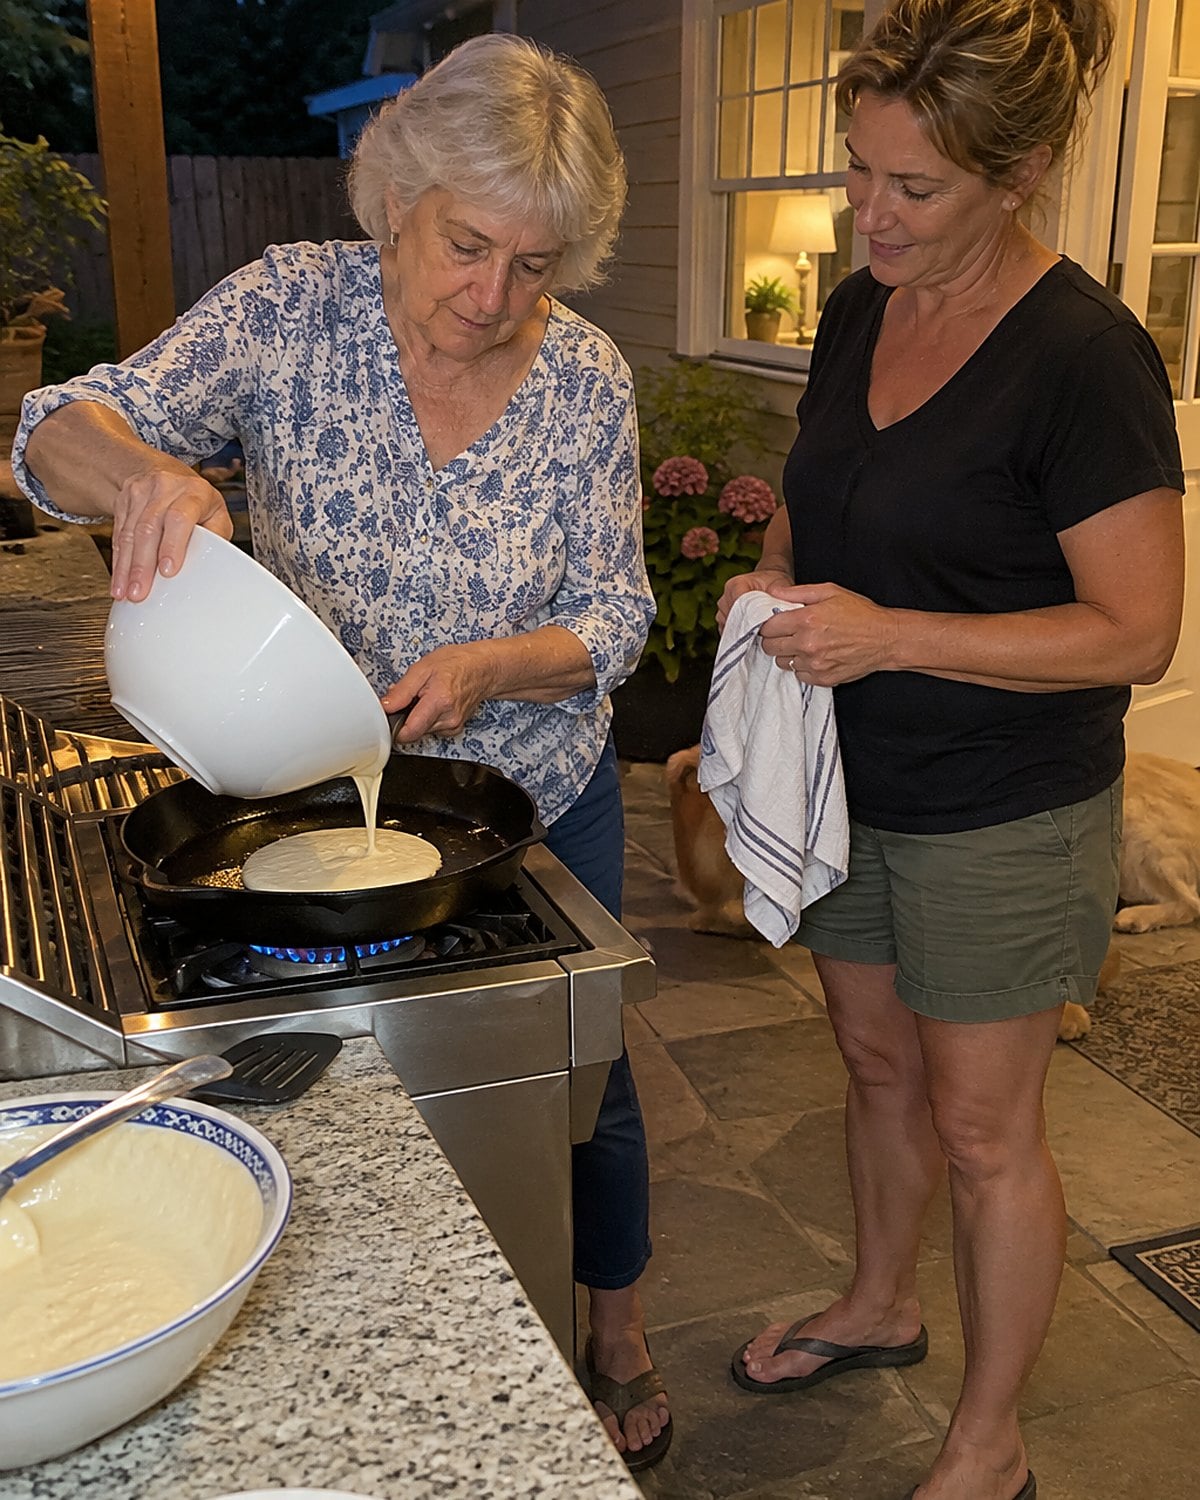
The skillet is hot before the batter goes in. You hear the hiss, then see a narrow line of fat climb the sides. That sound tells you more than the oven timer will. A different pan holds heat differently, gives steam another place to go, and changes what reaches your fork.
There’s room in a kitchen for shortcuts. There’s also room for the pan you reach past three others to find. After years of making supper, you know the difference is real, even when the old recipe says only “bake until done.”
#24 Tomato pie in a shallow pie plate
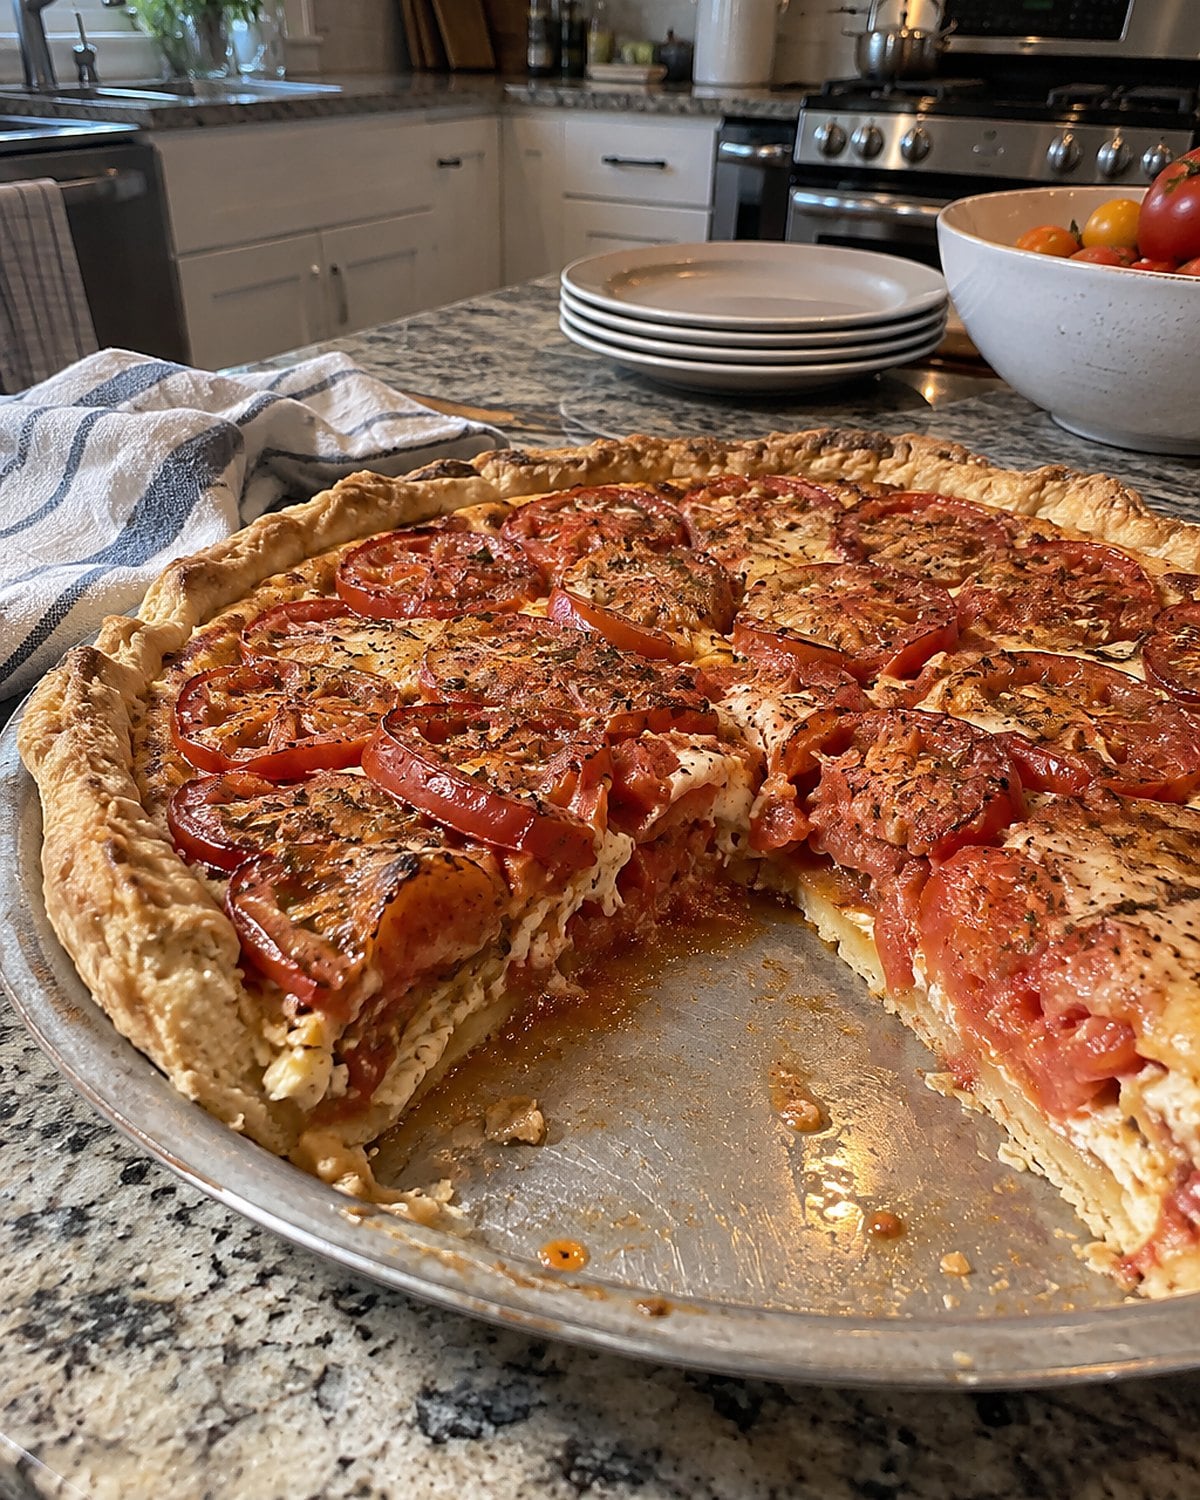
A deep dish sounds generous until you cut the first slice of tomato pie. Tomatoes release juice as they heat, and a deep filling holds that juice against the bottom crust. The slice slumps before it reaches your plate.
Reach for a shallow pie plate. Salt the tomato slices first, let them drain, then blot them before layering. That little pause does more for the crust than adding another handful of cheese. A metal plate gives the bottom direct heat; a glass plate lets you look underneath and see whether the crust has browned.
Give the pie time to stand after baking. When you slide a knife beneath the first wedge, you want a bottom that lifts with it, not a wet patch left in the plate. If the tomatoes from your garden are heavy with juice, draining them matters more than the exact amount of filling.
#23 Fried green tomatoes in a wide skillet
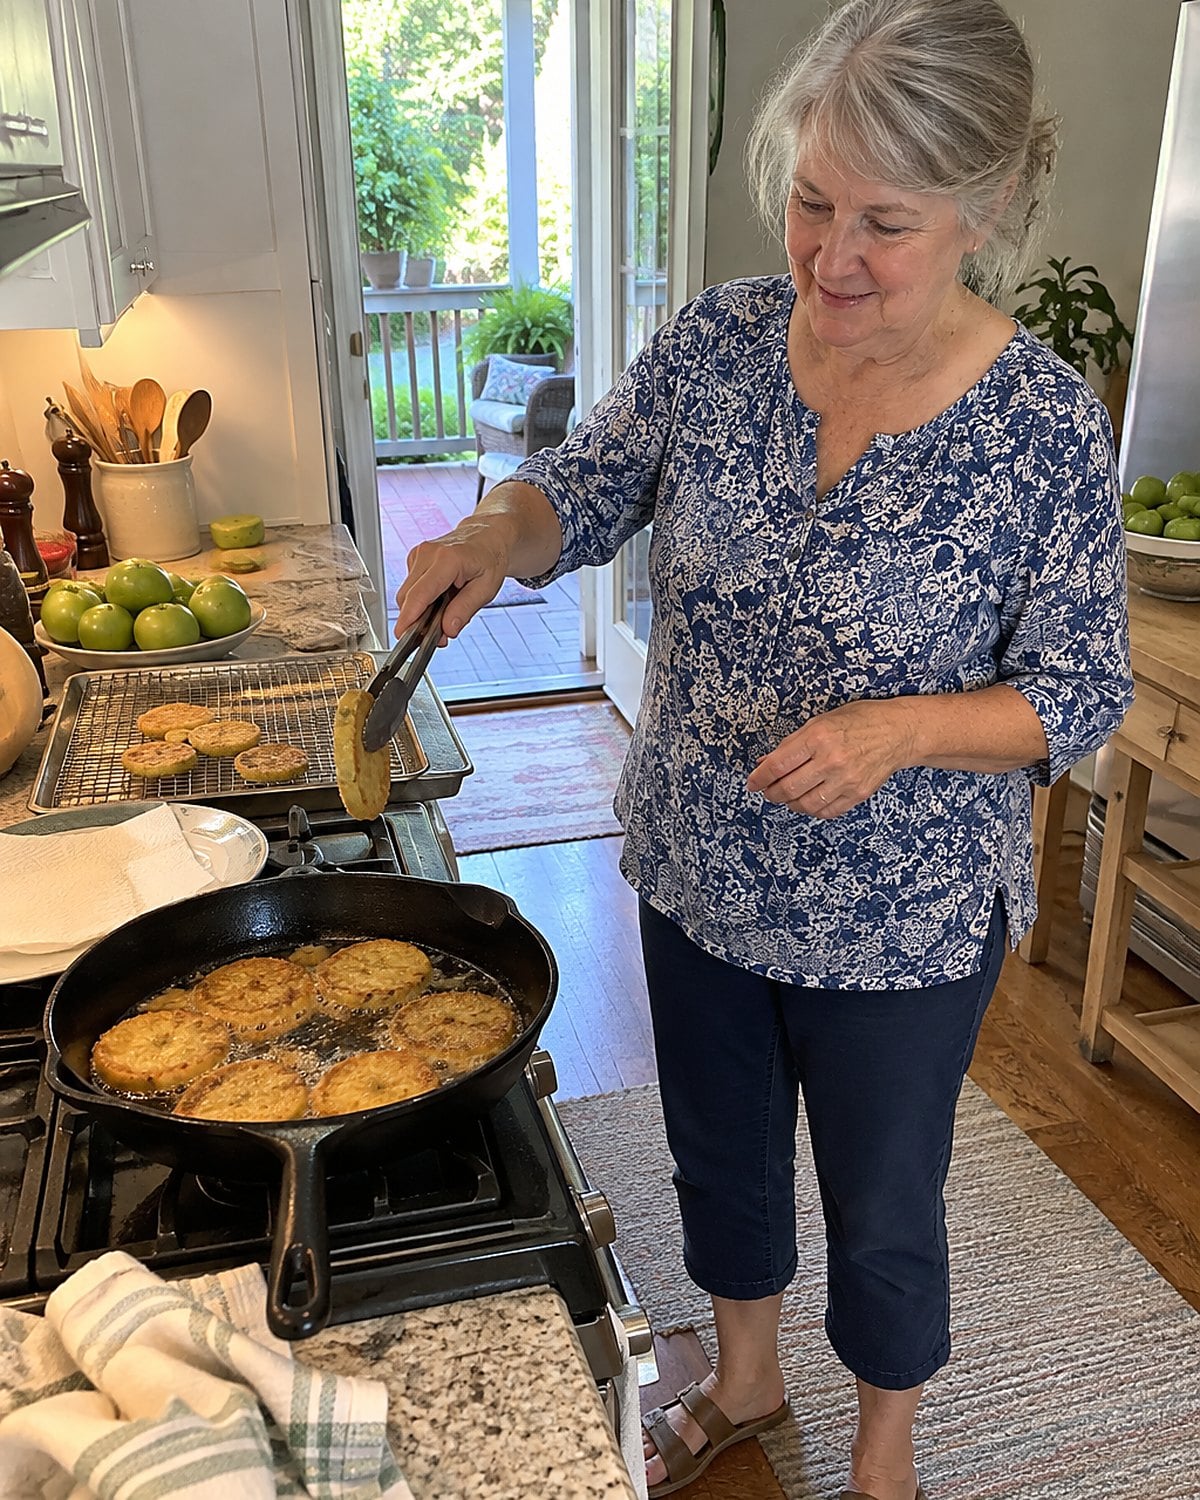
The porch door opens, somebody asks when supper is ready, and the first batch is already losing its crust. Fried green tomatoes wait for no one.
A narrow pan makes that wait worse: crowd the slices and their moisture gathers, cooling the fat before the coating sets. A wide skillet gives each slice room and lets you turn it without scraping its neighbor bare. Lay the coated tomatoes in hot fat with space between them.
Listen for steady sizzling. If the sound fades when the last slice goes in, the pan is crowded. Fry another batch instead.
Cast iron holds its heat through that first rush of cool tomatoes. A heavy stainless skillet works too, provided you watch the burner and adjust it when the coating darkens faster than the tomato softens.
Set the finished slices on a rack rather than stacking them on a plate. Steam trapped beneath the top slice takes back the crispness you just made. Bring them to the table while the edges still crackle.
#22 Hush puppies in a deep pot
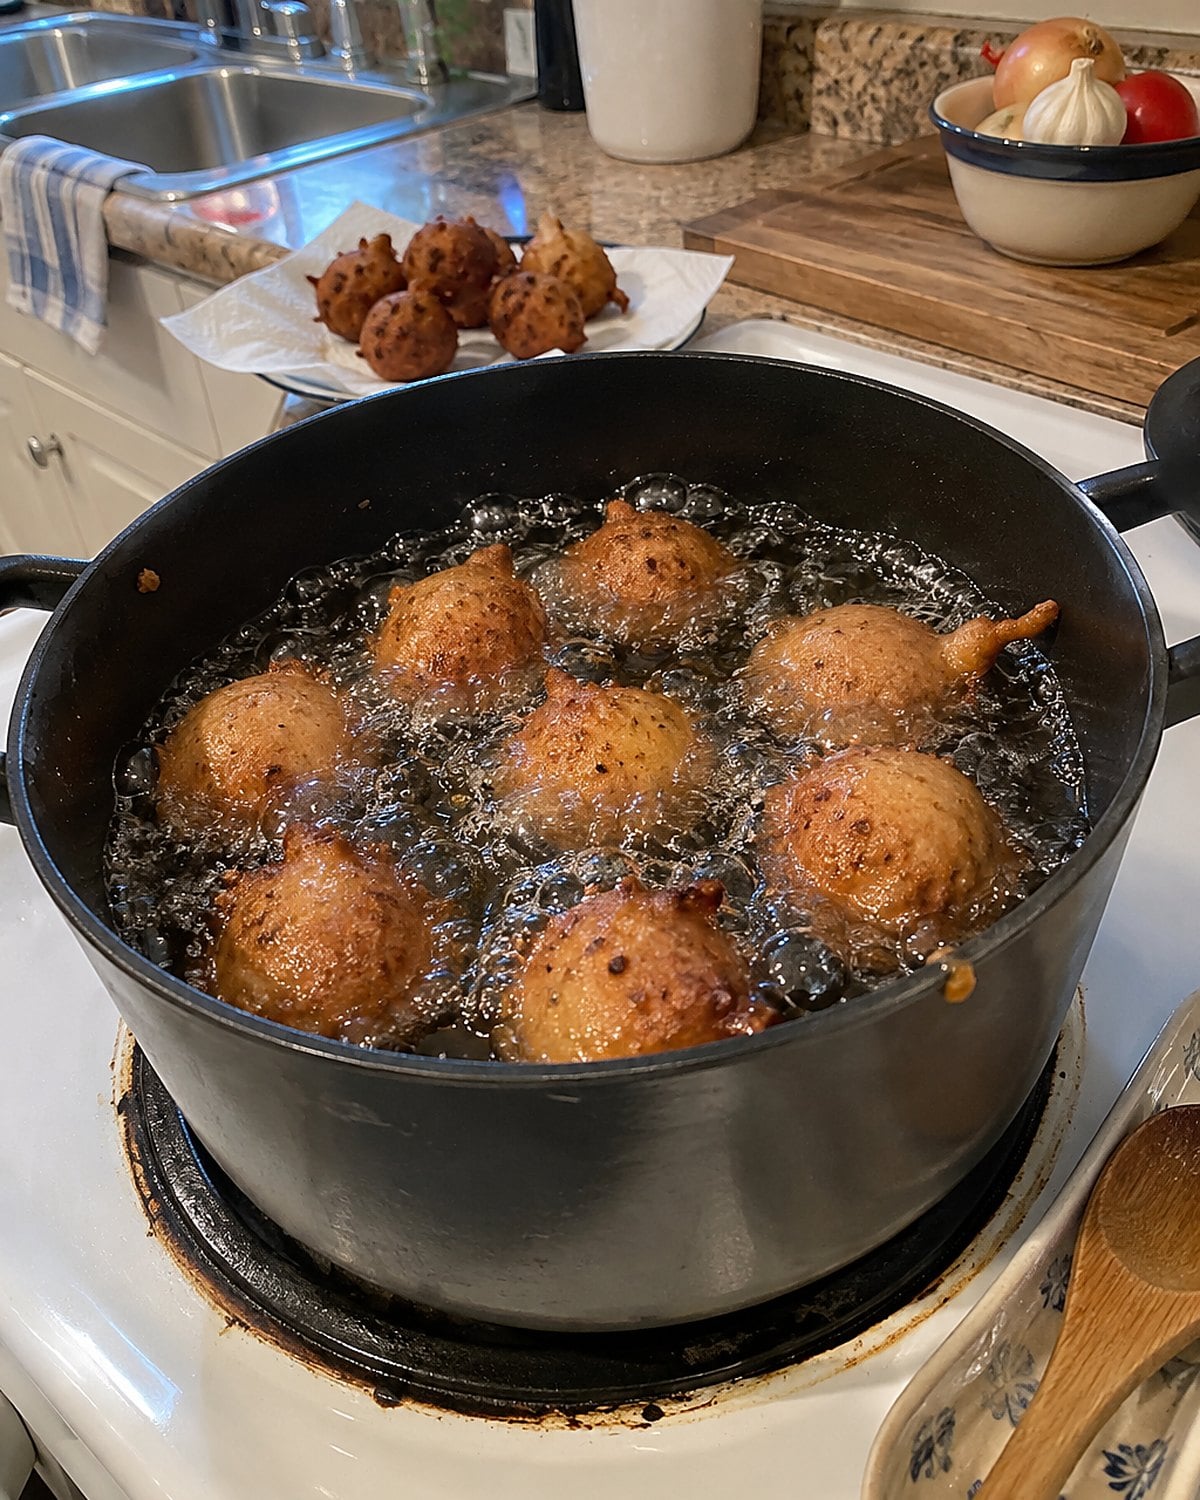
A shallow skillet gives hush puppies a flat side. They need enough oil to float and turn as their batter sets, so choose a deep, heavy pot with room above the oil for bubbling.
Watch the first spoonful. It should rise and color while the center cooks, rather than turn dark at once. At about 350°F, hot oil sets the outside without racing past the middle. Keep a thermometer clipped where you’ll see it, away from the pot’s bottom.
Drop modest spoonfuls and leave space between them. As you lift one out, break it open. You’re looking for a cooked, tender center without a stripe of raw batter. The pot has done its job when the hush puppy is round enough to roll across a plate.
#21 Okra in a well-heated skillet
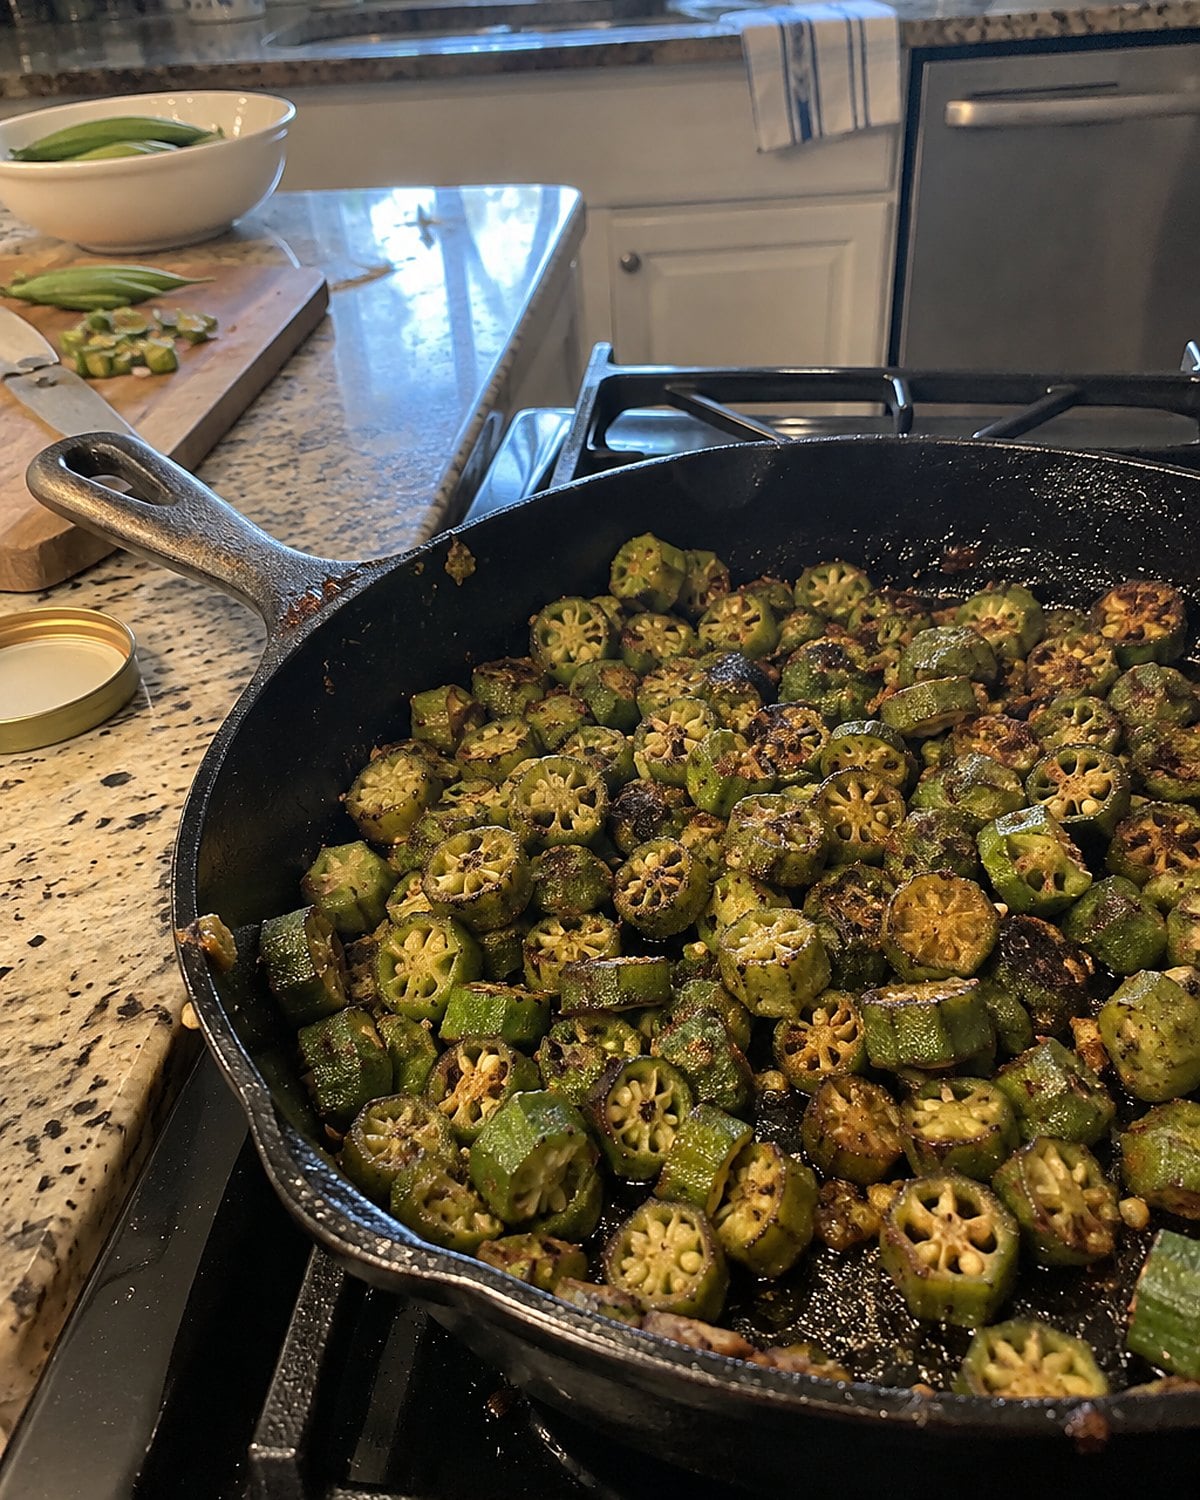
A bag of sliced okra hits the pan, and suddenly the spoon drags through a slick coating. The fix starts before you turn on the burner. Dry the cut okra well and give it a wide cooking surface.
In a crowded saucepan, cut okra steams. Its natural mucilage spreads through the liquid, which is welcome in gumbo but far less welcome when you want browned edges. A hot, roomy skillet lets moisture leave while the slices meet the pan.
Let the first side color before stirring. That stillness matters. If you keep moving the okra, you interrupt browning and pull more moisture across each piece. Cornmeal, if you use it, goes on just before frying so it stays dry enough to cling.
Taste a browned slice before adding more salt. The edge should have a little resistance, while the center stays tender. Your skillet won’t erase okra’s character. It gives that character somewhere useful to go.
#20 Country-fried steak in a roomy frying pan
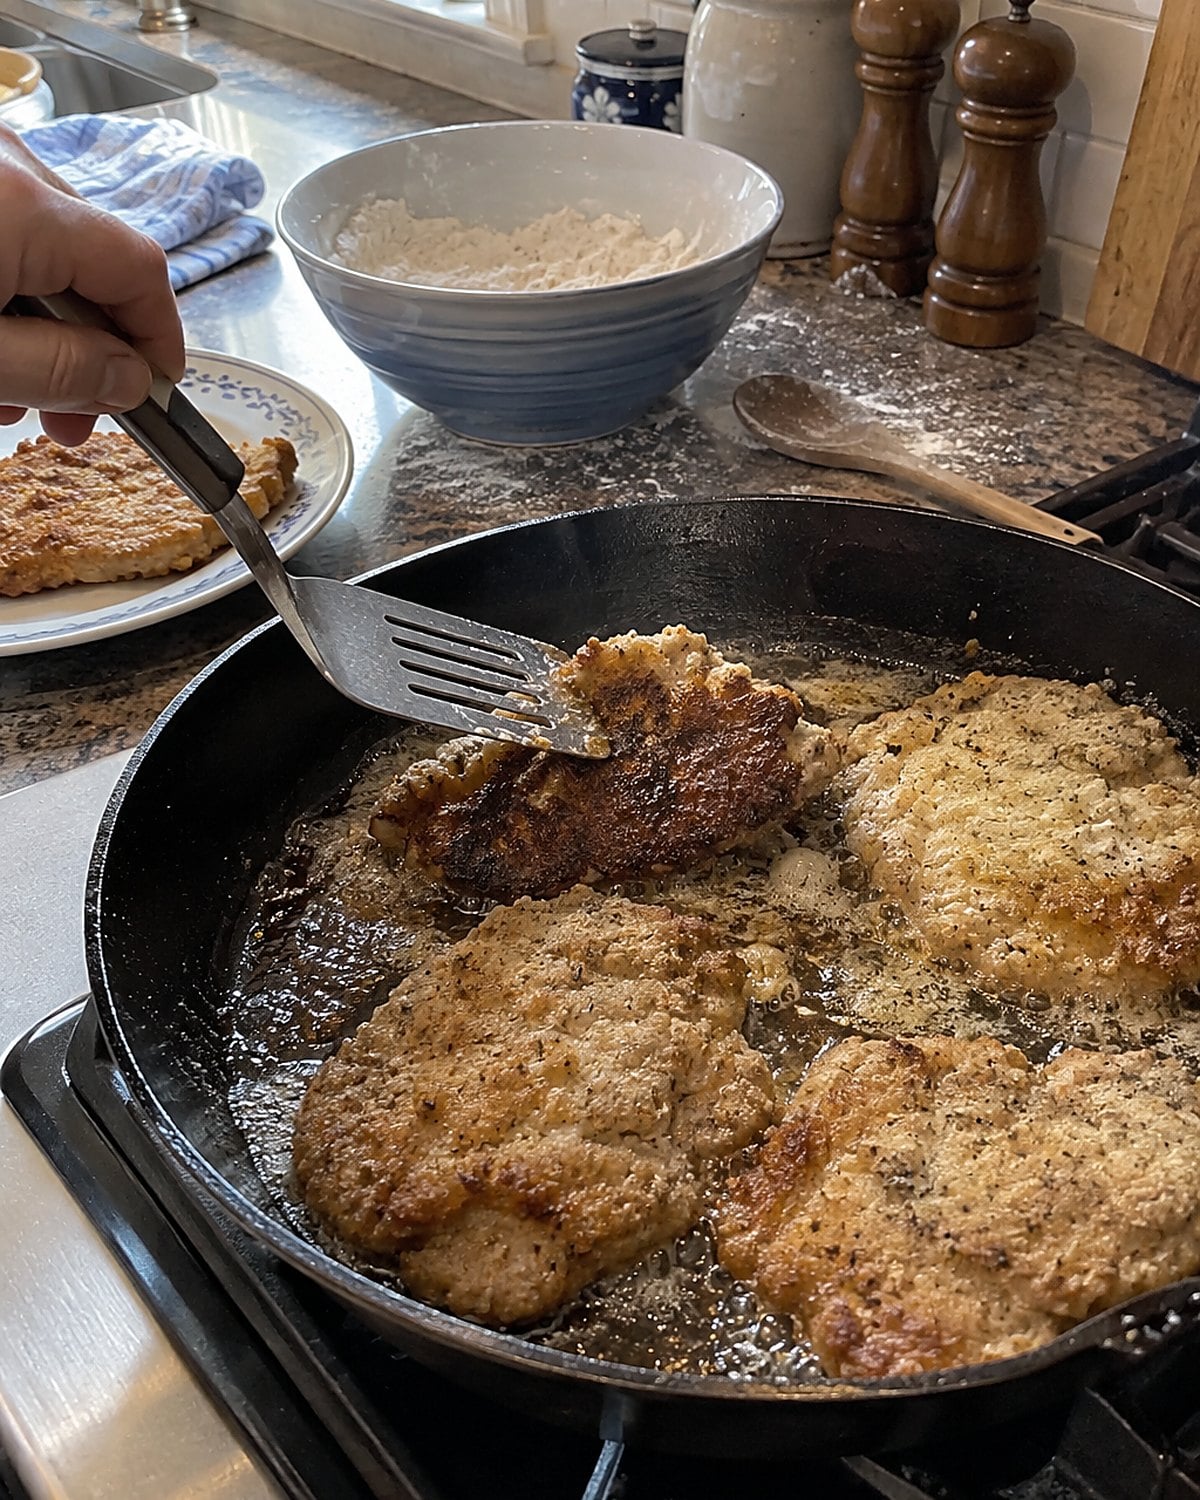
At the meat counter, thin cube steak looks ready for a fast supper. It is, once the coating has space to fry. Pack the steaks into a small pan and flour falls away where the pieces touch.
Choose a roomy frying pan with a broad, flat bottom. Heat the fat first, then lower in the coated steak and leave it alone until the underside has set. You’ll feel the difference with a spatula: a ready crust releases with less pulling.
After frying, keep the browned bits in the pan for cream gravy. Pour off excess fat, stir flour into what remains, then add milk while scraping the bottom. The pan carries supper into the gravy boat. That’s why washing it between the steak and the gravy never made sense.
#19 Red beans in a heavy Dutch oven
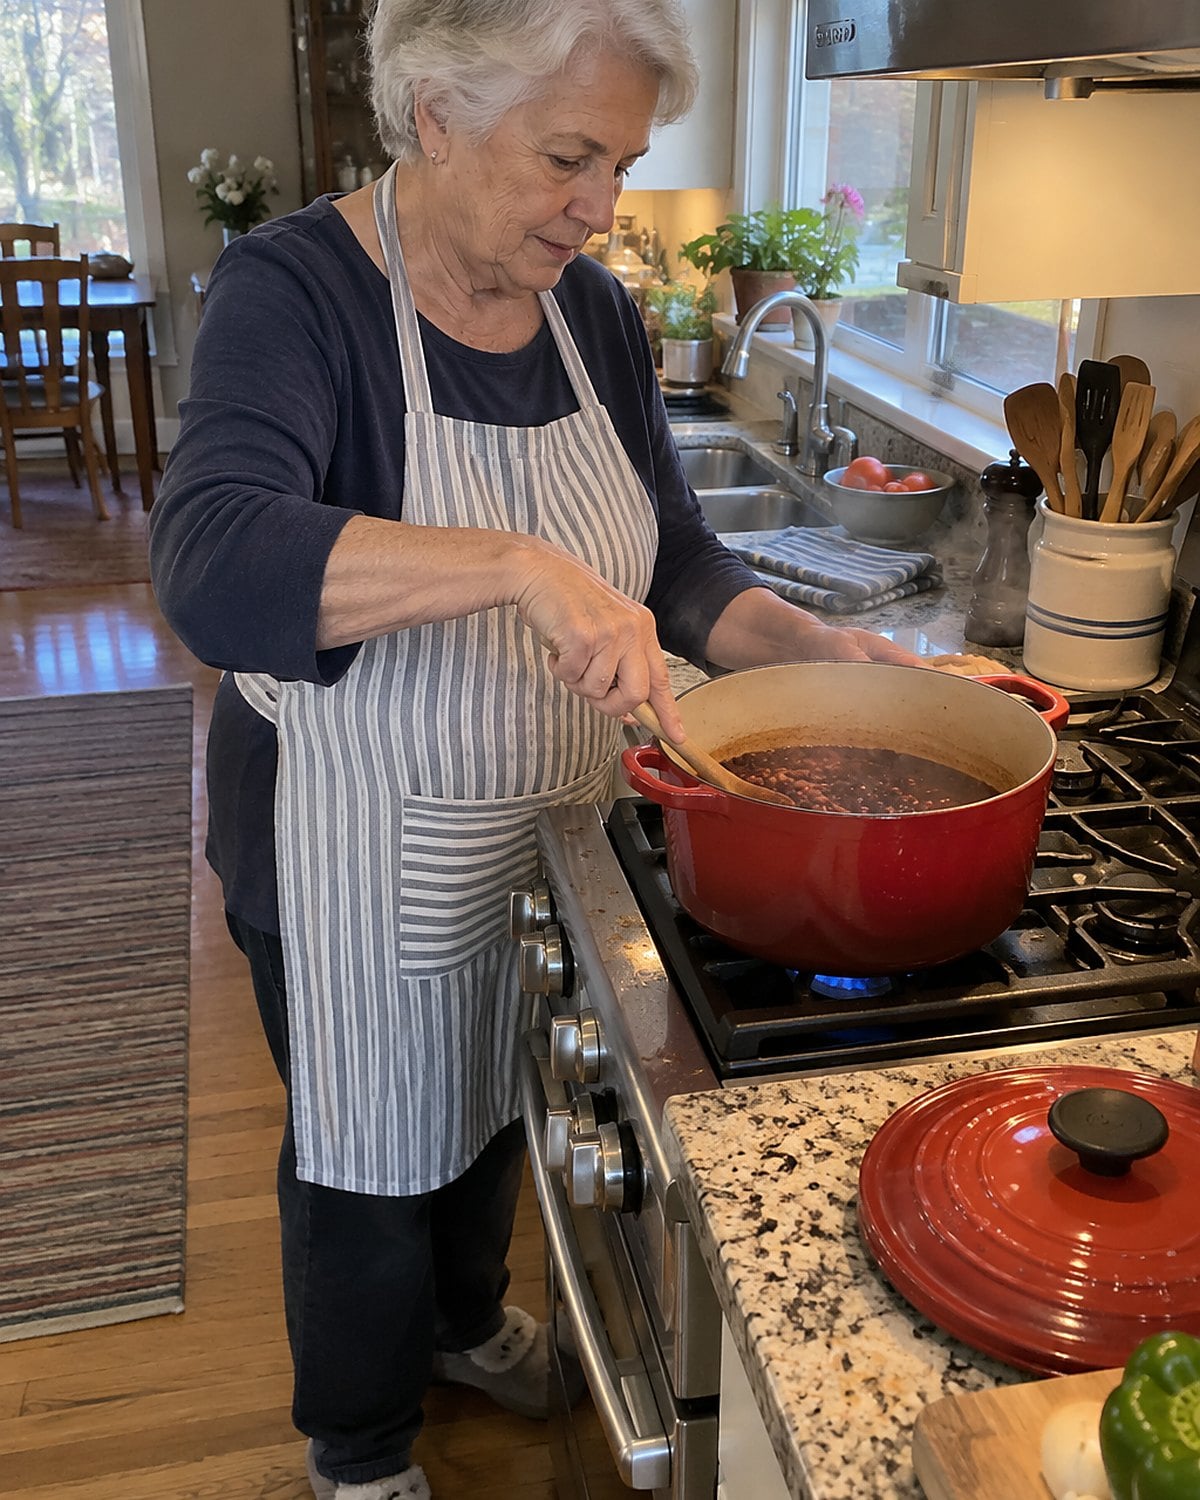
Red beans need a long stretch of steady heat. In a thin pot, the beans nearest the burner catch while those near the surface wait their turn. A heavy Dutch oven spreads the heat and gives you a broad bottom to stir across.
For dried red kidney beans, follow the FDA’s kidney bean guidance and check the package directions before cooking. An Instant Pot or slow cooker isn't the place to guess about the boiling step. The beans contain a natural lectin that requires proper cooking.
Once the beans have had that treatment, simmer them with the aromatics and smoked meat you favor. Stir along the bottom, not just through the middle. When the beans are tender, press a few against the side of the pot and stir them back in. Their starch thickens the liquid without a separate slurry.
A ladle dragged through the finished beans should leave a path that closes slowly.
Taste the liquid before you salt again. Smoked meat has been seasoning it all afternoon.
#18 Collards under a snug pot lid
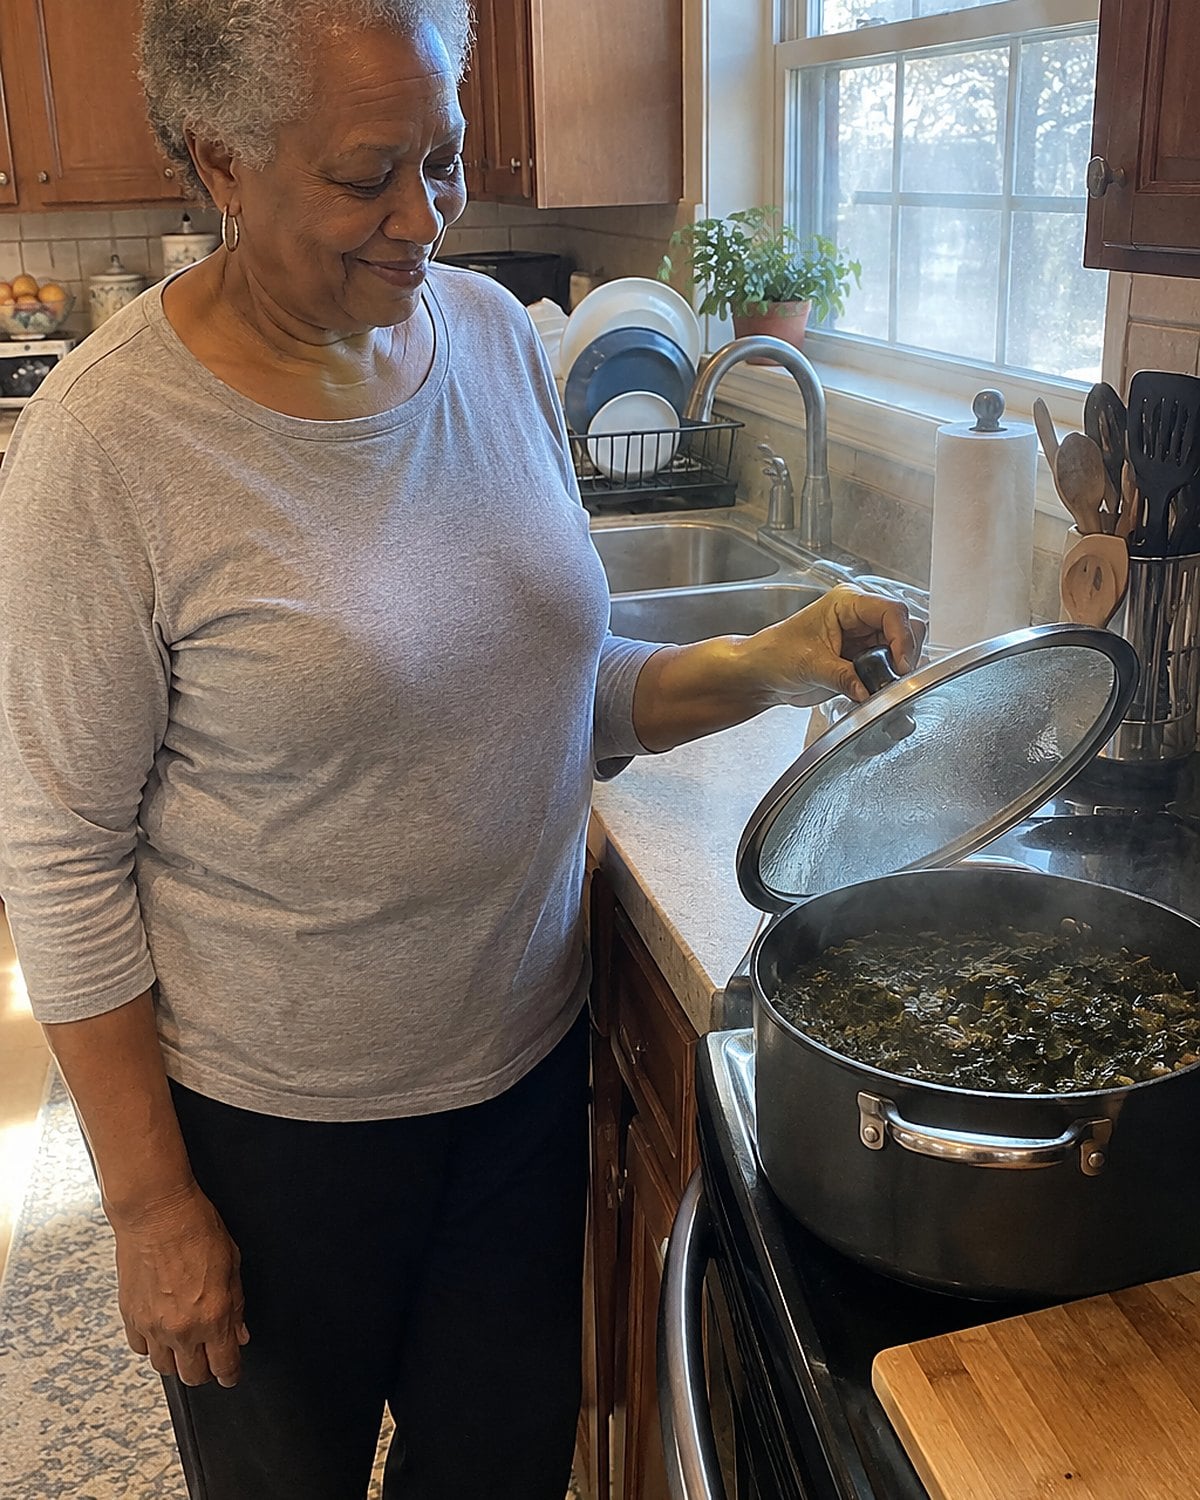
The lid on a pot of collards has a job. It catches steam and sends it back over the greens while the tough leaves soften. Leave the pot uncovered from the start, and you spend the afternoon replacing evaporated liquid.
Use a heavy pot with a lid that sits snugly. Begin with a little cooking liquid and your seasoning meat, then add the washed greens in batches as they wilt. Once the stems are tender, uncover the pot if the liquid tastes thin and let some steam escape.
Take a stem from the pot and bite it.
A knife test tells you it’s soft; your teeth tell you whether you want another stretch on the stove. The liquid left behind should taste like collards, not plain salted water.
Try it: Instant Pot Collard Greens With Sun-Dried Tomatoes
#17 Chicken and dumplings in a wide pot
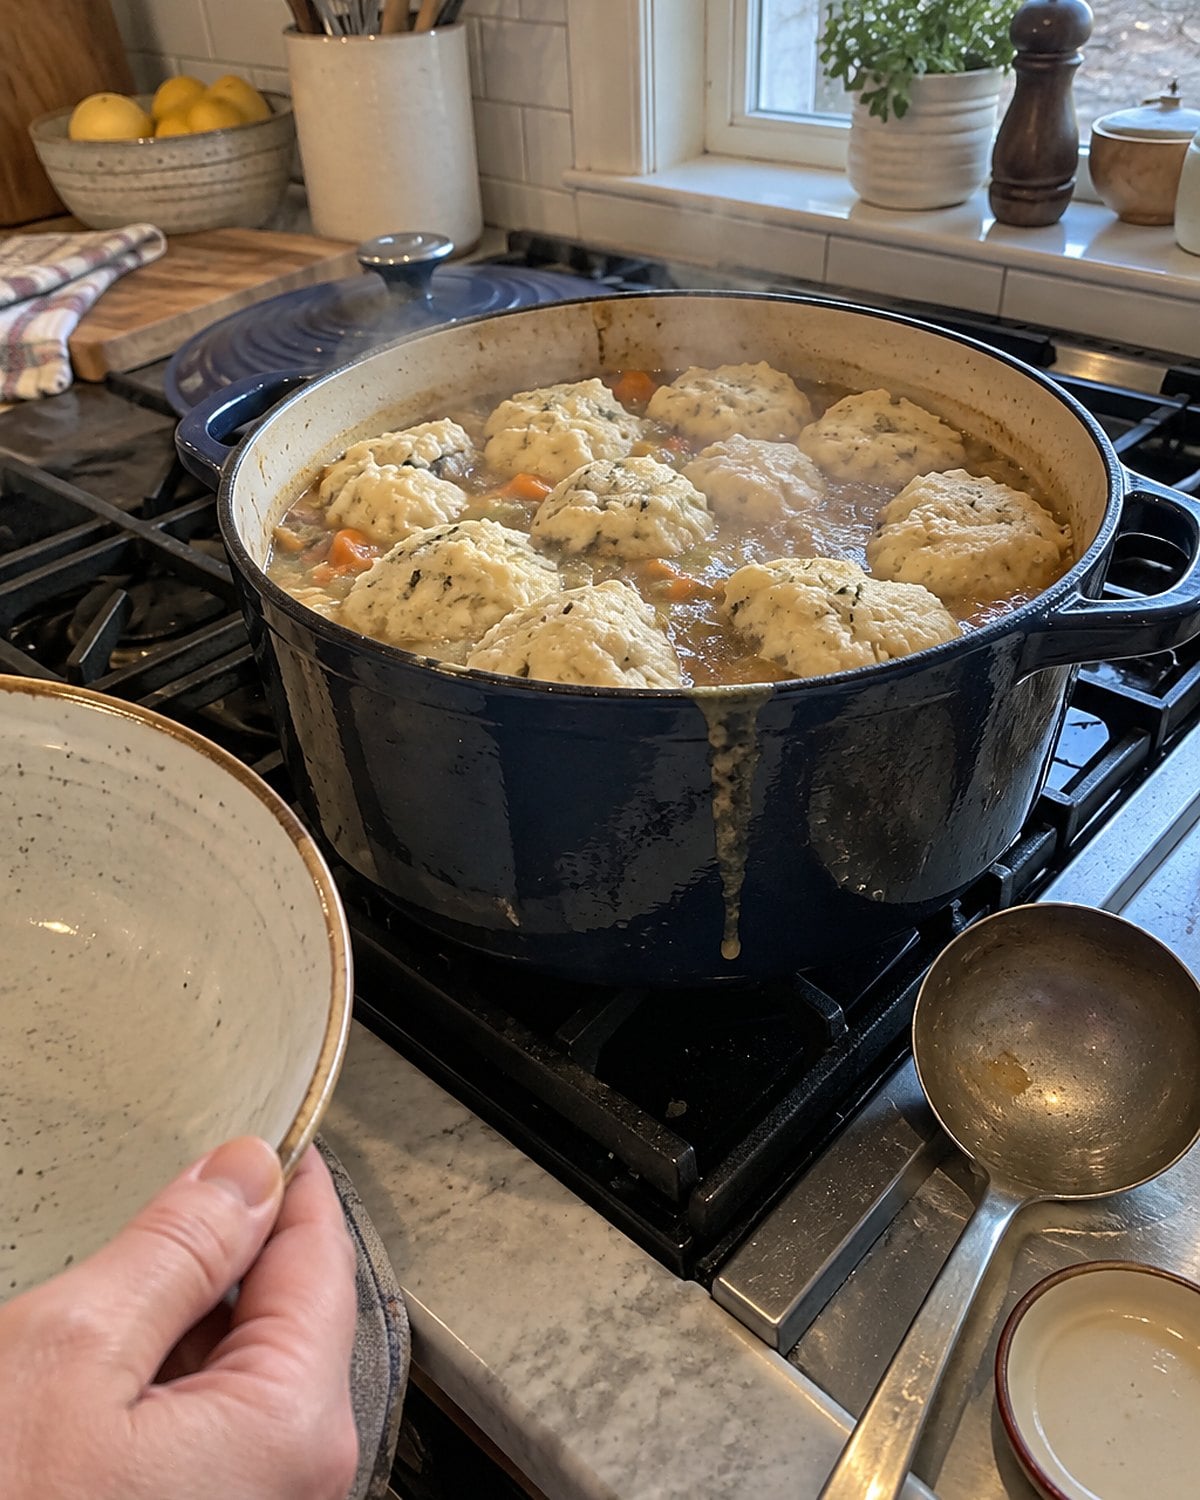
Someone always lifts the lid to see whether the dumplings have grown. That peek lets out the steam cooking their tops. Use a wide pot so the dumplings have room to sit across the broth rather than pile on one another.
Bring the chicken broth to a steady simmer before the dough goes in. Add the dumplings, put the lid on, and resist stirring through them while they set. A crowded, narrow pot pushes soft dough together and leaves you with a heavy clump in the middle.
The wide surface also makes it easier to find a piece of chicken when you serve. Pull the chicken into bite-size pieces before it goes back in.
Check the thickest part of the chicken with a thermometer, avoiding bone. The USDA Food Safety and Inspection Service lists 165°F for poultry.
Lift one dumpling and cut into its center. There should be no raw dough there. Then ladle carefully, because the tender ones have earned a better ending than being chased around with a spoon.
 You might also like27 Breads Your Mother Baked Weekly That You Can Still Make Without a Machine
#16 Shrimp and grits in a heavy saucepan
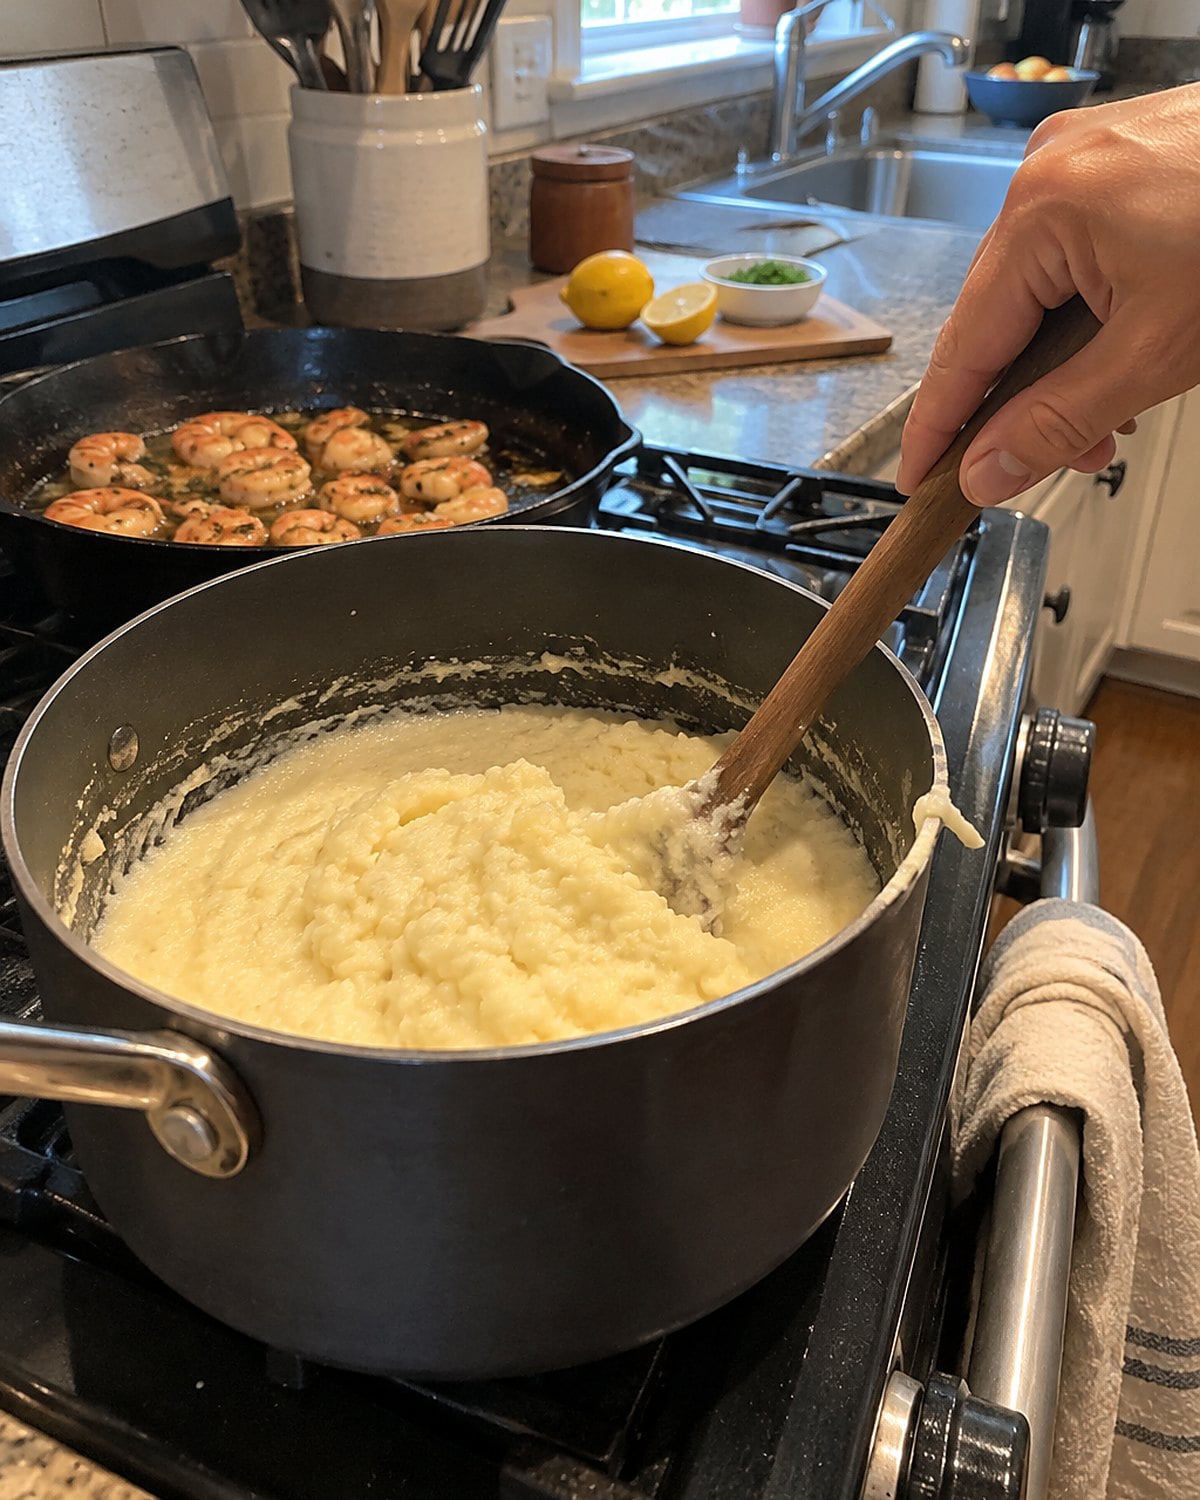
Grits announce a thin saucepan by sticking to its bottom. A heavy saucepan slows that rush of heat, giving the grains time to swell while you stir.
Keep the grits at a modest simmer. Scrape the bottom and the corners with a sturdy spoon, where the first thick layer gathers. Taste a spoonful before you call them done. If you feel a hard grain against your teeth, they need more cooking, even if the pot looks thick.
Cook the shrimp separately, fast, in a skillet. Fold them over the grits at the table or spoon them on top. Leaving shrimp in the grits pot while you finish seasoning turns a tender supper rubbery. Each pan has a different job, and both show up in the first bite.
#15 Smothered pork chops in a lidded skillet
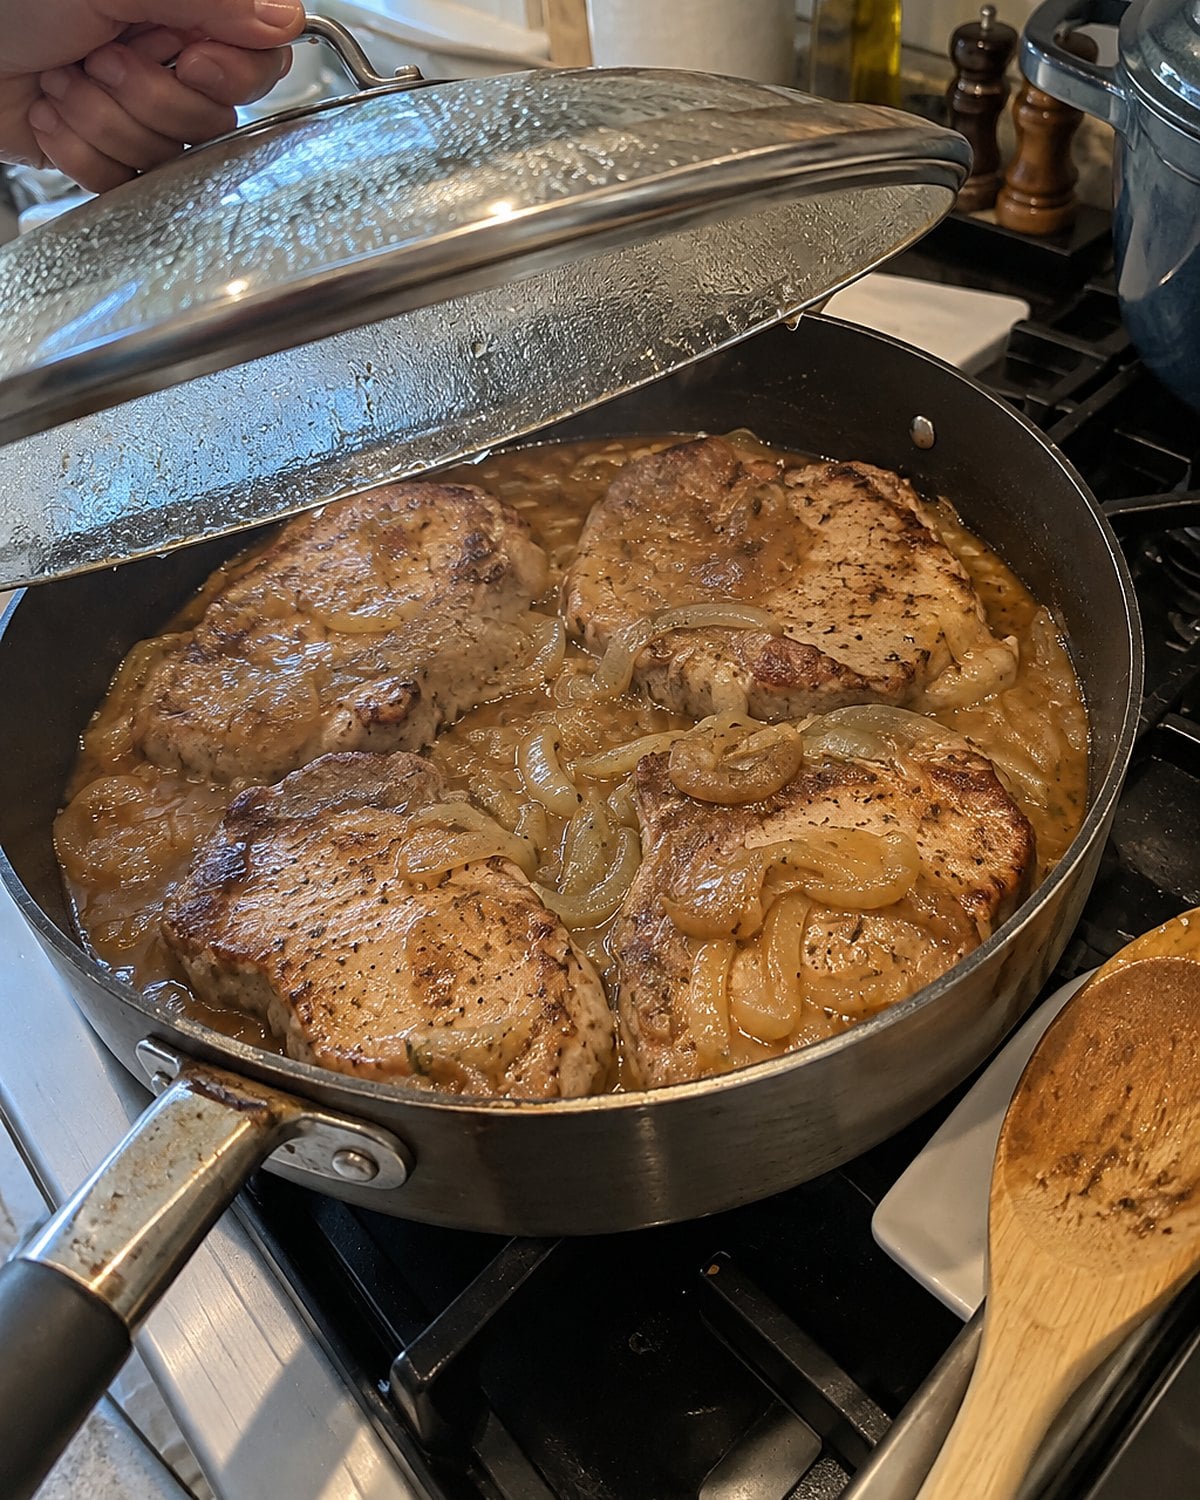
The pork chops are brown, but the onion gravy isn’t ready. That’s the moment a lidded skillet earns its space. You can build the brown bits first, then cover the chops for a short finish in the same pan.
Brown the chops without crowding them and set them aside. Cook the onions in the drippings until they soften and pick up the browned bits.
Add the liquid for your gravy, return the chops, and cover. The lid holds moisture close to the meat while the onions finish melting into the sauce.
Don’t judge doneness by the color of gravy. Put a thermometer into the thickest part of a whole-cut pork chop, away from bone. The USDA’s safe temperature is 145°F, followed by a 3-minute rest.
If the gravy needs thickening, move the chops to a plate and simmer the sauce uncovered. A spoon drawn across the skillet bottom should leave a clear trail for a moment. Put the chops back only long enough to coat them, then get the skillet to the table.
#14 Hoecakes on a flat griddle
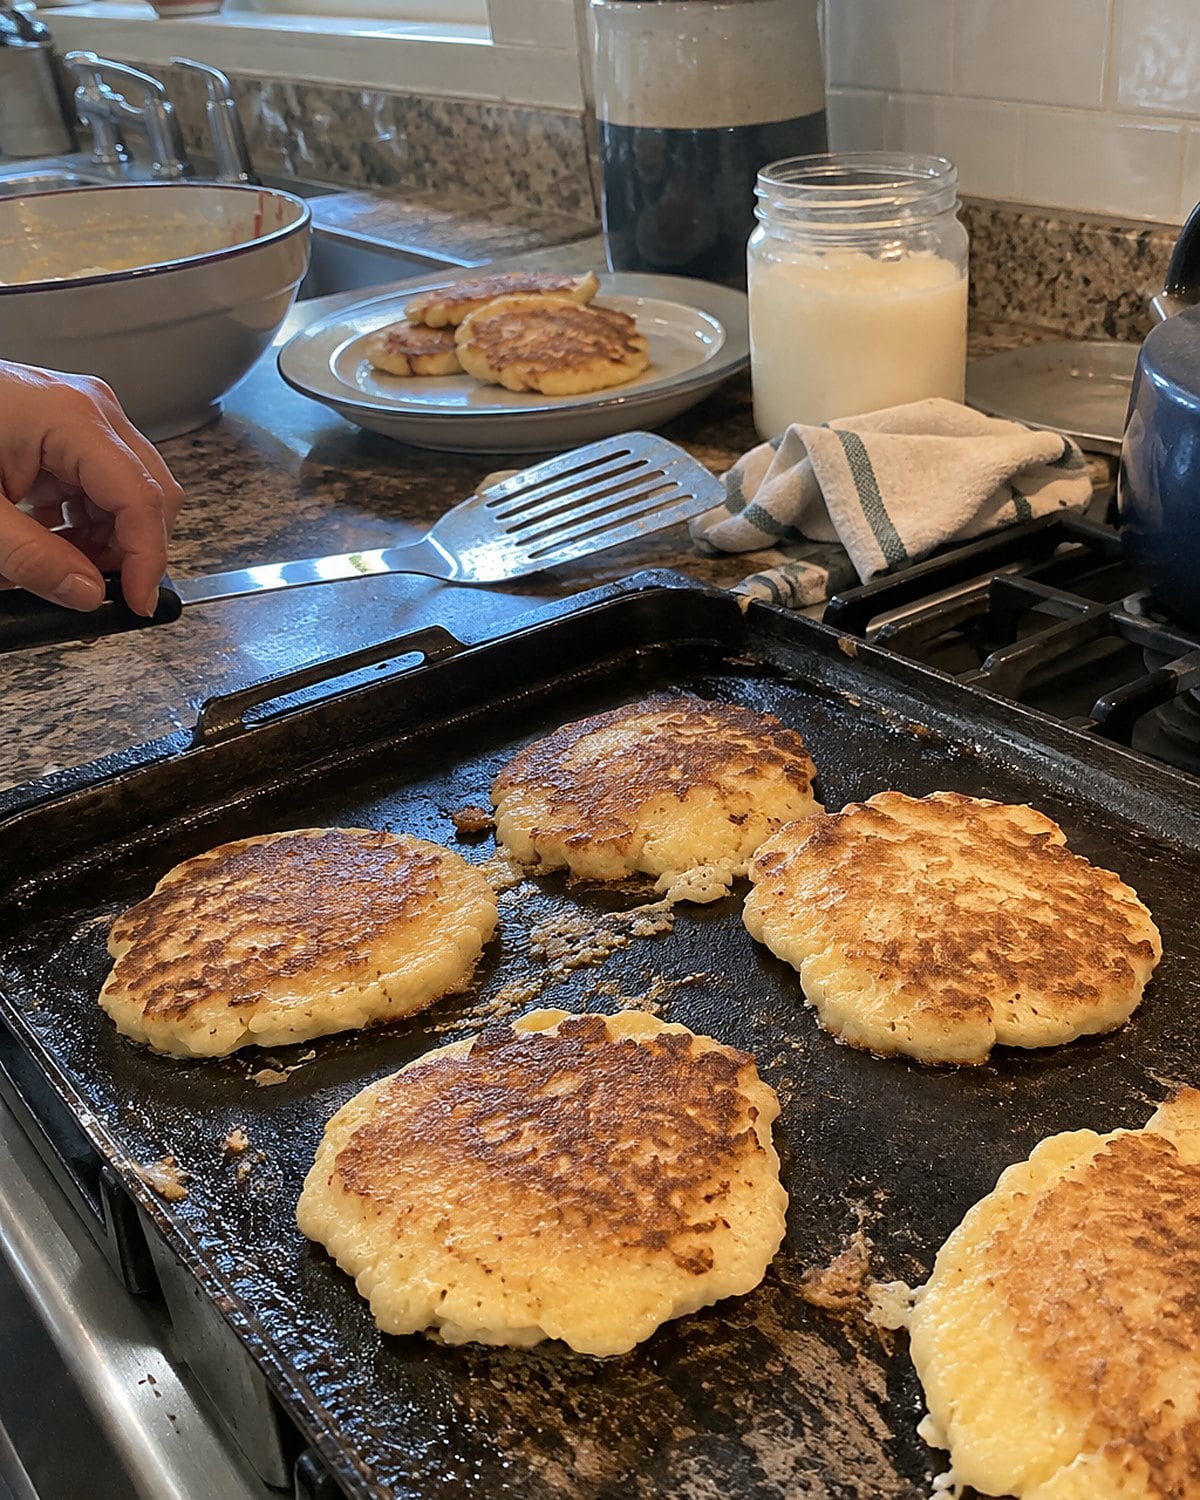
A hoecake wants direct, even contact with the cooking surface. In a deep skillet, it’s tempting to pour the batter too thick and call it a small pancake. On a flat griddle, you see its edges and have room to slide a spatula beneath them.
Heat the griddle before you spoon on the cornmeal batter. Wait for the rim to look set and the underside to take color before turning. Flip too soon and the tender middle pulls apart.
Make one first and break it open. You want a crisp surface around a cooked center, with enough corn flavor to stand beside greens or beans. Adjust the heat before the next batch. An old griddle tells you the right setting through that first hoecake.
#13 Brunswick stew in a broad stewpot
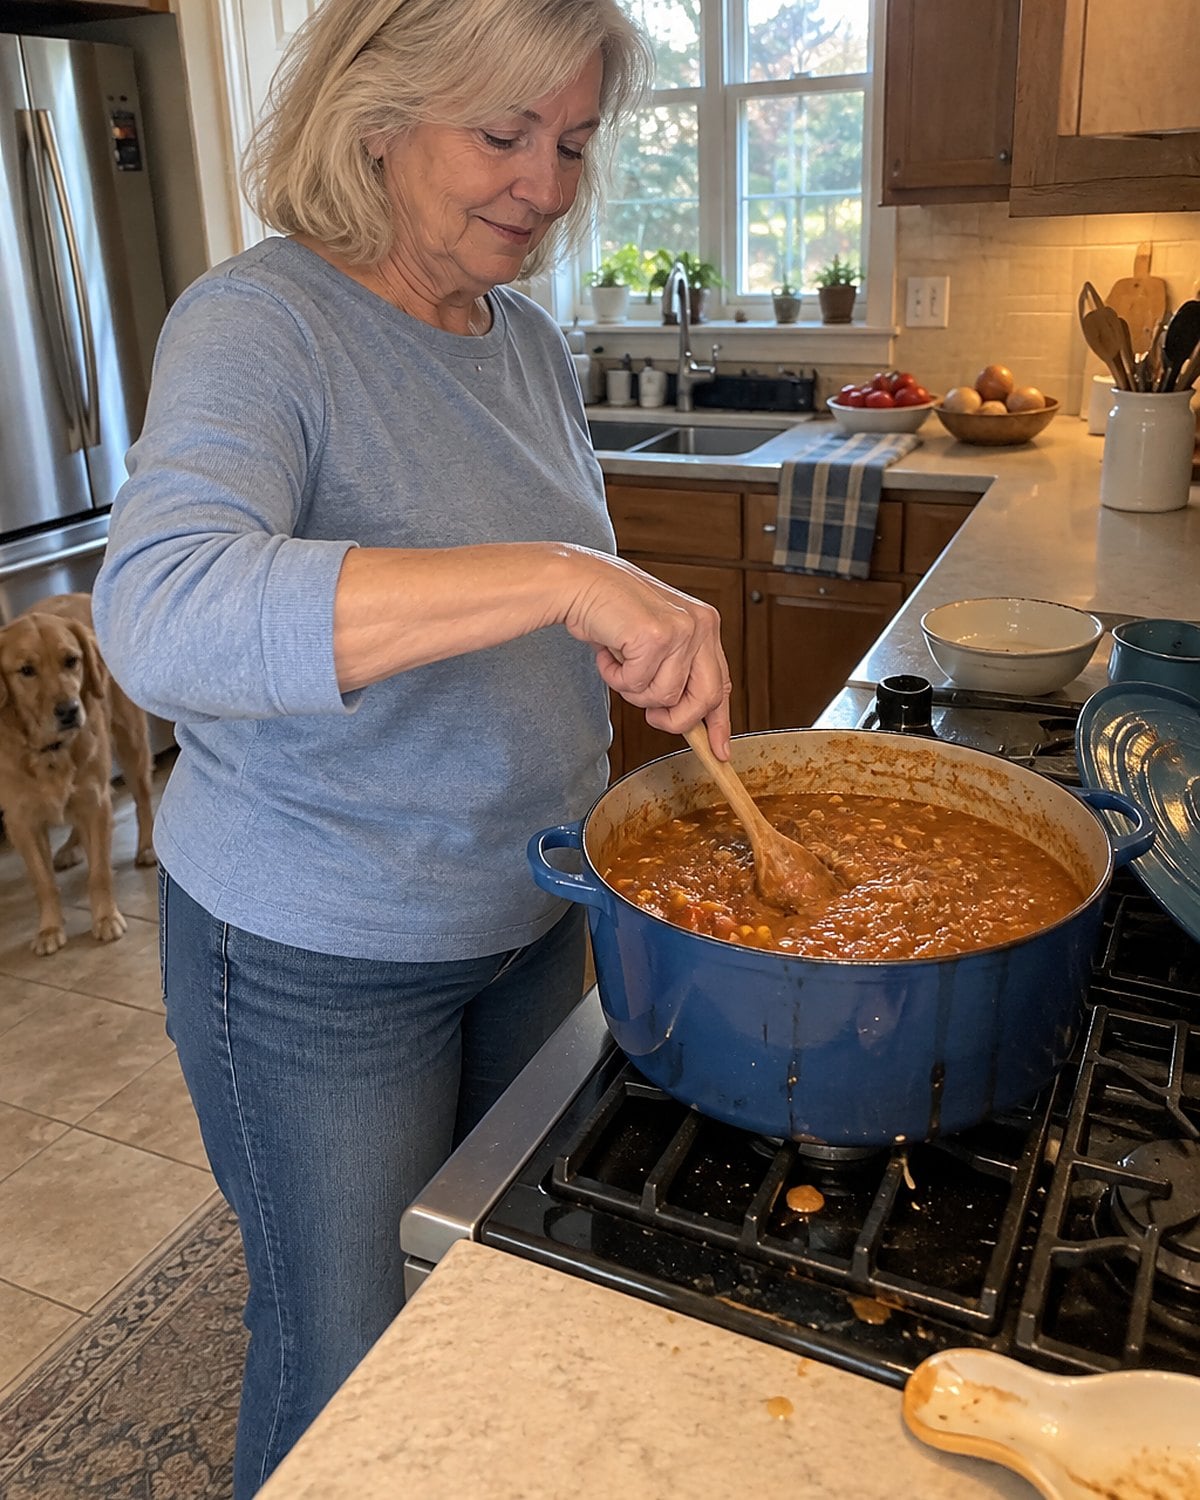
Brunswick stew gets thicker as it cooks. What begins as meat, vegetables, tomatoes, and broth ends with a spoon that stands up straighter. In a tall, narrow pot, that thickening hides at the bottom until it scorches.
A broad, heavy stewpot gives you room to draw the spoon all the way across its base. Stir there, then lift the spoon and look at the stew clinging to it.
If the bottom starts resisting, lower the heat and stir more frequently. Turning up the burner won’t speed up a thick stew kindly.
Keep the lid partly open when you want moisture to leave. Close it when the stew is thick enough and still needs time for the flavors to come together. That small choice changes the final bowl.
Taste for acid at the end. Tomatoes differ, and a stew that looks deep and rich still needs seasoning that reaches through the meat and vegetables. Your pot lets you see that change rather than discover it as a burnt smell.
Try it: Instant Pot Brunswick Stew
#12 Catfish in a seasoned frying skillet
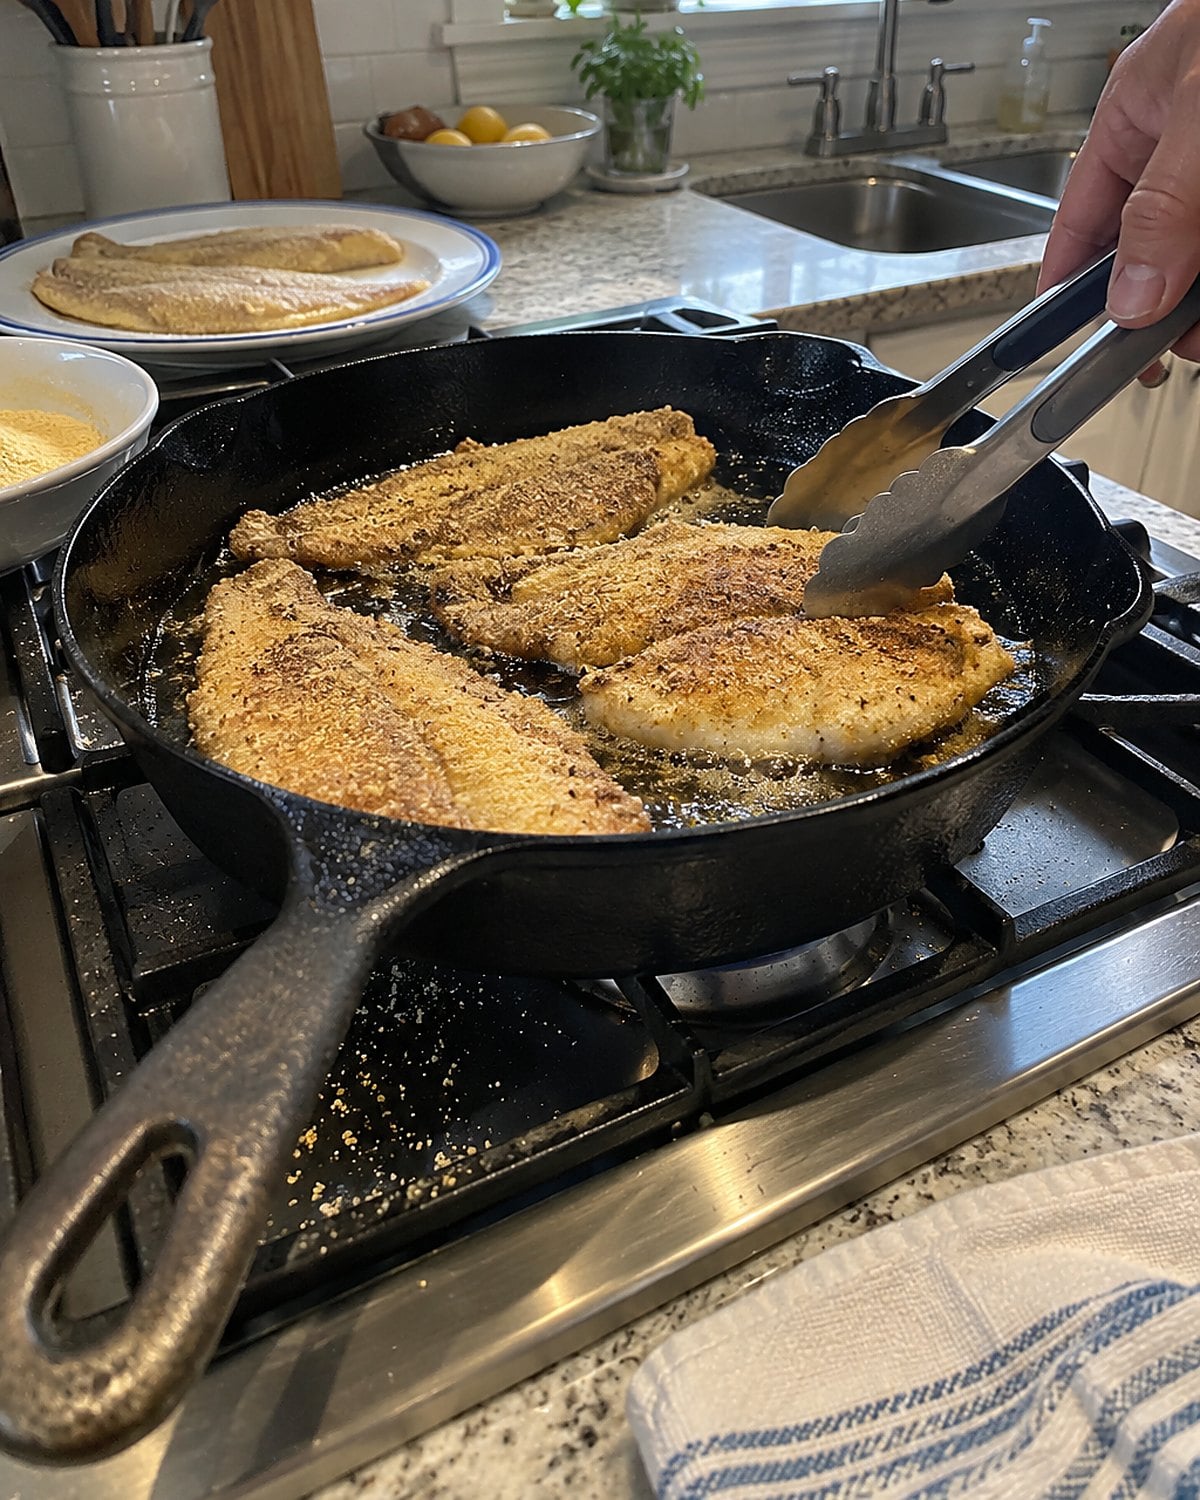
Listen when the catfish touches the fat. A brisk sizzle means its cornmeal coating has started to set. Silence means the oil needs more heat; frantic spitting tells you to lower the fillet with care and check for water on its surface.
A wide cast-iron skillet holds heat as each cool fillet goes in. Pat the fish dry, coat it, and fry without crowding. Turn it when the underside releases and the coating looks firm along the edges.
Check the thickest part with a thermometer. The FDA lists 145°F for fish. Set the cooked fillets on a rack so their undersides stay crisp while the rest of supper catches up.
#11 Macaroni and cheese in a shallow baking dish
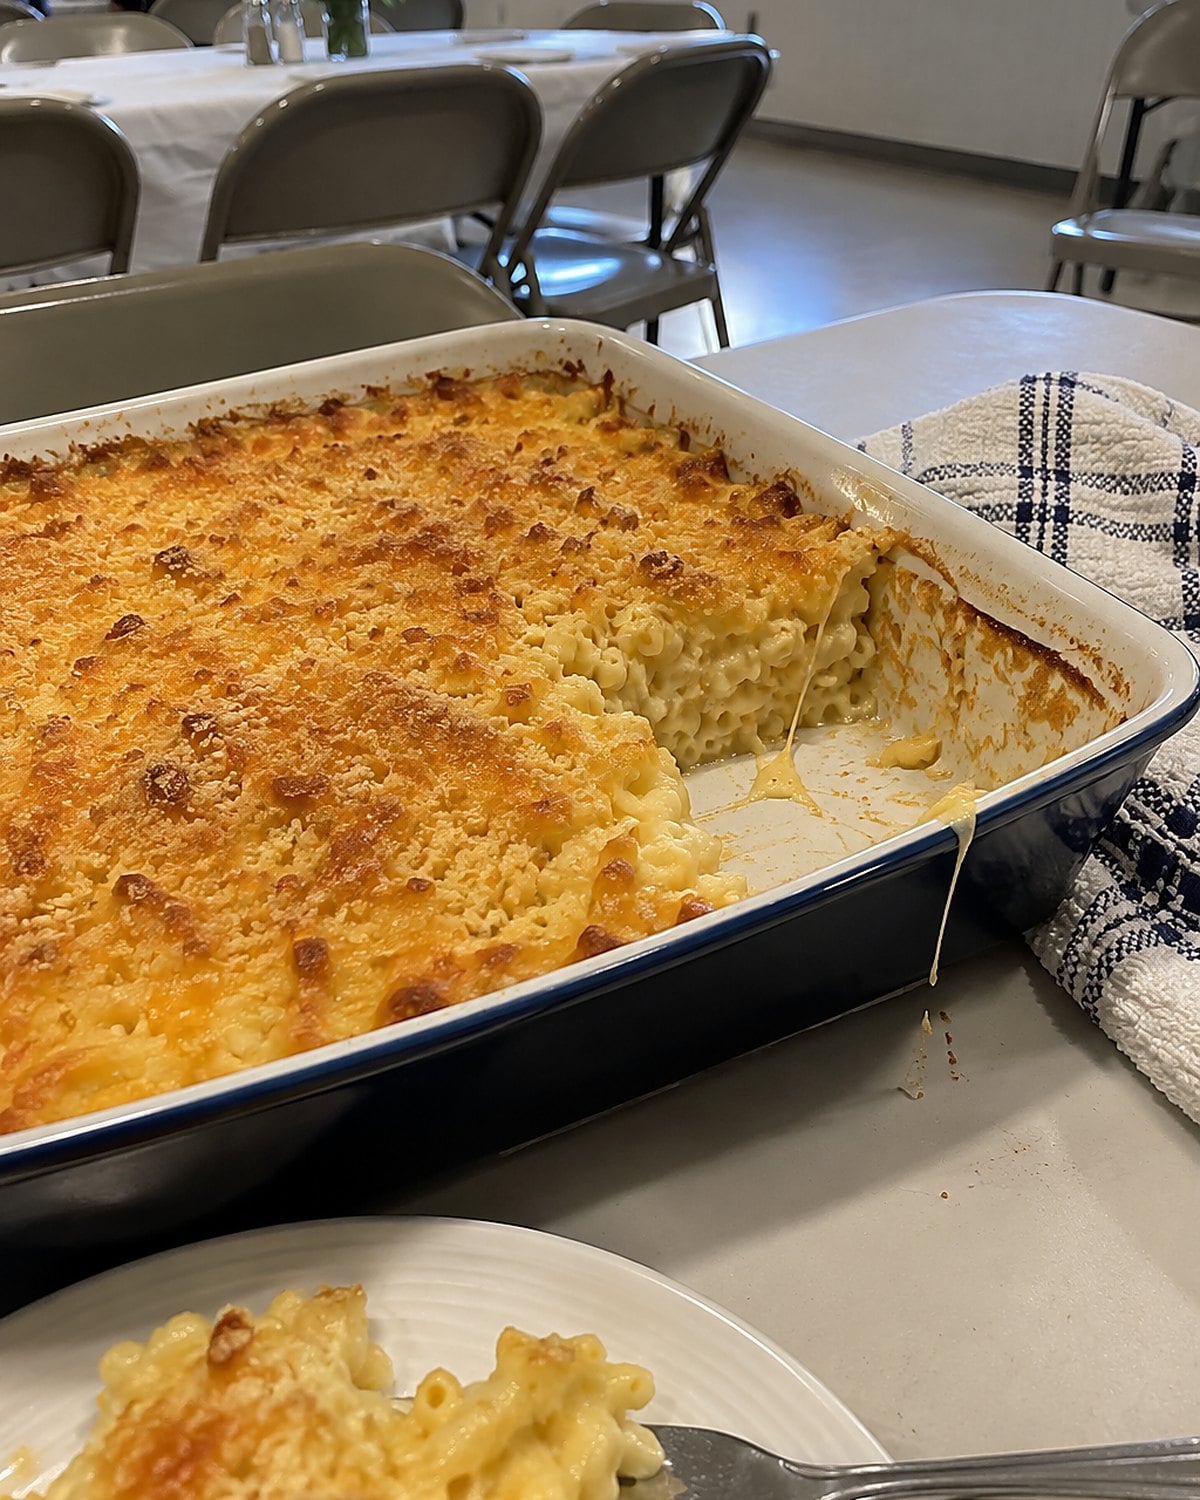
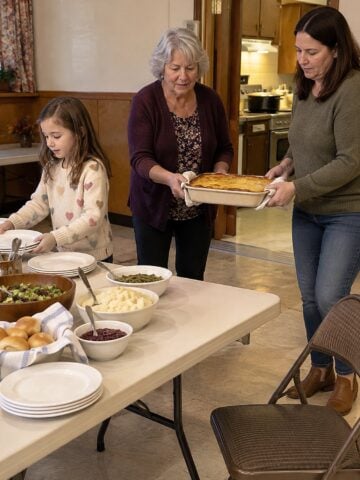
At the church hall table, somebody takes a corner piece before the serving spoon reaches the middle. That browned edge is the reason to choose a shallow baking dish. More macaroni sits near the hot surface, and less is buried under a deep layer of sauce.
Cook the pasta short of fully tender before it goes into the dish. It will take up moisture as the cheese sauce heats in the oven. If you begin with soft noodles, the center gets heavy before the top turns brown.
Spread the mixture into the dish rather than mounding it. Leave a little space at the rim so bubbling sauce stays where it belongs. When the top has browned, push a spoon into the middle. It should come away coated with creamy sauce, not loose liquid.
Let it stand before serving. The sauce settles around the noodles, and that first corner comes out in a scoop instead of sliding across the tablecloth. You already know which family member is headed for it.
Try it: Easy Instant Pot Macaroni & Cheese (Step-By-Step Recipe)
#10 Biscuits in a close-set baking pan
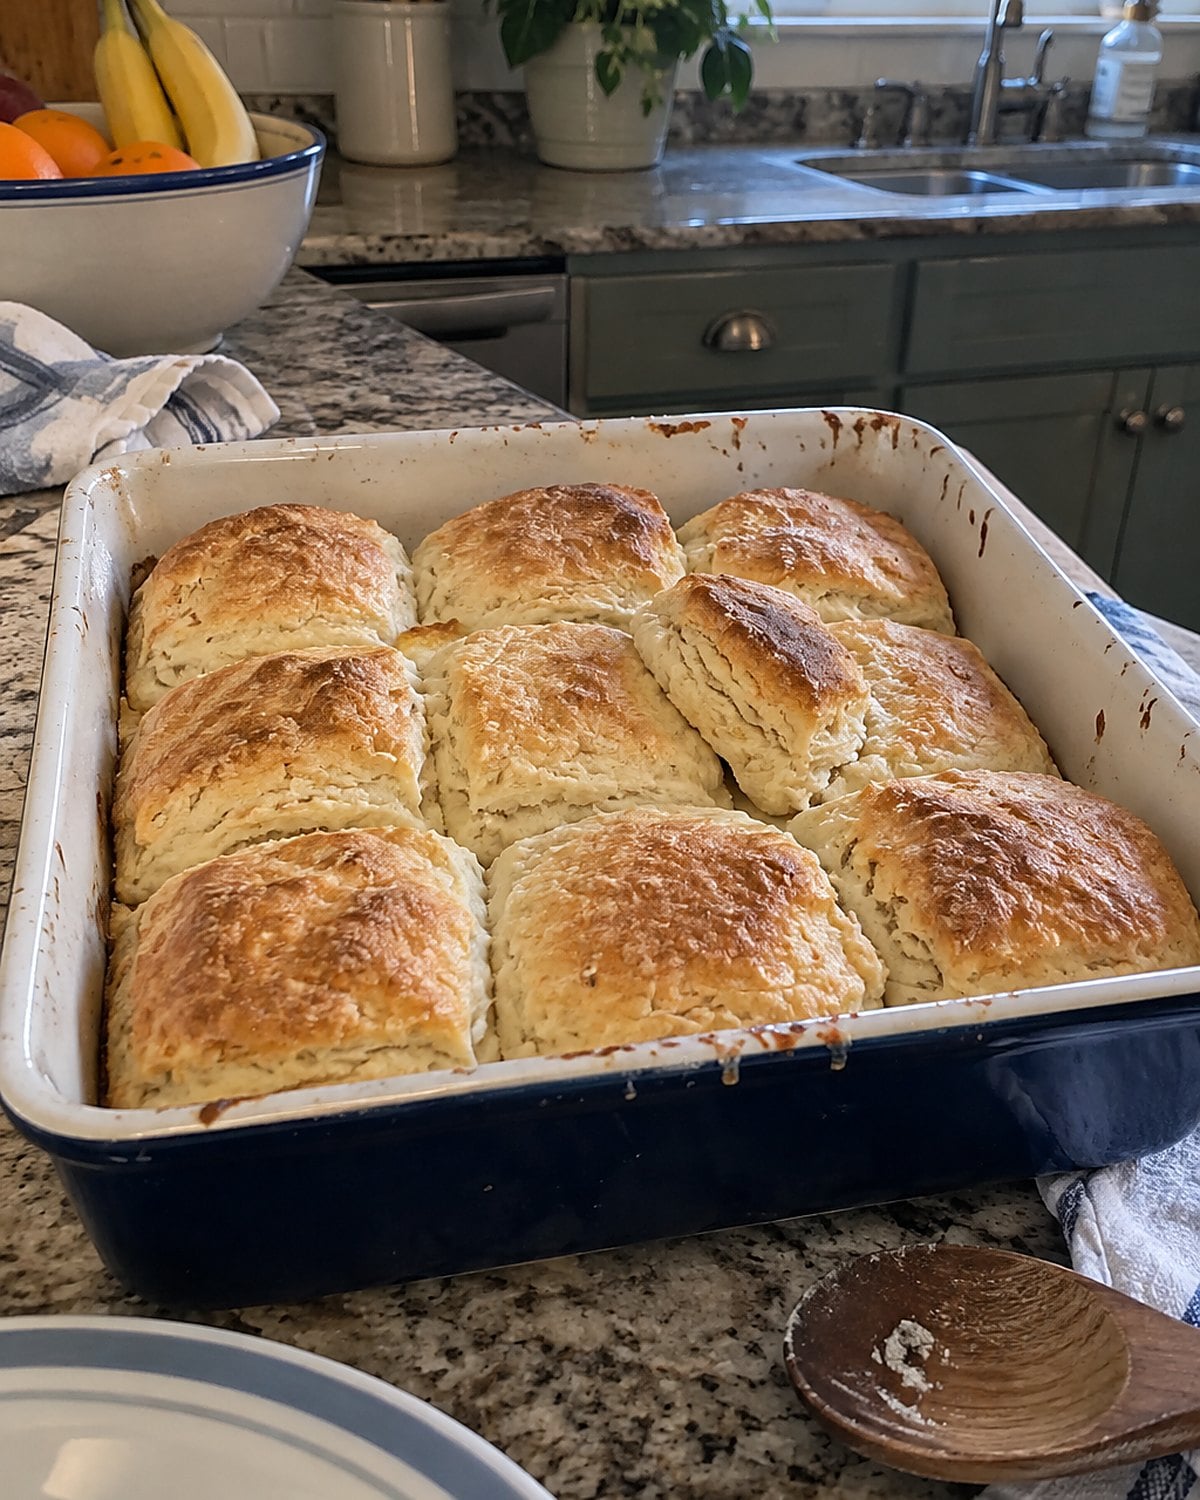
Separate biscuits on a baking sheet have room to brown all around. Set them close together in a baking pan, and their sides rise against one another, staying tender where they touch.
Choose the pan for the biscuit you want. For soft pull-apart sides, nestle the cut rounds together without squeezing them flat. For crisp edges, give them space on a sheet. Both are biscuits, but they don’t eat alike.
Cut straight down through the dough and lift the cutter without twisting. Twisting presses the cut edges together and works against the rise you want. When the tops color, pull one from the middle and split it. The center tells you what the whole pan needs.
#9 Pot roast in a covered Dutch oven
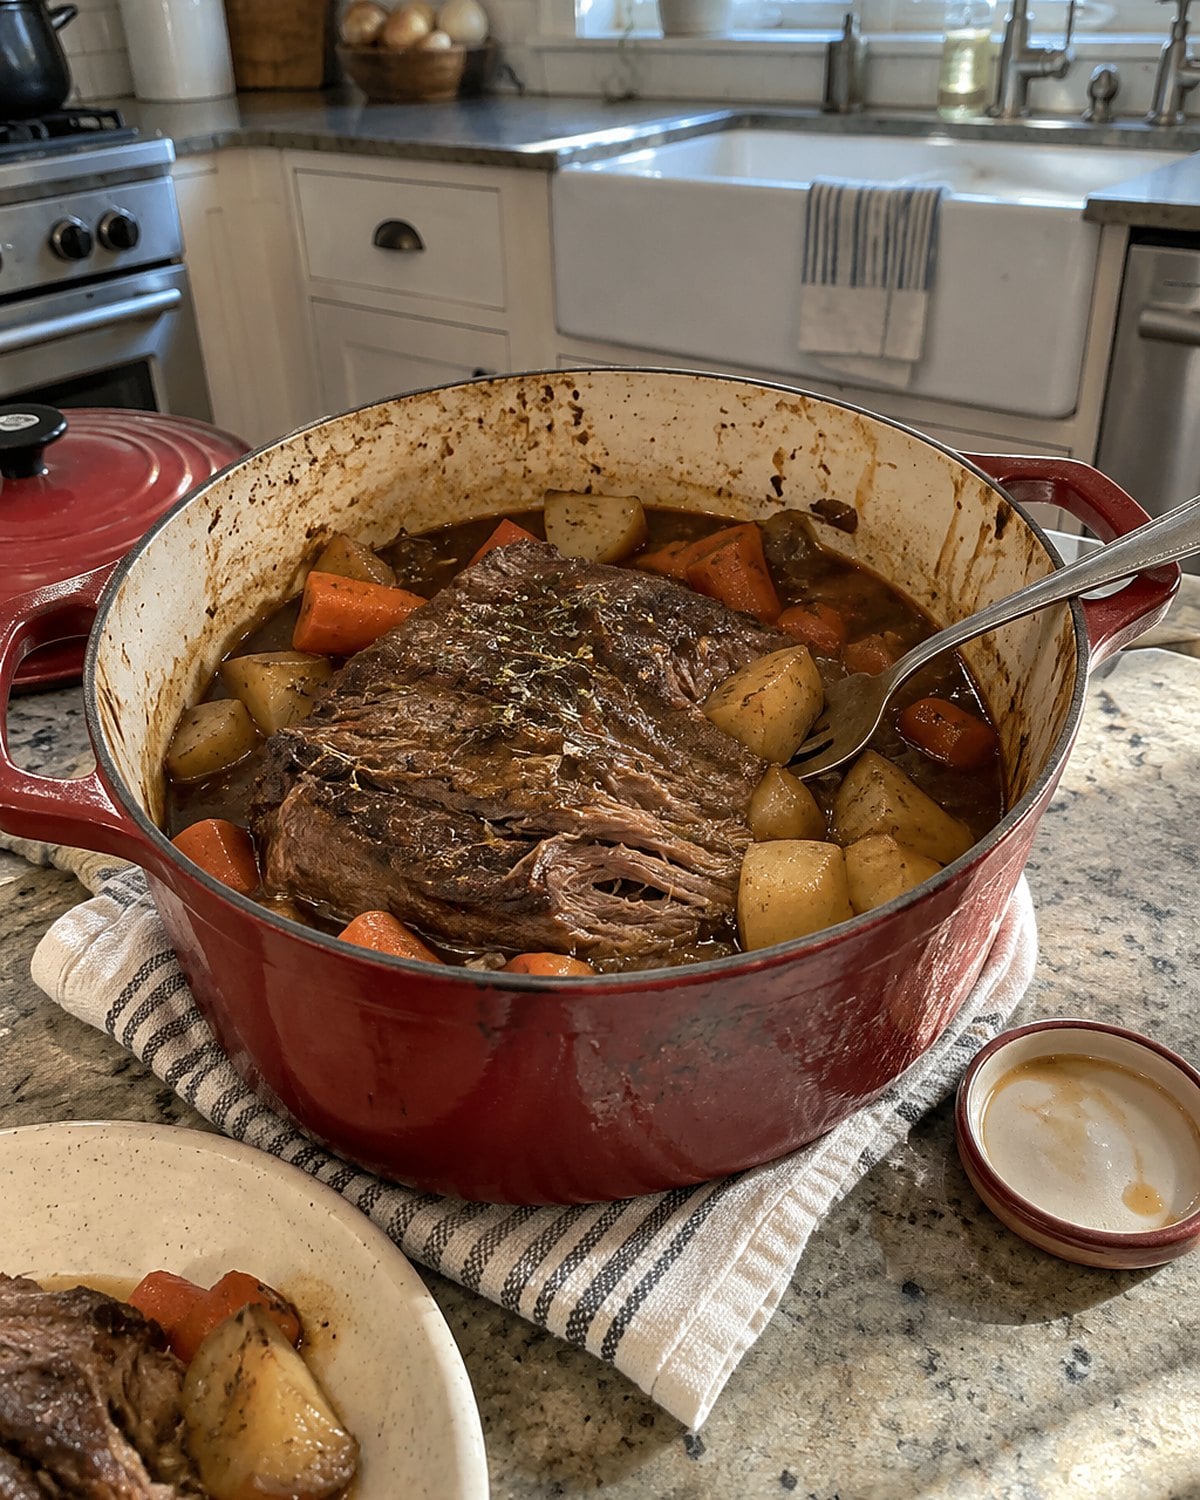
Sunday’s roast sits on the cutting board, and the lid is already on the counter. Before you put it back, brown the beef in the Dutch oven. That color gives the cooking liquid something to pick up besides onion and salt.
A heavy Dutch oven lets you brown, simmer, and carry the roast to the table in one vessel. After browning, add liquid below the top of the meat, along with the vegetables and seasonings. Cover and cook at low heat until a fork enters without a fight.
A roast cut for slow cooking needs that time for its connective tissue to soften. Slicing it early because it has reached a safe temperature leaves tough meat on the plate.
Use a thermometer for safety, then use the fork for texture. The USDA lists 145°F with a 3-minute rest for whole cuts of beef.
Skim fat from the cooking liquid and taste it before making gravy. The pot has held every browned bit. You shouldn’t have to add much to make it worth spooning over the potatoes.
Try it: Instant Pot Beef Pot Roast With Potatoes & Carrots
 You might also like27 Old-Fashioned Desserts That Deserve a Comeback
#8 Pecan pralines in a heavy saucepan
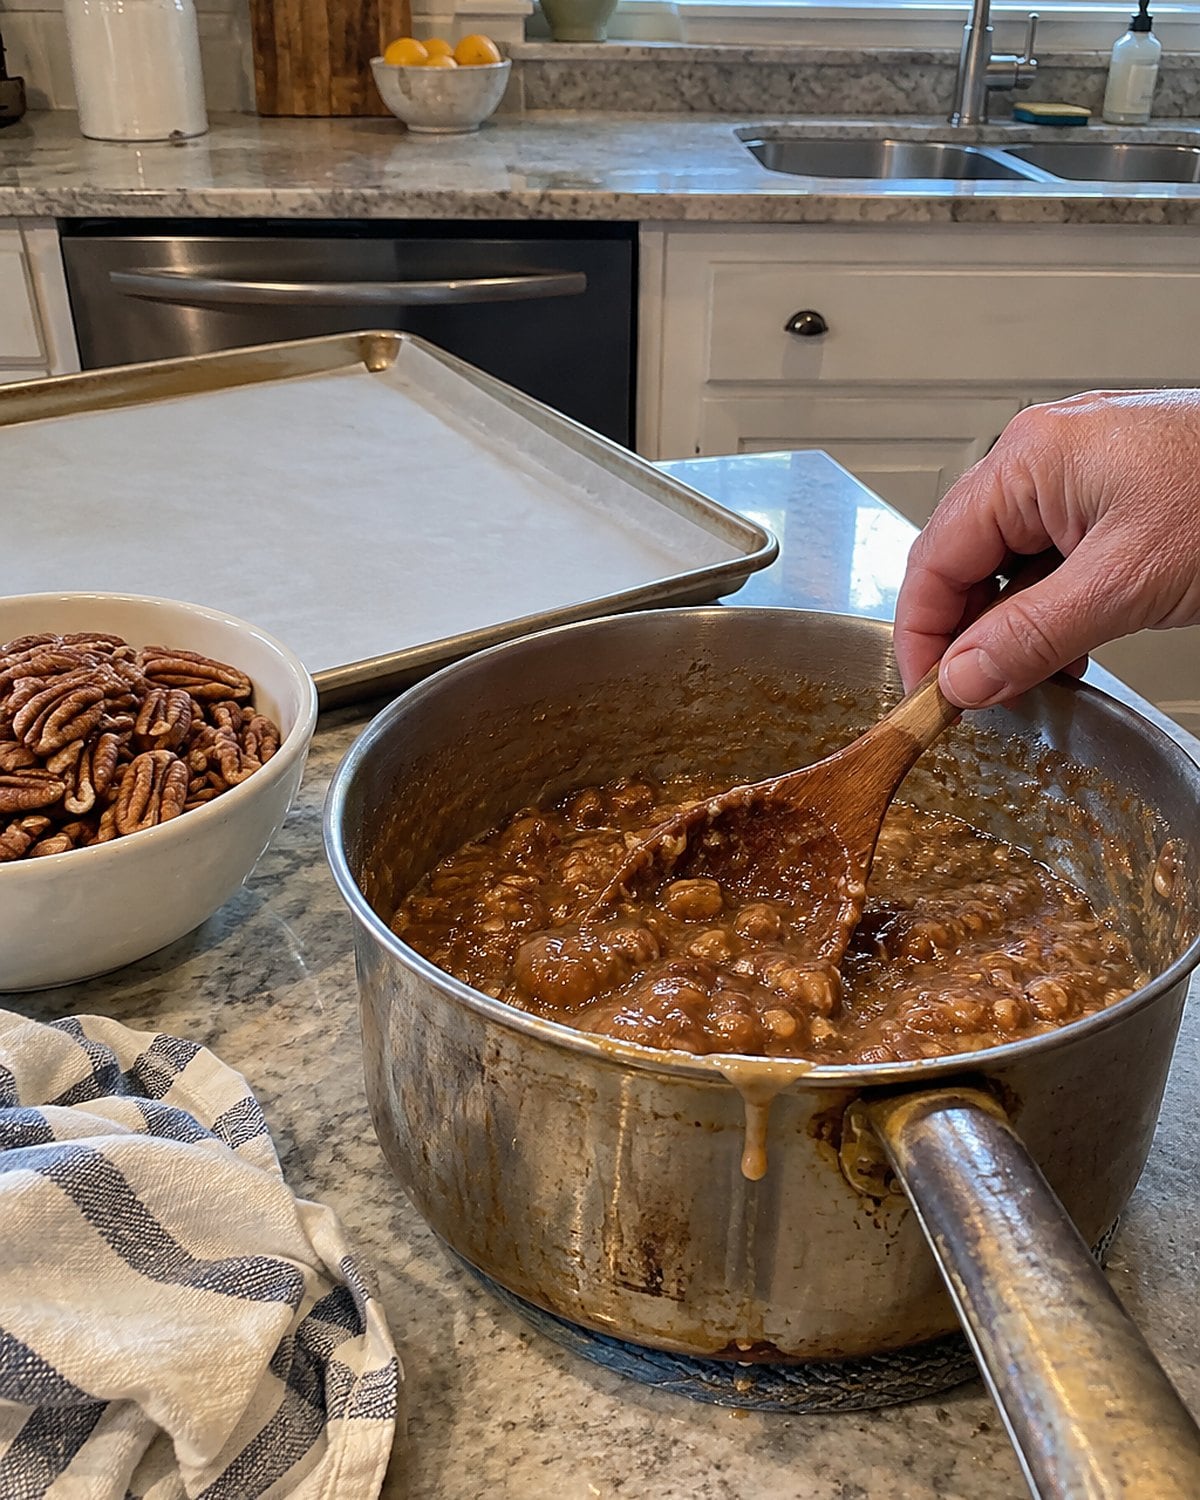
The bubbling changes before your eyes. As praline syrup thickens, the bubbles grow slower and heavier, and the mixture climbs the spoon. A heavy saucepan buys you time to notice.
Sugar scorches at hot spots in a thin pan. Keep the mixture moving as the recipe directs, and use a candy thermometer for its stated stage rather than trusting color alone. A damp pastry brush helps wash stray sugar crystals from the inside of the pan before they seed graininess.
Have the pecans and a landing place ready before you start. Once the mixture reaches the right stage, it won’t wait while you clear the counter. The saucepan’s weight steadies the heat; your preparation handles the rush that follows.
#7 Peach cobbler in a baking dish
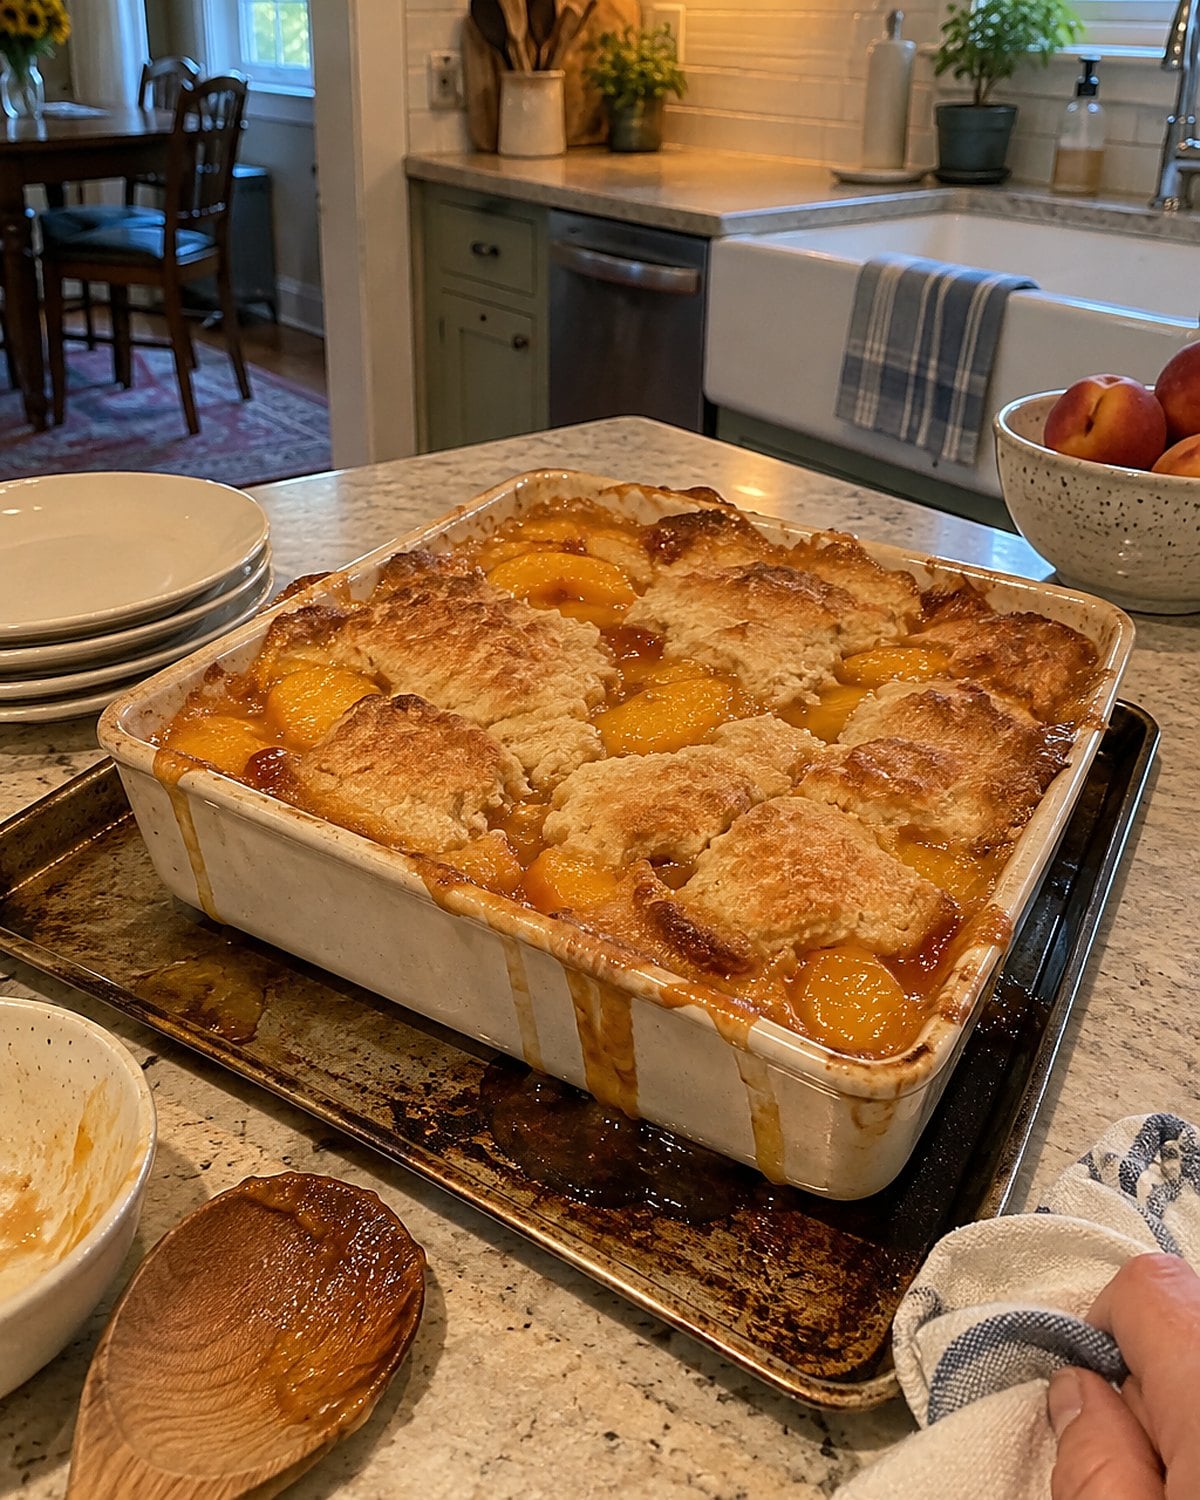
Peaches bubble up at the sides before the center of a cobbler is done. A baking dish gives that juice space and puts the fruit beneath the topping, where it stays hot while the dough cooks through.
Choose a dish with room above the filling. Set it on a rimmed sheet pan if your peaches are especially juicy. That sheet catches drips; it doesn’t replace the dish. A deep pot traps more steam under the topping and delays browning.
Look past the color on top. Slip a knife into a thick patch of dough and check for wet batter. Then look along the edge: the fruit juices should bubble there. Those two sights tell you more than a timer because peach size, ripeness, and topping thickness change the bake.
Let the cobbler sit long enough for the bubbling to calm. The first spoonful will still be warm, but the fruit will stay with its topping. No one at the table needs a perfectly straight slice.
#6 Deviled eggs on a chilled tray
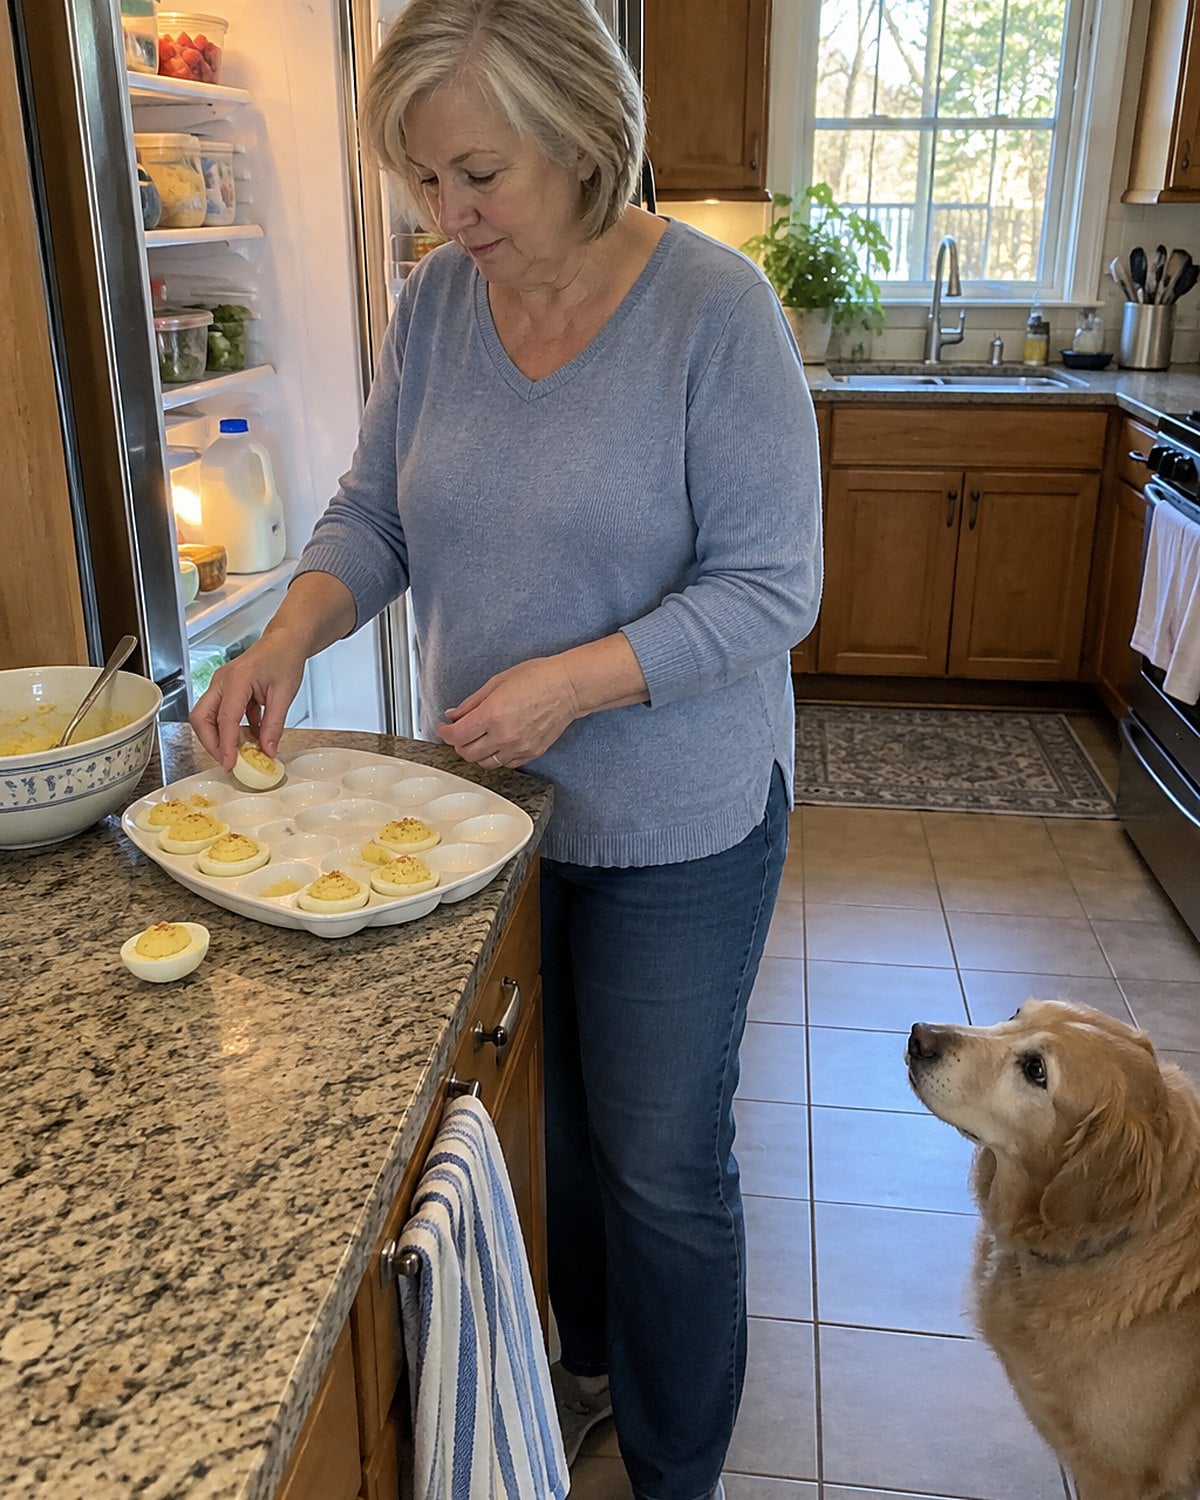
Deviled eggs don’t ask for a special pan, but they do ask for the right tray. A flat dinner plate lets the filled whites slide toward the rim every time someone opens the fridge.
Set the halves on a tray with shallow hollows, or steady each one in a small bed of shredded lettuce. Chill them promptly and keep them cold until serving. The FDA’s refrigerator guidance says 40°F or below.
If the tray is headed to a porch gathering, bring out a smaller batch and leave the rest refrigerated. Look at the filling before you carry it out: a firm swirl holds its shape and stays where you spooned it. It’s a small kitchen choice with a visible payoff.
#5 Fried chicken in a deep cast-iron skillet
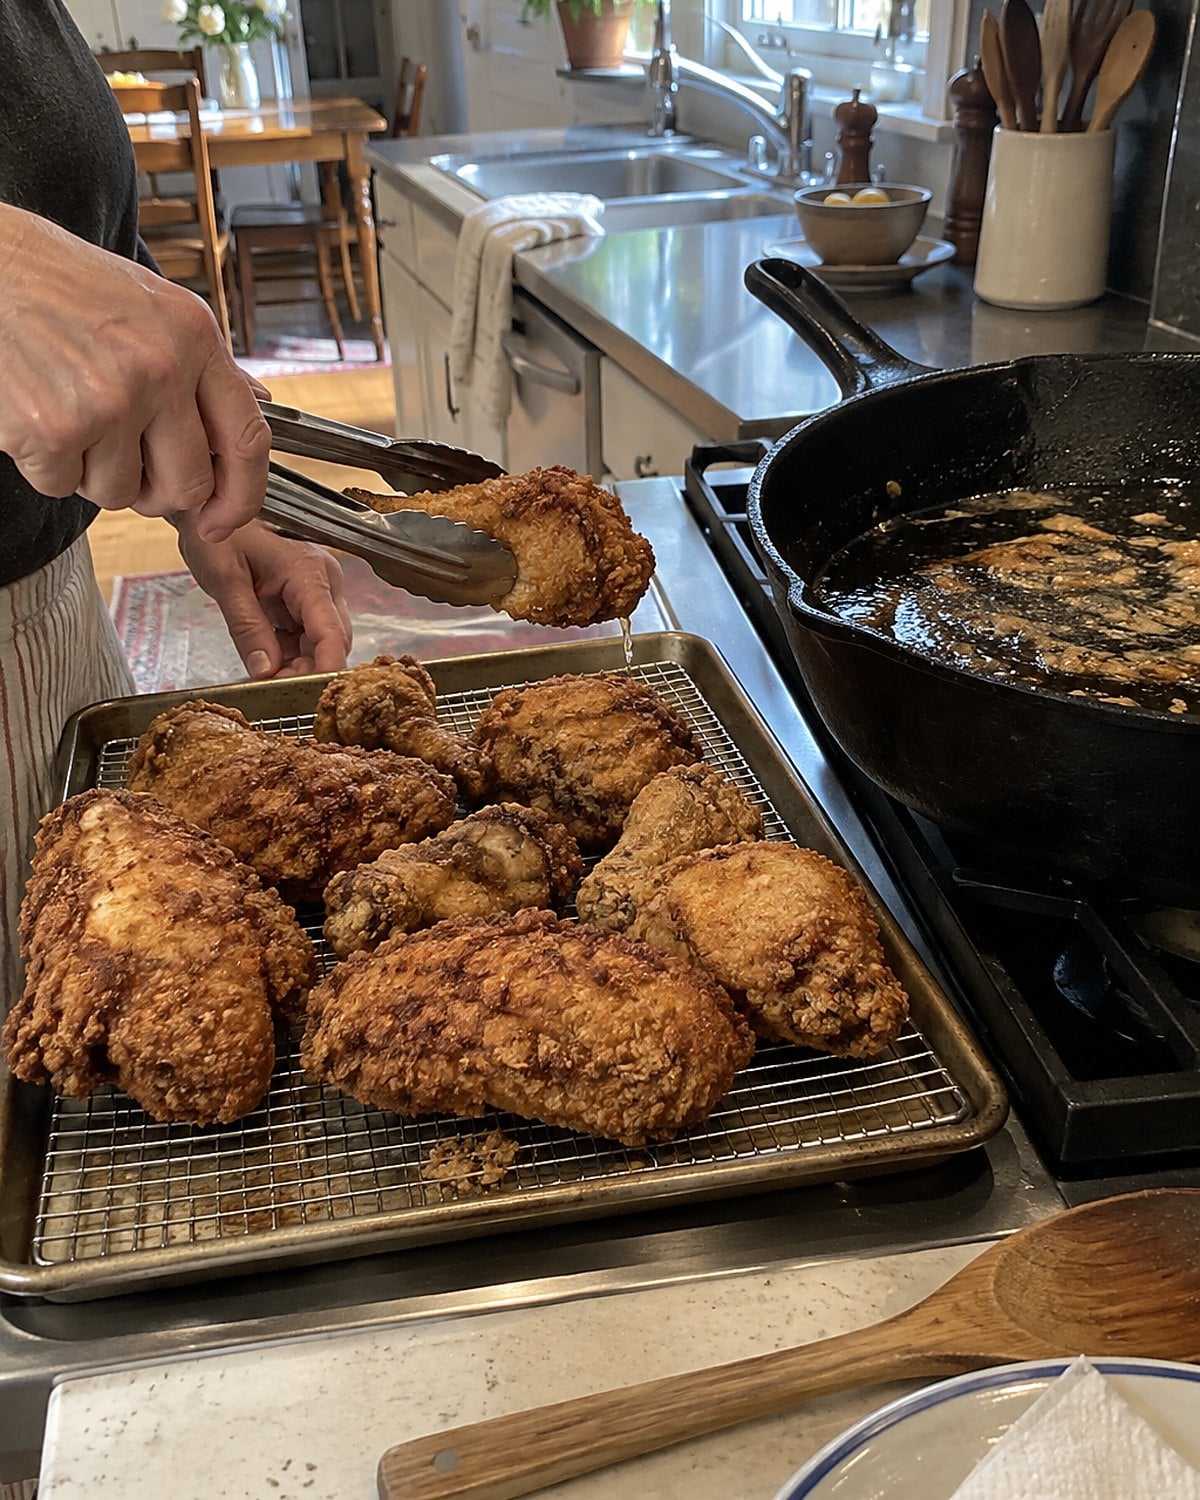
There’s a reason the old frying skillet has high sides. Chicken needs room for hot fat to bubble without creeping toward the rim, and the heavy iron holds heat when cold pieces go in.
Don’t load every piece at once. Give the chicken space, then turn it when the crust has set and browned. A tight pan drops the oil temperature and leaves pale, greasy patches where pieces meet. Keep a thermometer for the oil and adjust the burner between batches.
A dark crust doesn’t tell you what happened beside the bone. Check the thickest part of each piece with a food thermometer, avoiding bone. The USDA calls for 165°F for poultry. If the crust is done first, finish the chicken in the oven and check again before serving.
Set cooked pieces on a rack over a sheet pan, not in a covered bowl. The rack protects the underside from steam while you finish the batch. Then listen when someone picks up a drumstick. That crust should sound like work paid off.
#4 Rice dressing in a wide skillet
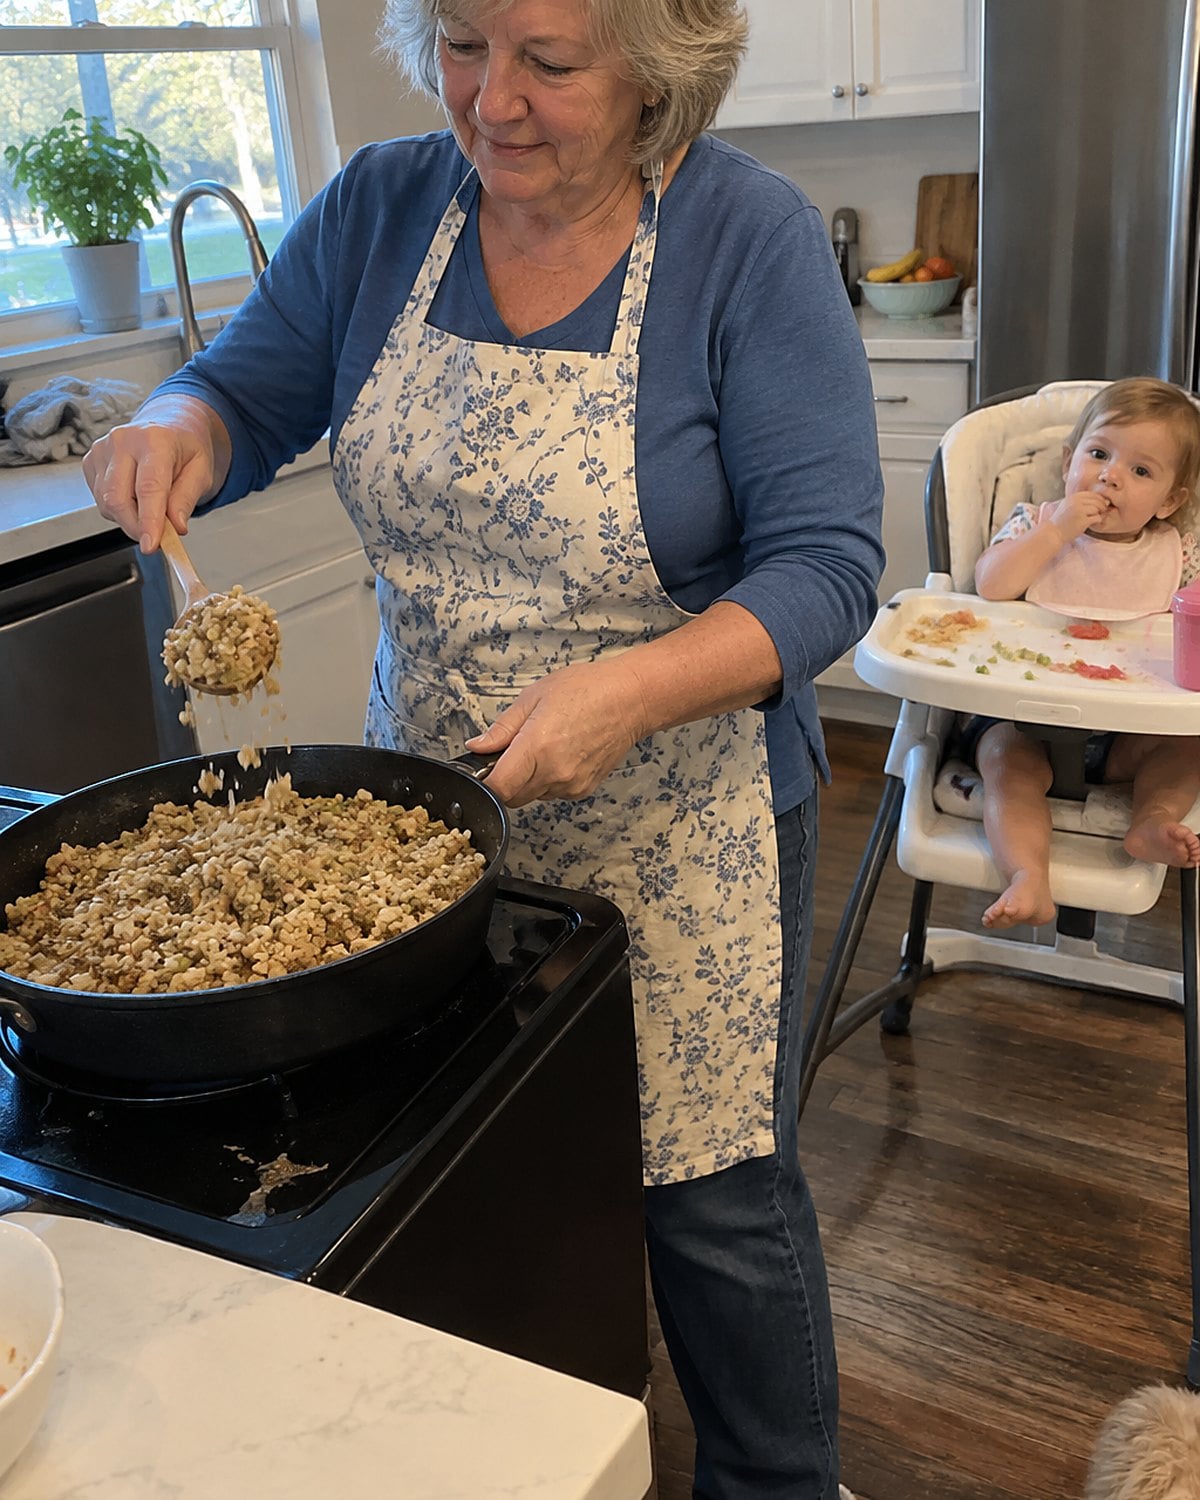
The old spoon circles the pan and finds a patch of browned rice. That bit would disappear in a tall saucepan, where the mixture steams in a heap.
For rice dressing, cook the meat and aromatics in a wide skillet first. Let their moisture cook off before stirring in cooked rice. Spread the rice across the bottom and give it time to heat through. A little contact with the pan builds flavor; constant stirring keeps everything damp.
Taste a spoonful that includes rice and meat together. The rice should carry the seasoning, not sit underneath it. If the dressing looks dry, add cooking liquid in small splashes. If it looks wet, spread it out and let the skillet do its work.
Try it: Instant Pot Dirty Rice
#3 Blackened fish in a screaming-hot skillet
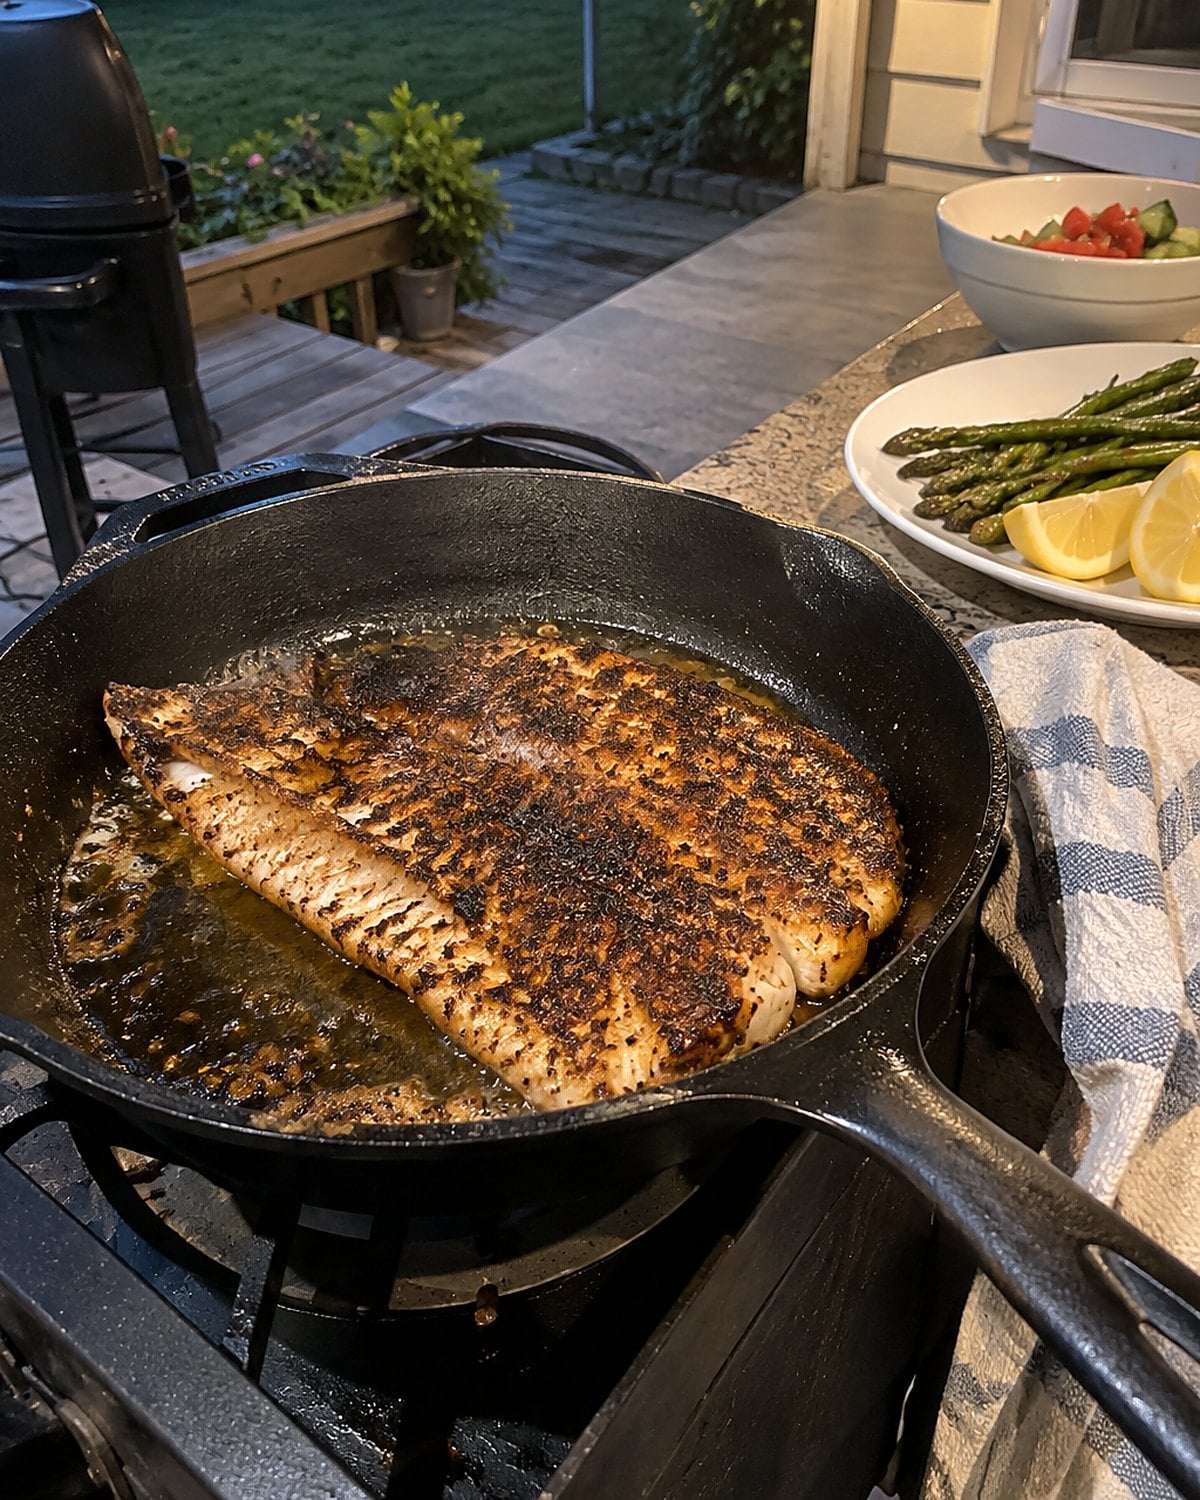
Open the window first. Blackening fish takes a very hot skillet and makes smoke, which is part of the reason to cook it outside when you have a safe burner setup.
Use a dry, heavy cast-iron skillet and have the seasoned fish ready before the pan heats. The seasoning darkens fast against iron; moving the fillet around tears the crust before it forms. Set it down, give it contact, then turn it with a broad spatula.
A thin nonstick pan is the wrong tool for this high-heat method. Follow your cookware maker’s heat limits, especially for coated pans. Cast iron handles the heat and gives the seasoning direct contact across the fish.
Check the thickest portion for doneness. The FDA’s fish guidance is 145°F. Then pull the pan off the burner. You’ll taste the seared spices first, followed by fish that still deserves the name.
#2 Buttermilk chess pie in a metal plate
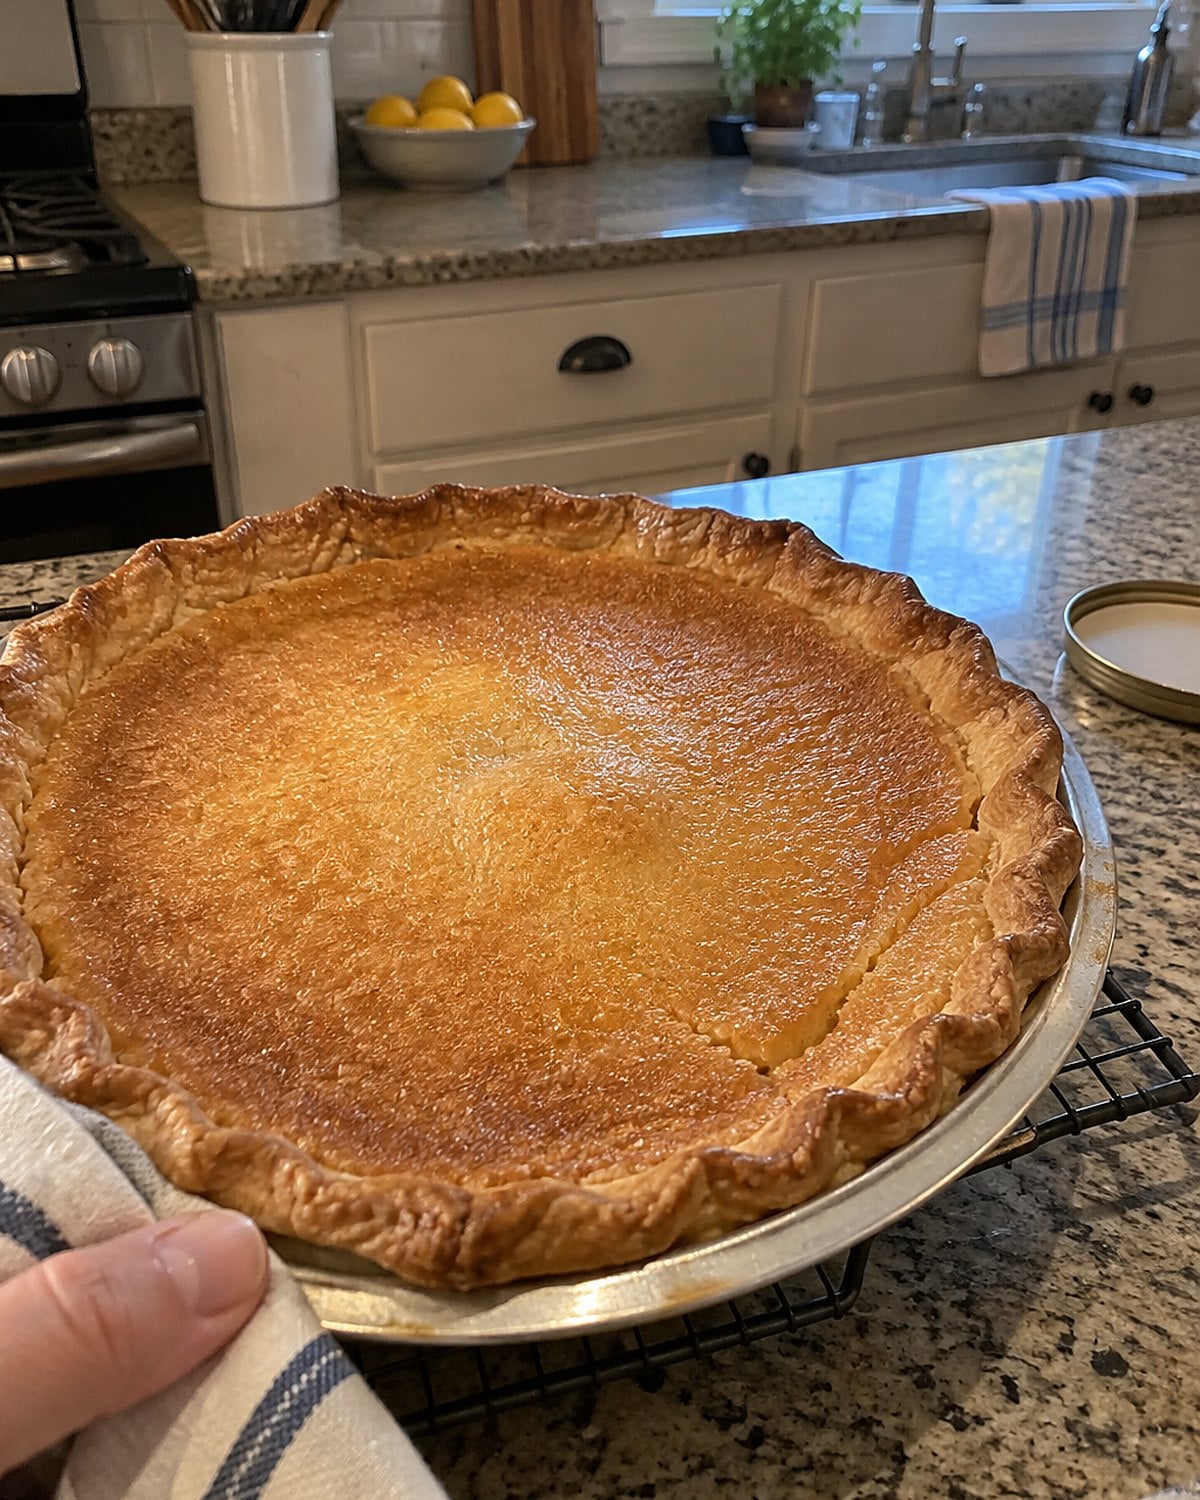
A handwritten card says to bake until set. It doesn’t tell you how much heat the bottom crust needs while the filling firms. A metal pie plate moves heat into that crust promptly, which helps it brown before the custard spends too long in the oven.
Set the filled plate on a baking sheet so you can move it without pressing a thumb into the edge. As it bakes, watch the outer filling set while the center keeps a small wobble. A center that moves like liquid needs more time; a slight jiggle settles as the pie cools.
Look under an edge of crust before calling it done. Pale pastry beneath a browned top tells you the pan and oven position deserve another look next time. Make a note on that old card. The plate matters as much as the instruction.
#1 Skillet cornbread in preheated cast iron
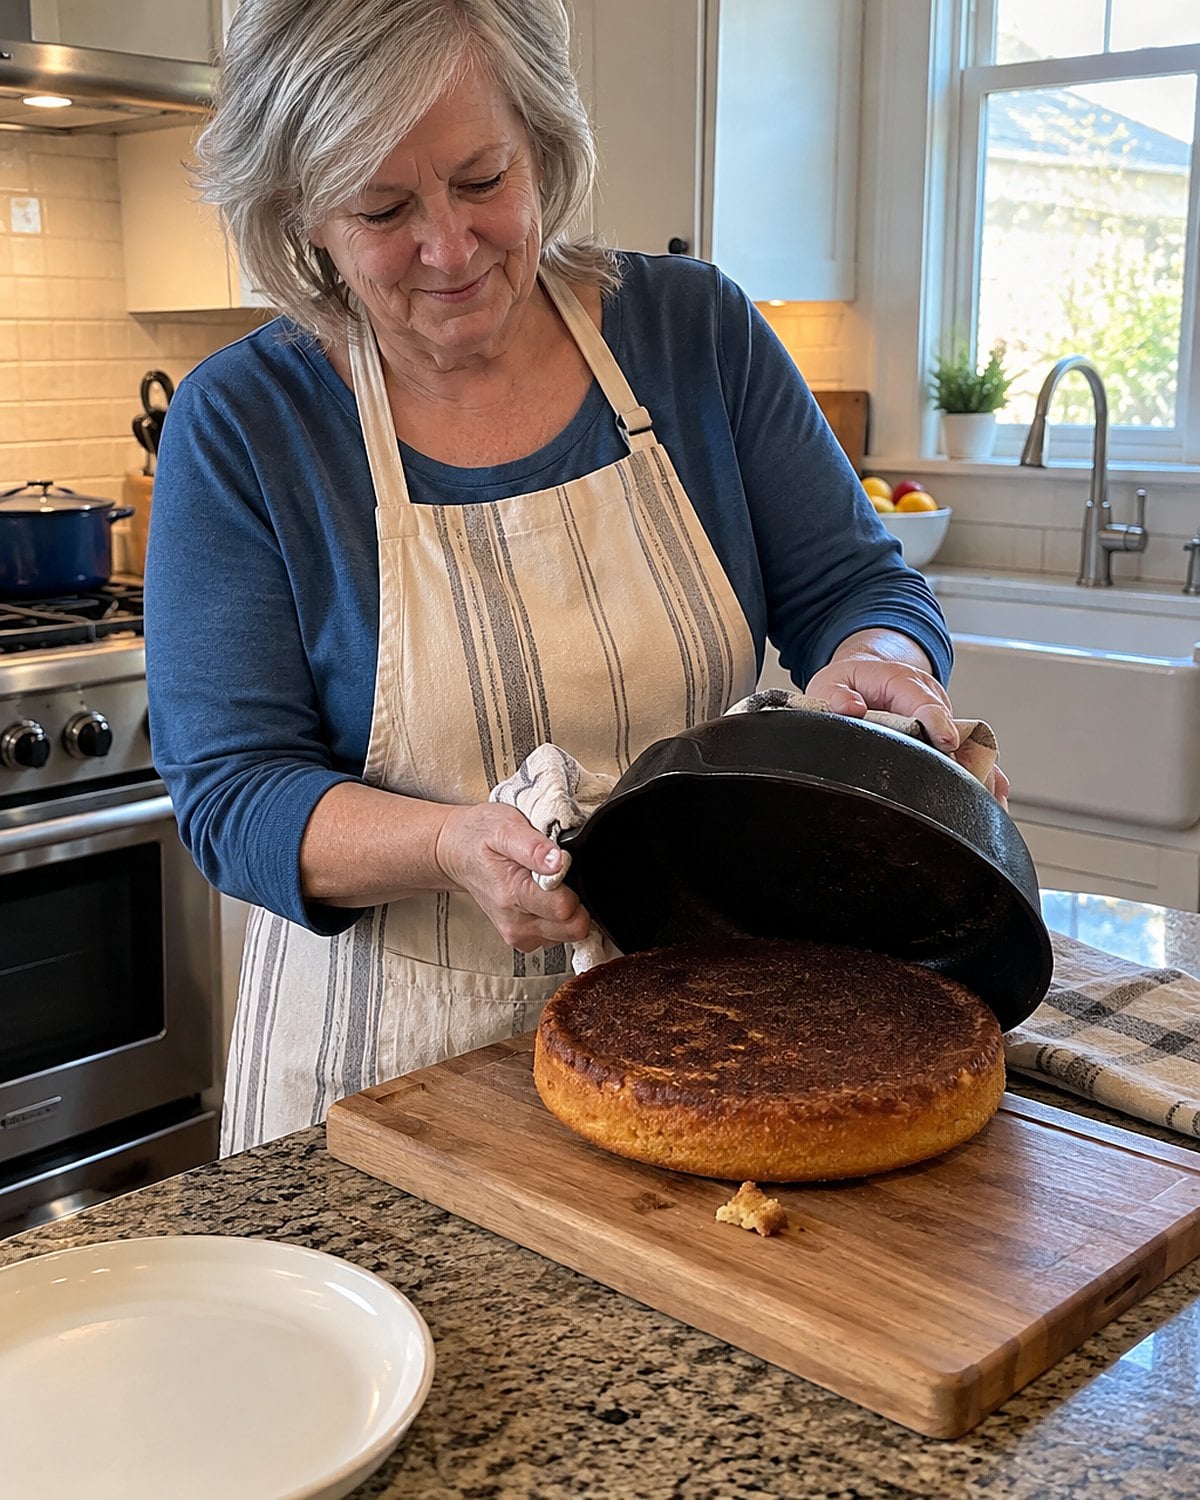
You know the sound before you open the oven: batter meeting hot fat with a sharp hiss. That first contact makes the crust. Pour the same batter into a cool baking dish and it heats gradually, leaving a softer edge.
Good cornbread deserves the skillet.
Put the cast-iron skillet in the oven while it heats. Once the pan is hot, carefully add the fat and swirl it across the bottom and up the sides. Pour in the batter at once. It should sizzle at the edge; if it sits there without a sound, the skillet wasn’t hot enough.
Watch for the edge to pull back slightly and turn deep gold. The top should feel set when you touch it with a fingertip. A knife tip pushed into the center should come out without wet batter. Give the bread a short rest, then run a thin knife around the rim.
Turn it out if you want the bottom crust to stay crisp. Leave it in the skillet and steam gathers underneath as it cools. That choice is yours, and you’ll hear the difference when you cut a wedge. Pass it beside beans or greens while the crust still holds.
Keep reading
 27 Dishes From Church Suppers That Nobody Makes Anymore
See all 27 →
More you’ll remember
 26 Dishes Every Midwestern Kitchen Made, and the Rules That Went With Them
 25 Dishes That Deserve to Come Back, With a Note on What Went Wrong the First Time
 24 Casseroles That Fed America in 1975 and Disappeared Without a Funeral
The bottom line
The pan decides where heat goes and whether moisture stays or leaves. That’s why a wide skillet, a snug lid, and a shallow dish give familiar food its familiar finish.
The well-prepared version of you has already heated the iron, cleared a rack for fried food, and written “shallow dish” beside a vague instruction in the church cookbook.
Which pan in your kitchen tells you supper is on the right track before you’ve tasted a bite? If it’s the skillet, keep reading Instant Pot Eats for the next thing to make in it.
Leave a Reply