

The pot lid sits crooked on a spoon, and the kitchen smells of onions and beef. Oxtail once went into soup because it was an inexpensive way to give broth body. Now a specialty sign hangs over the same rings of bone and meat. You lift the package twice.
The butcher’s tag has changed. The work in the pot hasn’t. Before you bring a piece home, look through the wrapping and picture supper: what will soften, what will flavor the broth, and what will stay on the bone?
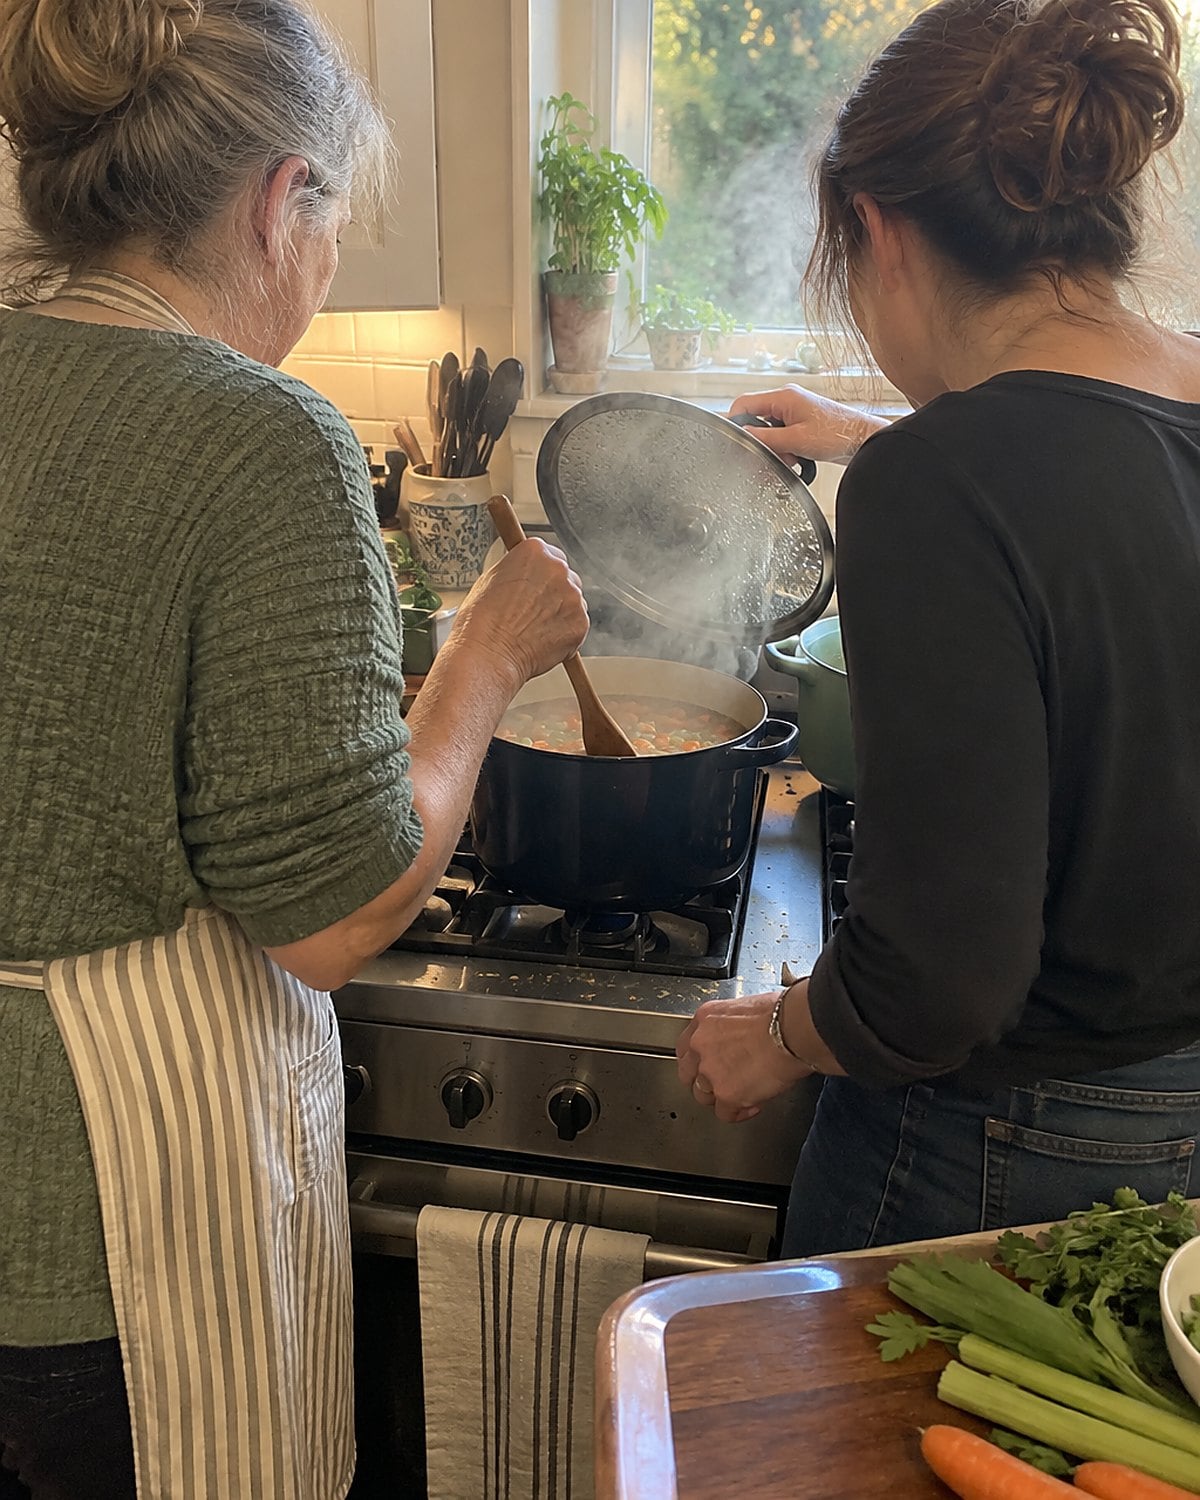
#25 The oxtail in the soup pot
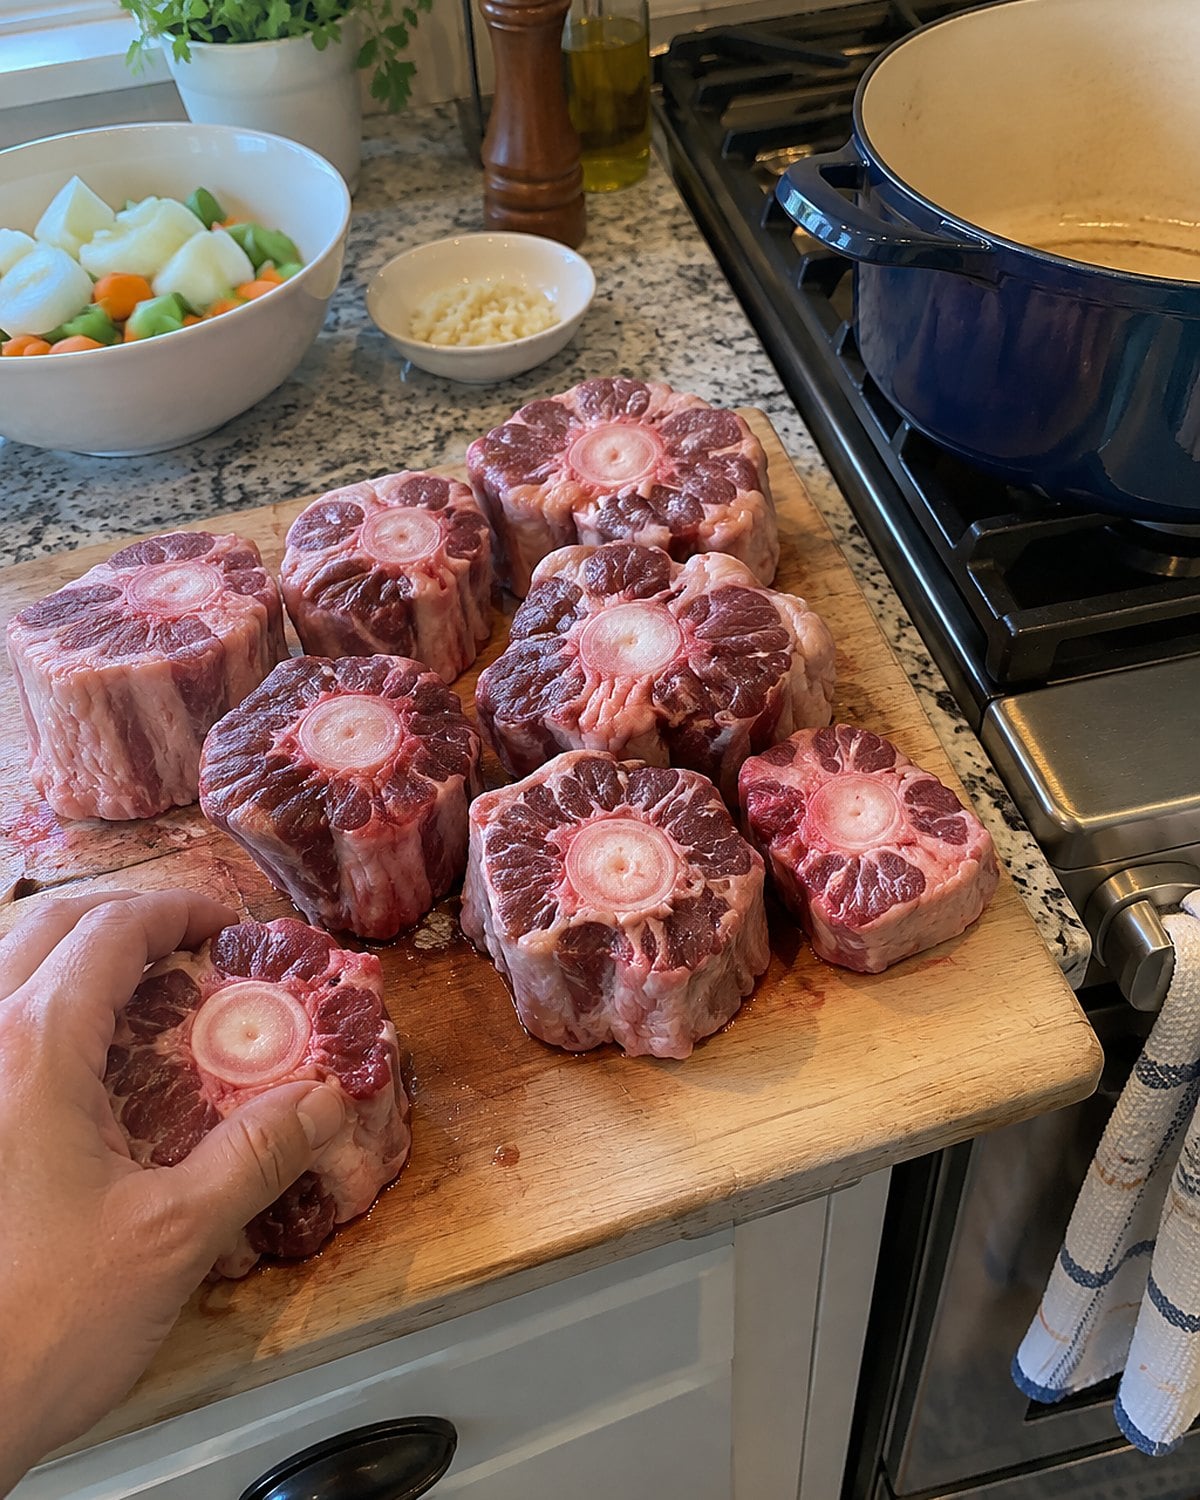
Oxtail earned its place in the pot honestly. Those round pieces hold bone, fat, and connective tissue along with the meat. After a long, covered simmer, the connective tissue softens and gives the broth body. A spoonful feels rich before you add potatoes or barley.
That richness doesn't mean the whole package is dinner for two. Bone takes up much of the weight. Buy enough to flavor a larger pot of beans or vegetables, then pull off the cooked meat. You don't need a pot full of tails to get their character.
Look through the package for pieces with meat around the bone. If the butcher cuts them to order, ask for crosswise pieces that will sit flat in your pot.
Then leave the lid on while they simmer. The broth grows silky, and the meat loosens enough to lift from the bone with a fork. Put a spoonful beside the vegetables before you decide whether the pot needs anything else.
#24 Beef cheeks beneath the butcher paper
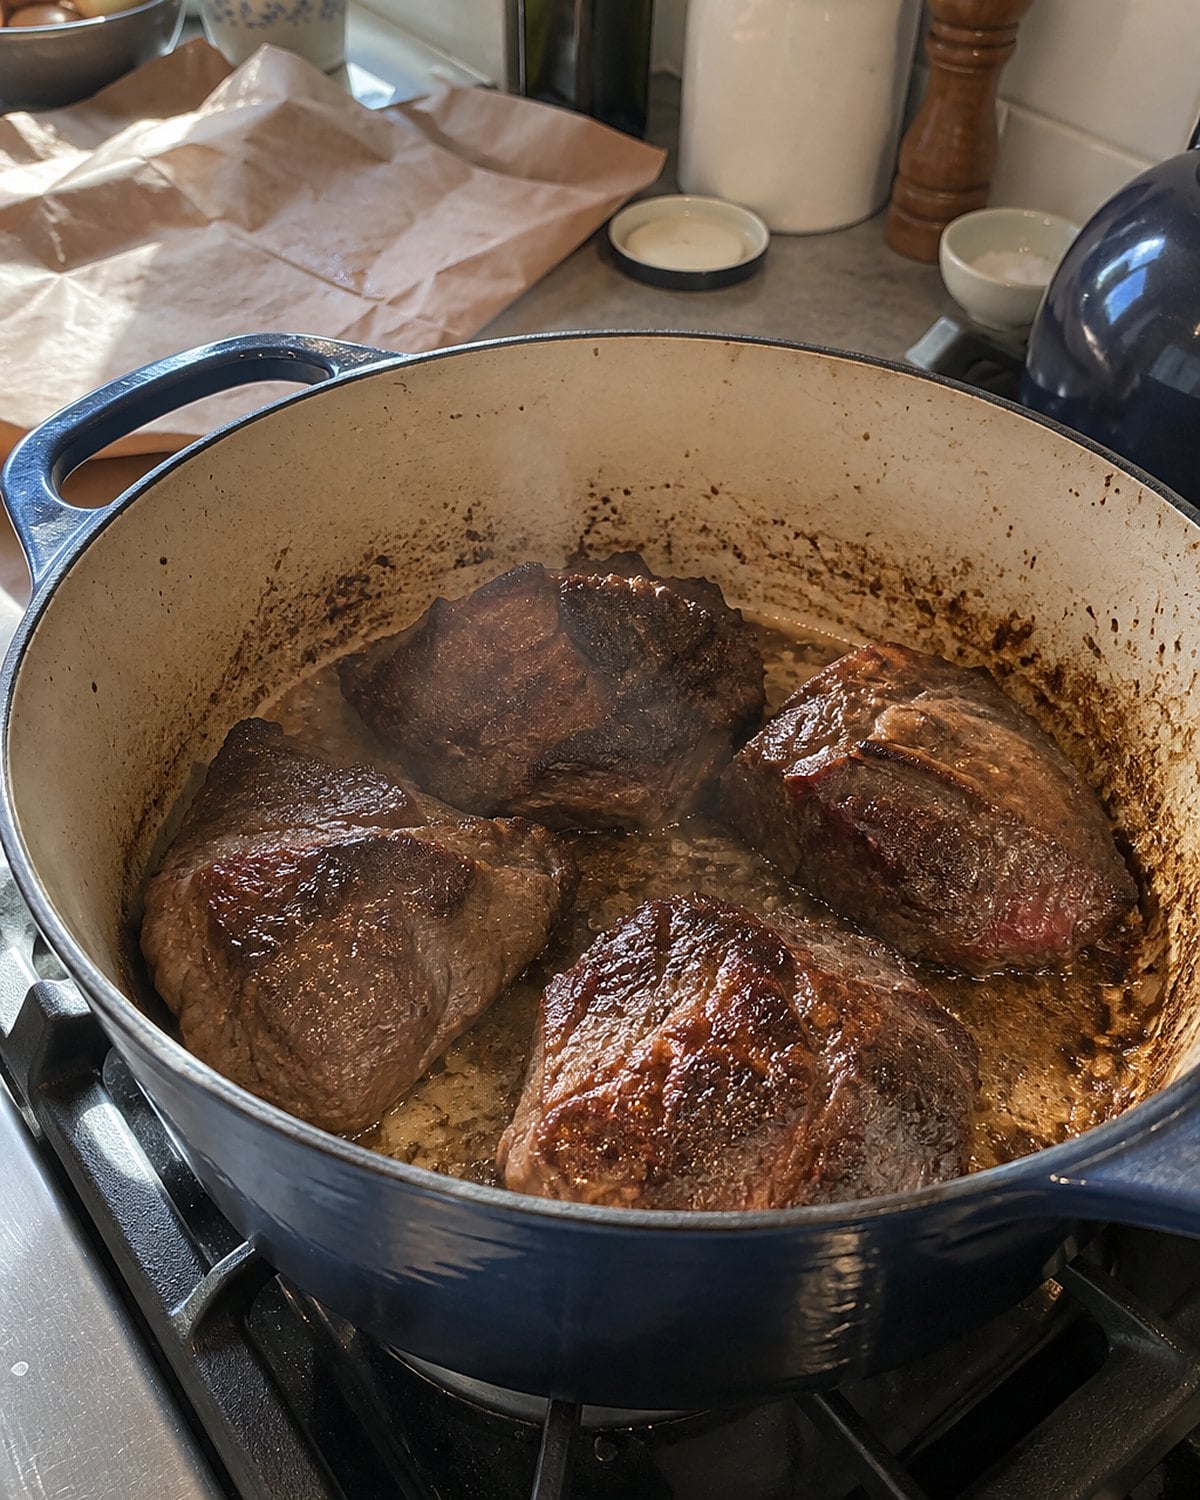
Beef cheeks look like a cut that has worked for a living. The muscle is dense, with seams running through it. Give it a quick turn in a skillet and it stays stubborn. Give it a long braise, and those seams turn silky.
Ask for the cheeks trimmed, then look them over at home. Remove thick, hard patches of surface fat. Leave the connective seams within the meat alone; they're part of what makes the finished braise so good.
Brown the cheeks in a heavy pot. Add onion and enough liquid to reach partway up the meat, then cover and keep the heat low. At first, a knife tip still meets resistance, although the pot smells ready.
Keep cooking. Check that the liquid hasn't disappeared, and turn the pieces if their tops look dry. They're done when a fork pulls them into strands without a fight.
Serve a little over mashed potatoes and save the rest for tortillas. If someone at your table dislikes the sound of “beef cheeks,” skip the speech. Put dinner down first.
Try it: Instant Pot Beef Cheeks (Served 4 Ways)
#23 Short ribs cut across the bone
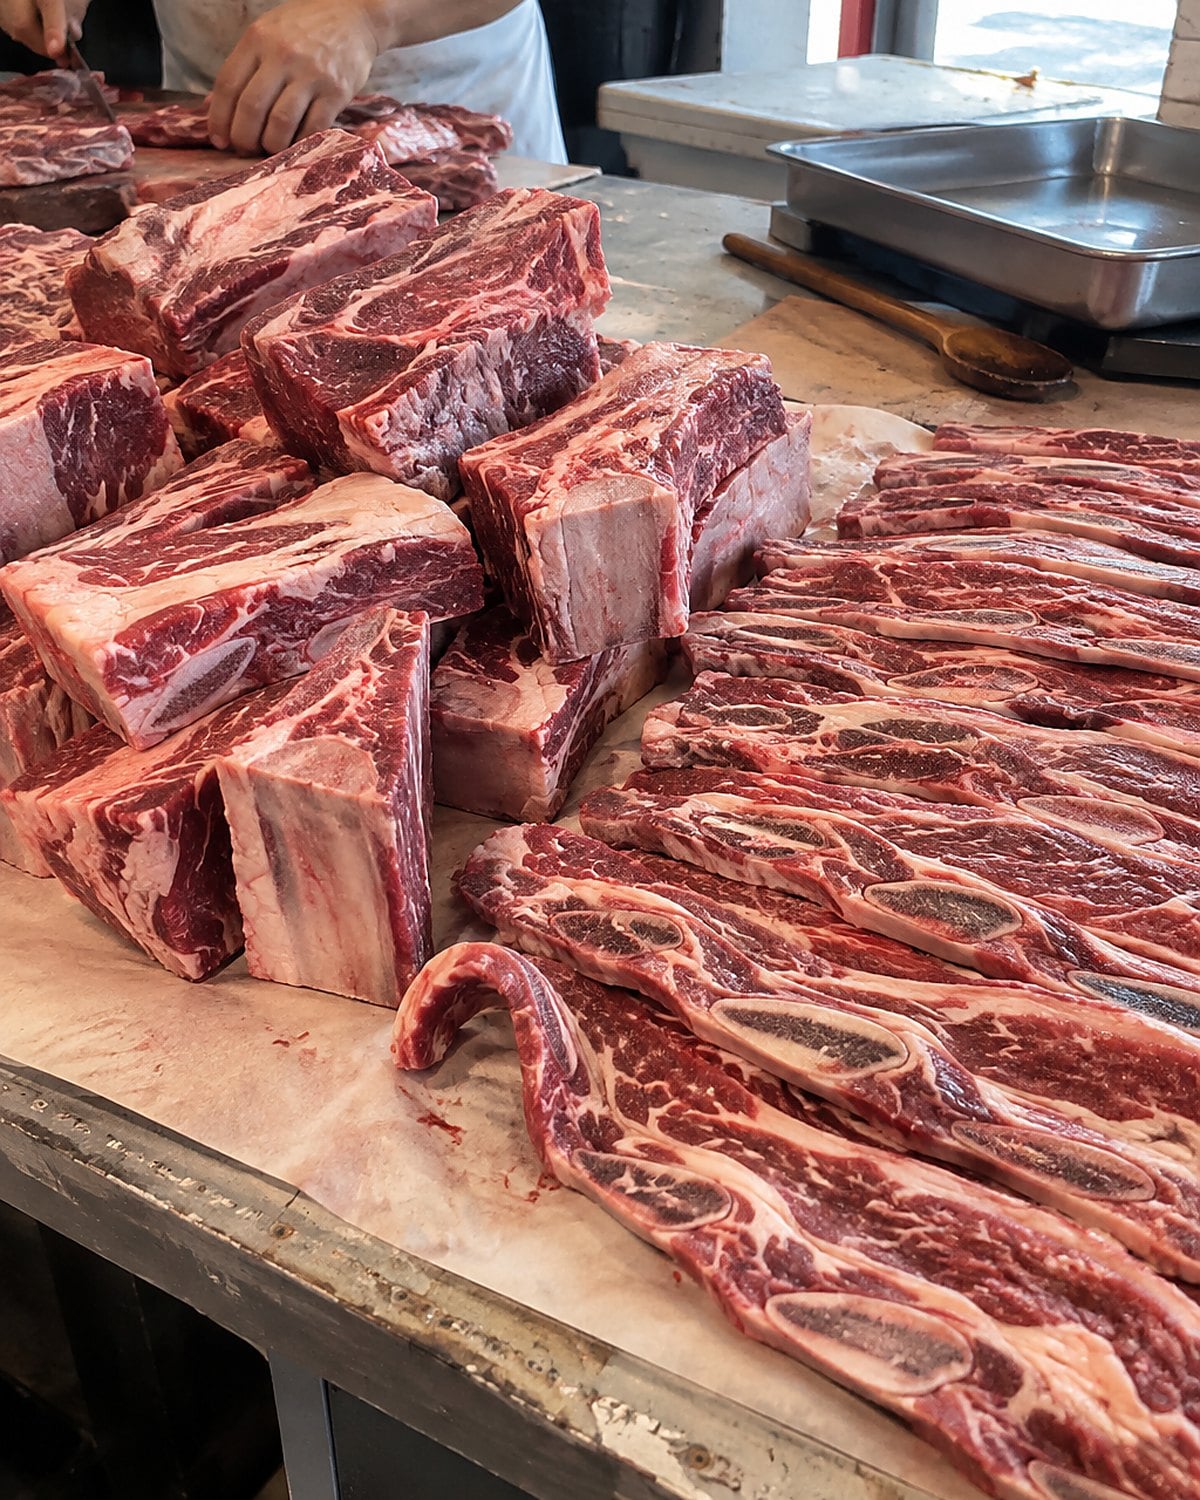
The short rib has had quite a change of address. It once filled a family pot because a small amount of meat gave the gravy deep flavor. At a restaurant, the same cut arrives standing tall beside a spoonful of potatoes.
For home supper, check the cut before you check the recipe. English-cut ribs run along a bone; flanken-cut ribs cross several bones in thin strips. Those shapes cook differently. The thin strips suit a hot pan, while the thick pieces ask for a covered pot and time.
Look closely at the package. You want visible meat, not a stack of bone with a narrow red edge. At home, brown thick ribs in batches so they touch the pan. Crowding steams them.
After braising, spoon fat from the surface of the sauce before serving. That pause brings back the gravy your mother wanted, without leaving a greasy film on the plate.
Try it: Instant Pot Short Ribs With Garlic & Wine
#22 Skirt steak at the meat counter
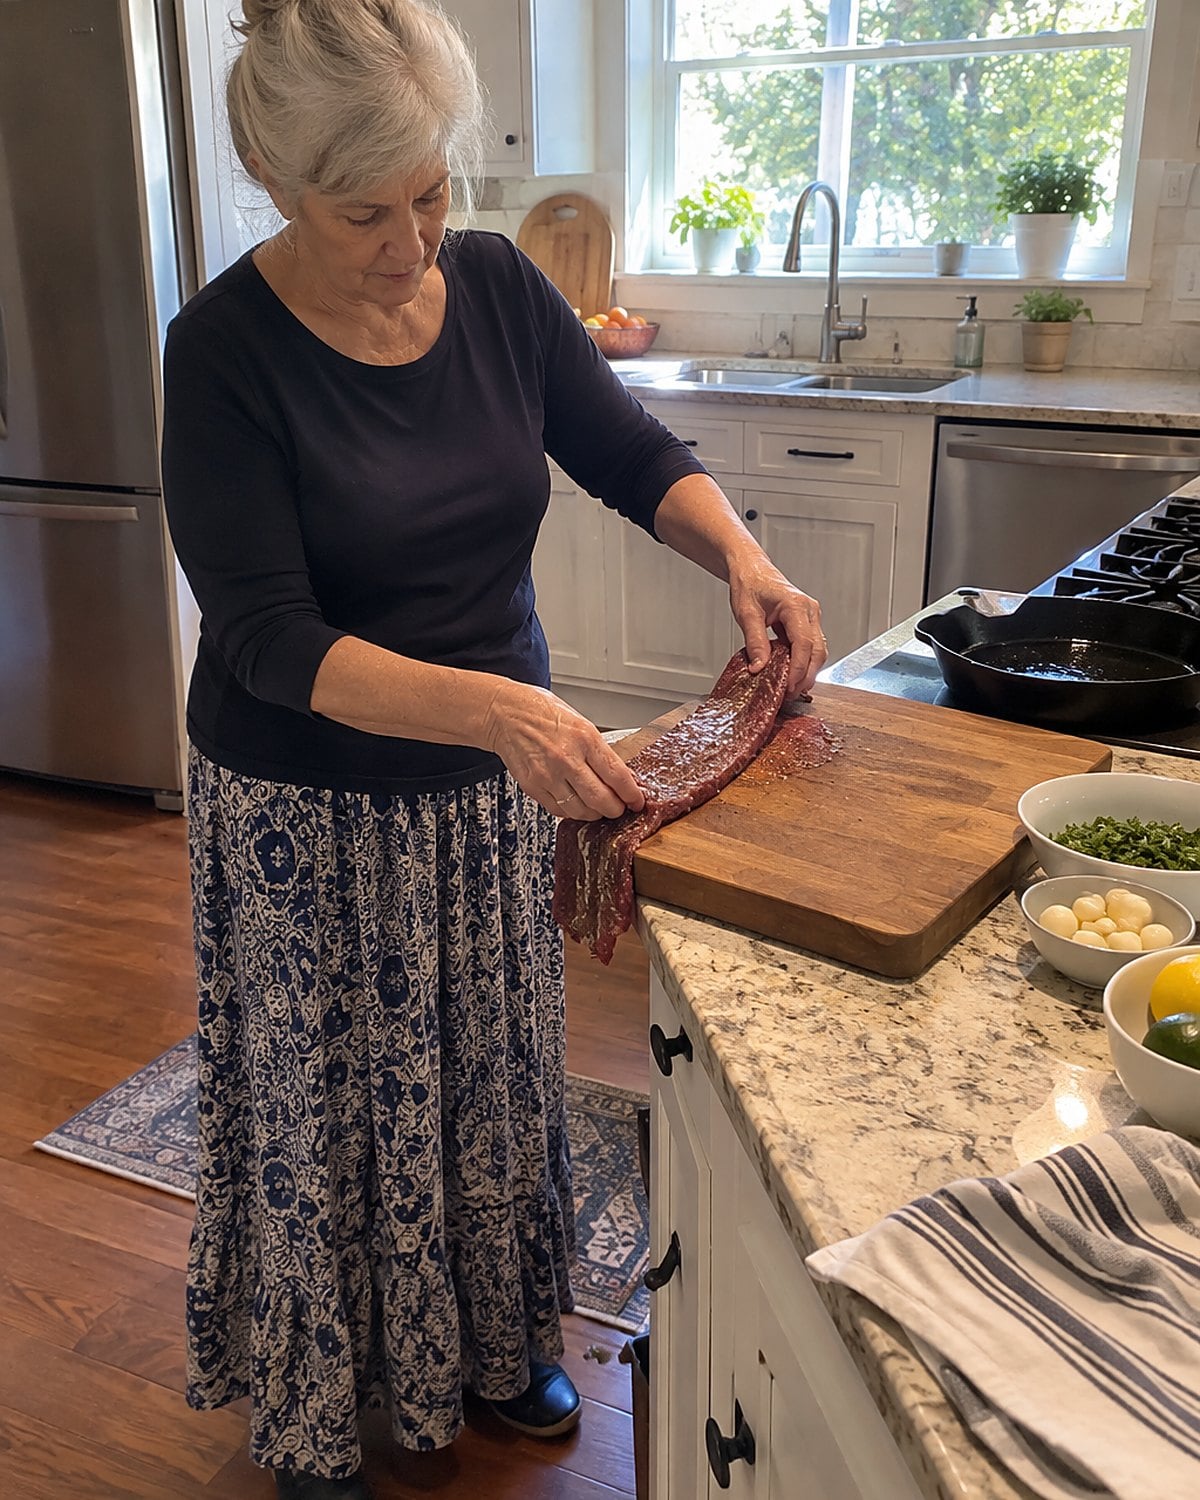
Skirt steak used to be the piece someone brought home because it cooked fast. Its long, loose fibers give you a clear instruction: slice across them. Miss that step, and a well-browned steak still takes work to chew.
Ask whether you're looking at inside or outside skirt. Outside skirt is thicker and less common in the case. Either way, spread the steak out at home and find the grain before cooking. You can see the lines running along its length.
Pat the surface dry. A hot cast-iron pan browns skirt before it spends too long over the heat. If the piece is too long for your pan, cut it into sections that lie flat. Don't fold it over itself.
For a whole beef steak, USDA Food Safety and Inspection Service gives 145°F with a 3-minute rest as the safe minimum. Slide the thermometer into the thickest part, away from bone.
After the rest, turn your knife across the grain and cut thin slices. That last move is the one everyone at the table will notice.
#21 Flank steak beside the church supper rolls
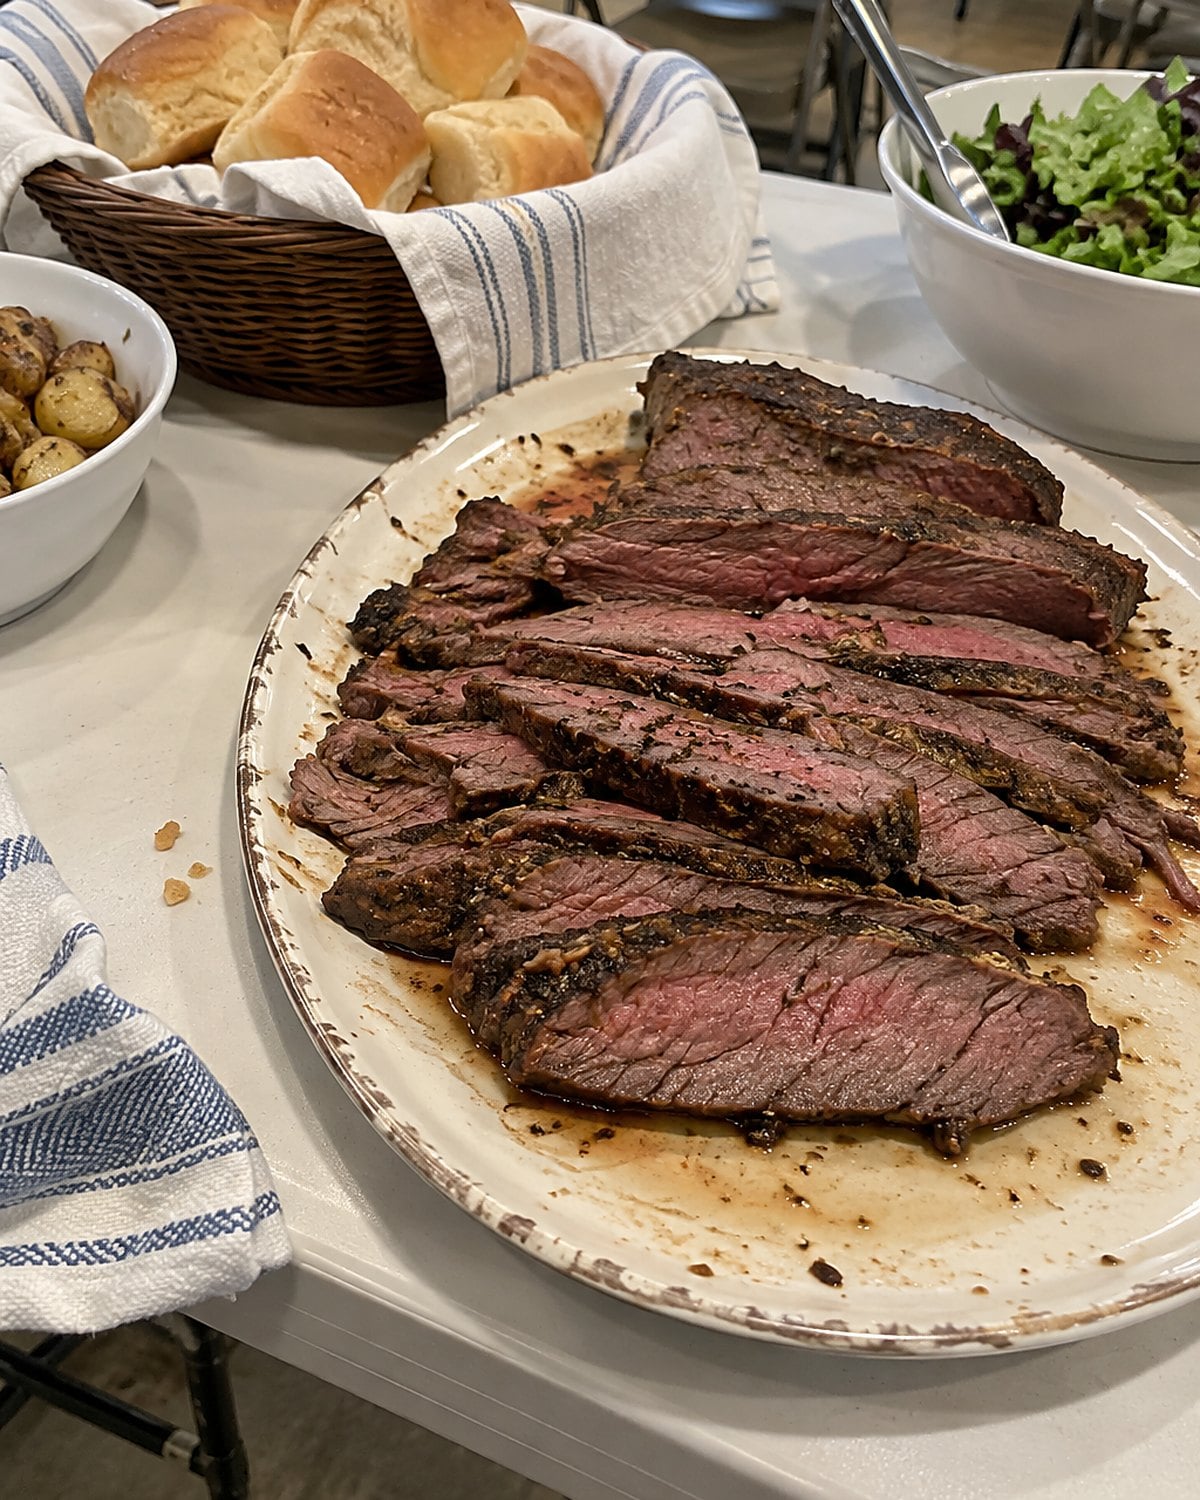
A tray of sliced flank steak disappears fast at a church supper. The cook who brought it didn't need an expensive steak. She needed a sharp knife and time to let the meat rest.
Flank is broad and fairly lean, with fibers you can spot from the other side of the counter. Cook it whole, then slice thinly across the grain. Cut with the grain, and you leave long fibers for everyone to chew.
When you shop, ask to see the full piece if the package hides its shape.
A thicker end and a thinner end won't finish at the same moment. Keep the thin end away from the fiercest heat, and check the thick end with a thermometer.
Bring the slices to the table with their juices. The rolls will take care of whatever lands on the platter.
#20 Chuck roast in the freezer drawer
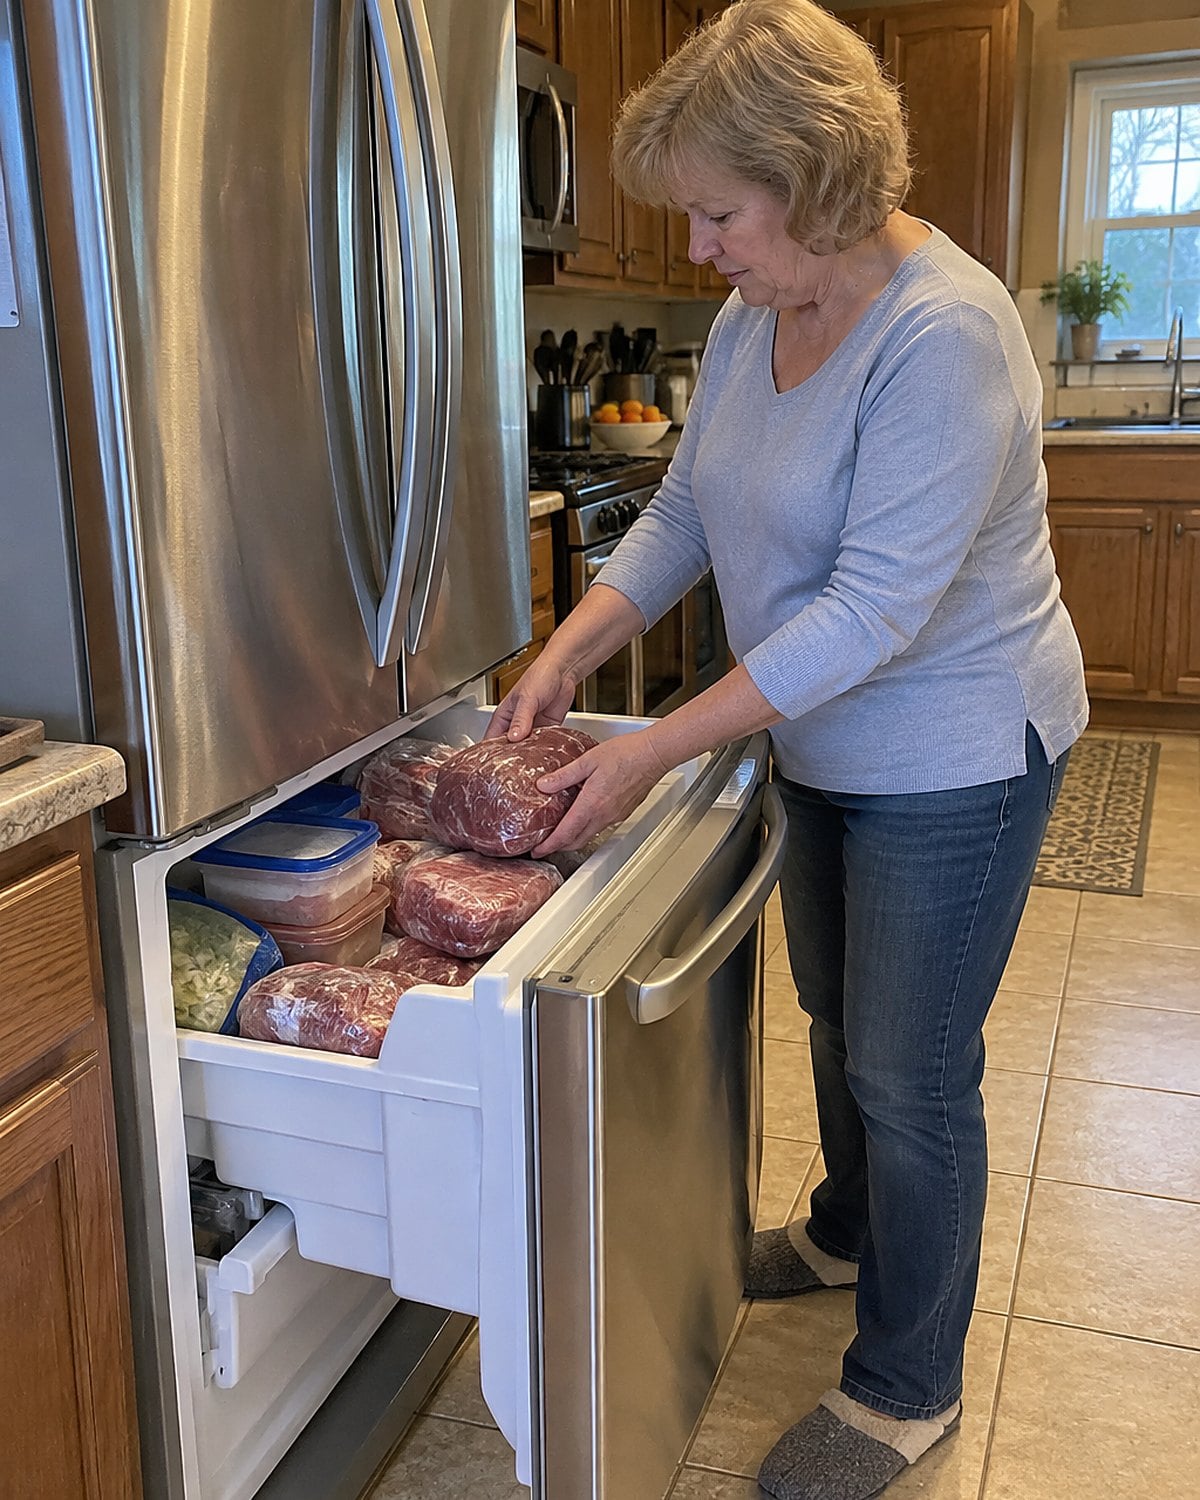
A chuck roast used to mean the freezer drawer held a plan. You bought it, wrapped it well, and knew which Sunday would need a pot roast. Now a butcher might cut that same shoulder into little steaks and give each a promising name.
Look at the marbling and the seams before deciding how to cook it. Chuck contains several muscles, with fat and connective tissue between them. A thick, seamed roast belongs in a covered pot with a little liquid.
As it cooks, those seams loosen. The meat tells you it's ready when a fork turns easily and the slices no longer spring back.
If you're cooking for one or two, divide a large roast into meal-sized portions before freezing. Wrap each snugly, press air from its freezer bag, and write the cut and date on it. Then Tuesday doesn't demand a family-sized roast.
The USDA's freezer guidance distinguishes safety from quality for food kept frozen at 0°F. Your label answers a more immediate question: what's behind that frosty plastic?
Try it: Instant Pot Beef Pot Roast With Potatoes & Carrots
#19 Chuck eye steak in the skillet
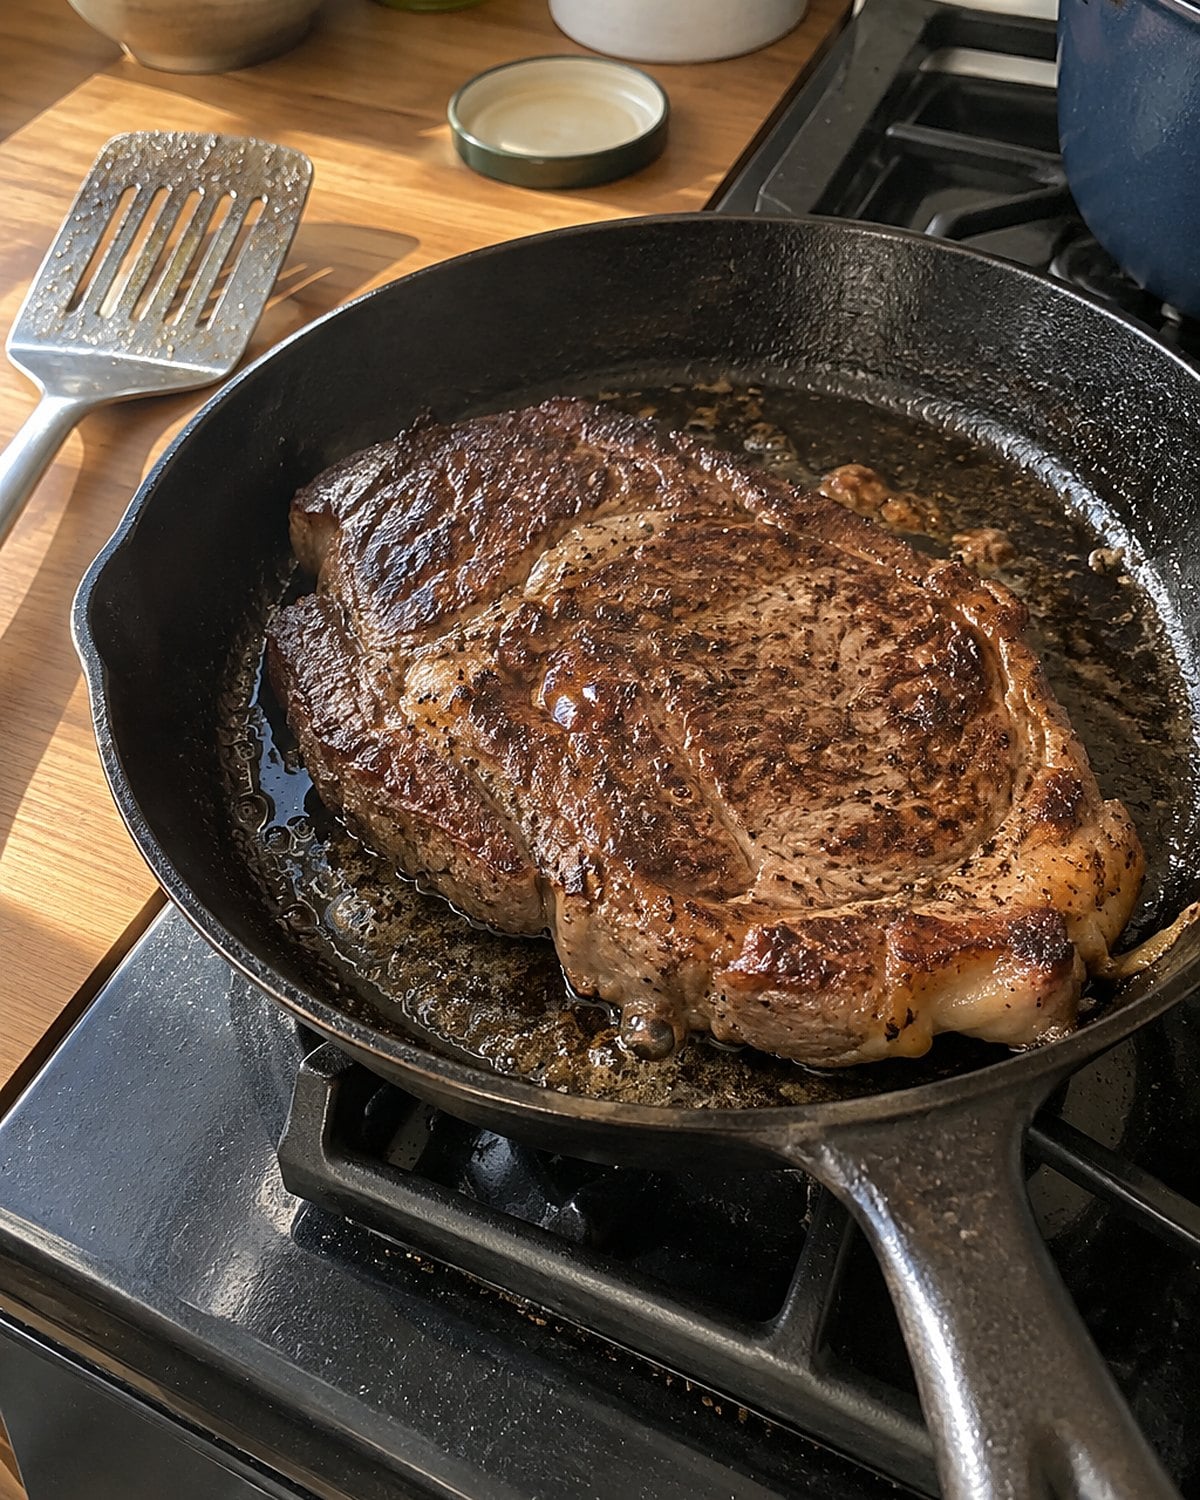
Chuck eye sits near the rib section of the animal, which helps explain its appeal as a steak. It isn't the whole chuck roast squeezed into steak shape. Ask for it by name, then look at the piece you get.
Marbling should run through the meat. A thicker steak gives you room to brown the outside while watching the center. Pat its surface dry and set it in a hot skillet. Leave it alone long enough to form a crust.
Don't take the name home without checking the steak itself. If the piece is thin, watch the pan closely and use your thermometer rather than its browned surface as your guide. A whole beef steak needs to reach 145°F and rest for 3 minutes under USDA guidance.
Before you buy, compare the tag with the other steaks in the case. If the gap has closed, choose the one you wanted in the first place.
#18 Brisket under a tight-fitting lid
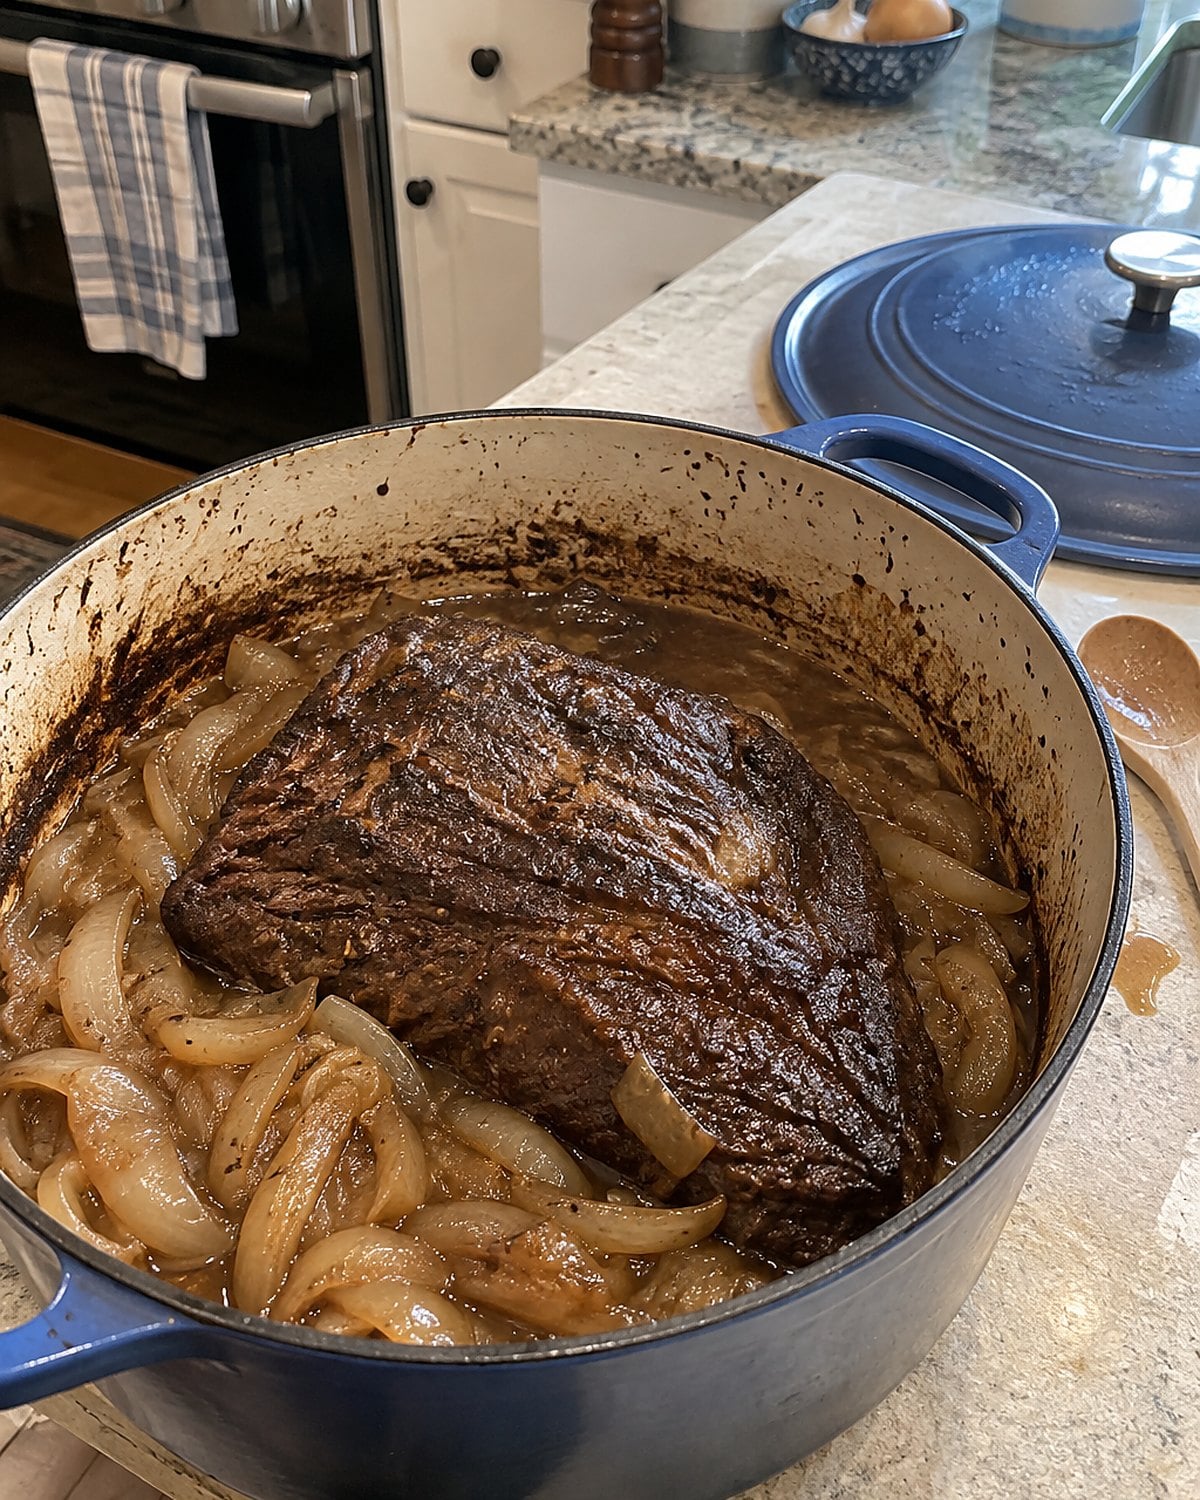
Brisket brought people around a table long before it became a showpiece at the meat counter. Its firm fibers and fat need a plan, whether that plan involves a smoker or your old Dutch oven.
For a home braise, start with the size of your pot. Brown the brisket, lift it out, and cook sliced onions in the same pan. Scrape up the browned bits when you add liquid.
Put the beef back, cover tightly, and keep the liquid at a low simmer. A hard boil can leave the meat feeling tight. Check beneath the lid now and then; the onions shouldn't be left in a dry pot.
Give the cooked brisket time to rest, then find the grain before slicing. On a large piece, the grain changes direction. Turn the meat as you cut so the knife keeps going across the fibers. Thin slices hold together in the gravy without making everyone work through long strands.
If the package has a heavy fat cap, trim some before it goes in. Leave a little for the pot, and let the onions and browned bits carry the sauce.
Try it: Instant Pot BBQ Brisket
#17 Hanger steak for a smaller supper
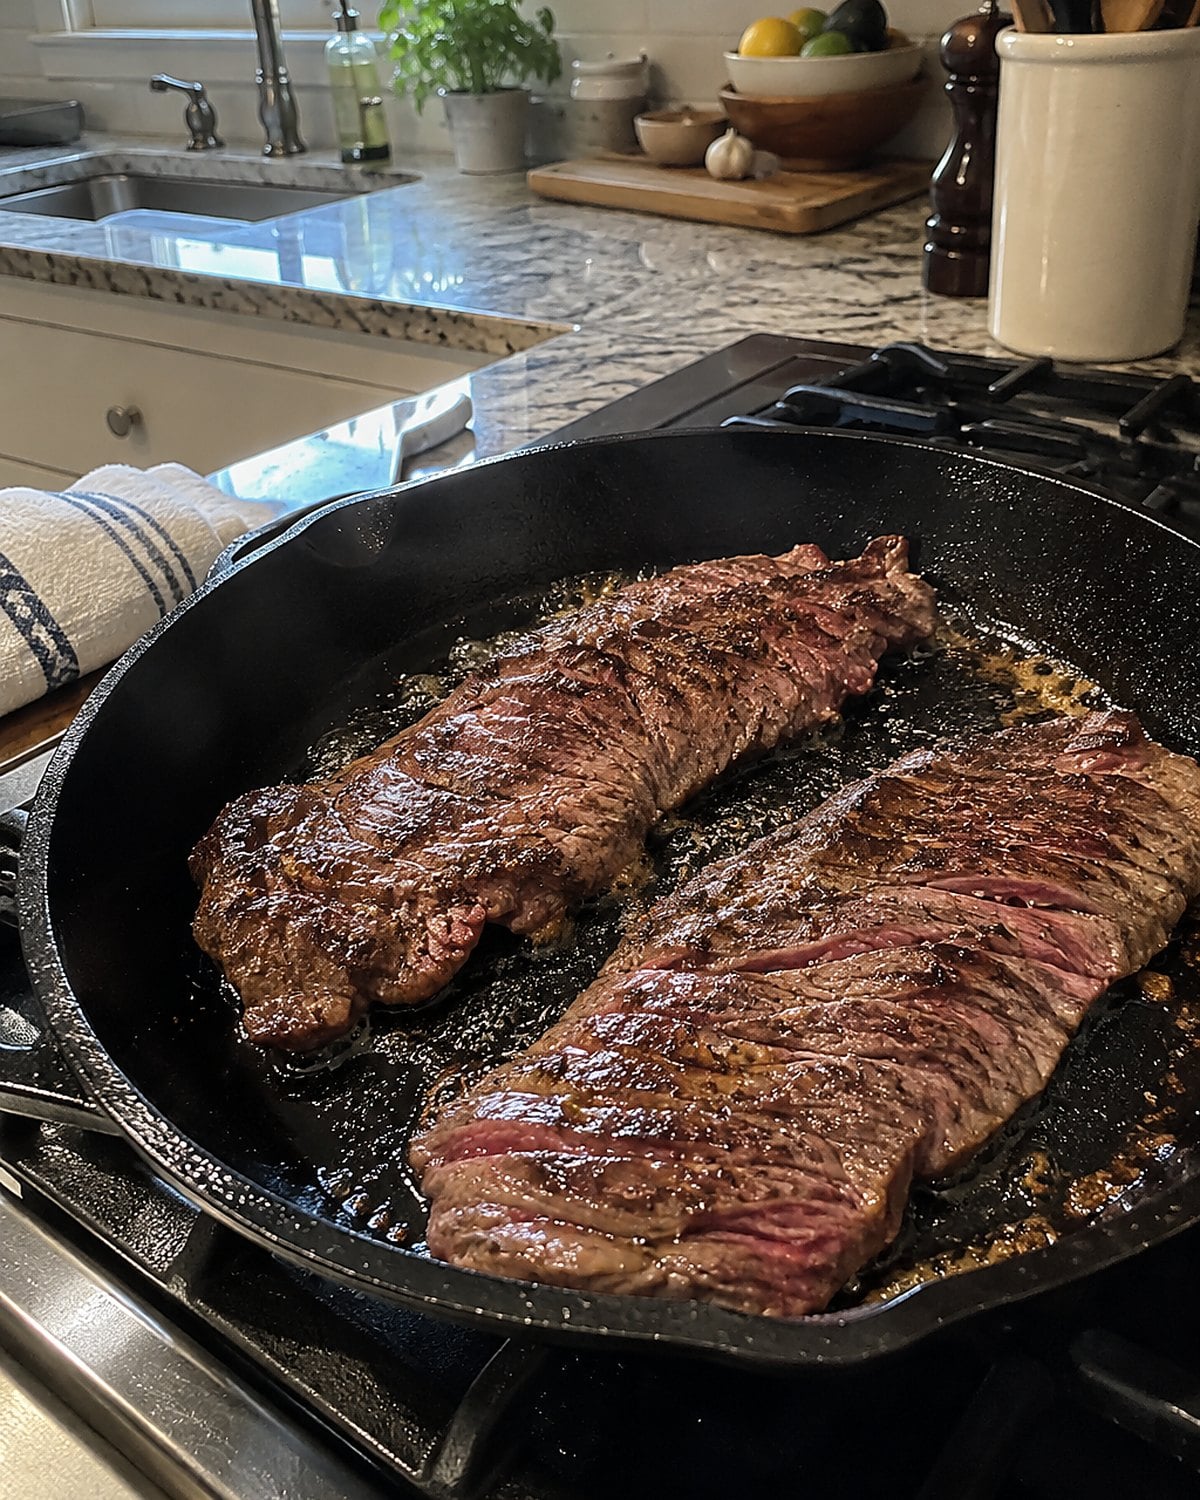
Hanger steak has a strong beef flavor and a name that catches the eye on a menu. There is only one hanger steak per animal, so it won't always be waiting at the counter.
It has a tough membrane running through the middle. Ask the butcher to remove it, or cut along both sides of it at home. You'll end up with smaller pieces that sit flat in the skillet. The membrane is the part you'd push aside on your plate.
For a two-person supper, dry the surface and use a hot pan. Check the thickest part with a thermometer, then let the cooked steak rest. Cut thin slices across the grain.
Taste a slice before you reach for sauce. Those trimmed pieces give you plenty to put beside potatoes and a pan of onions.
#16 Flat iron steak on the cutting board
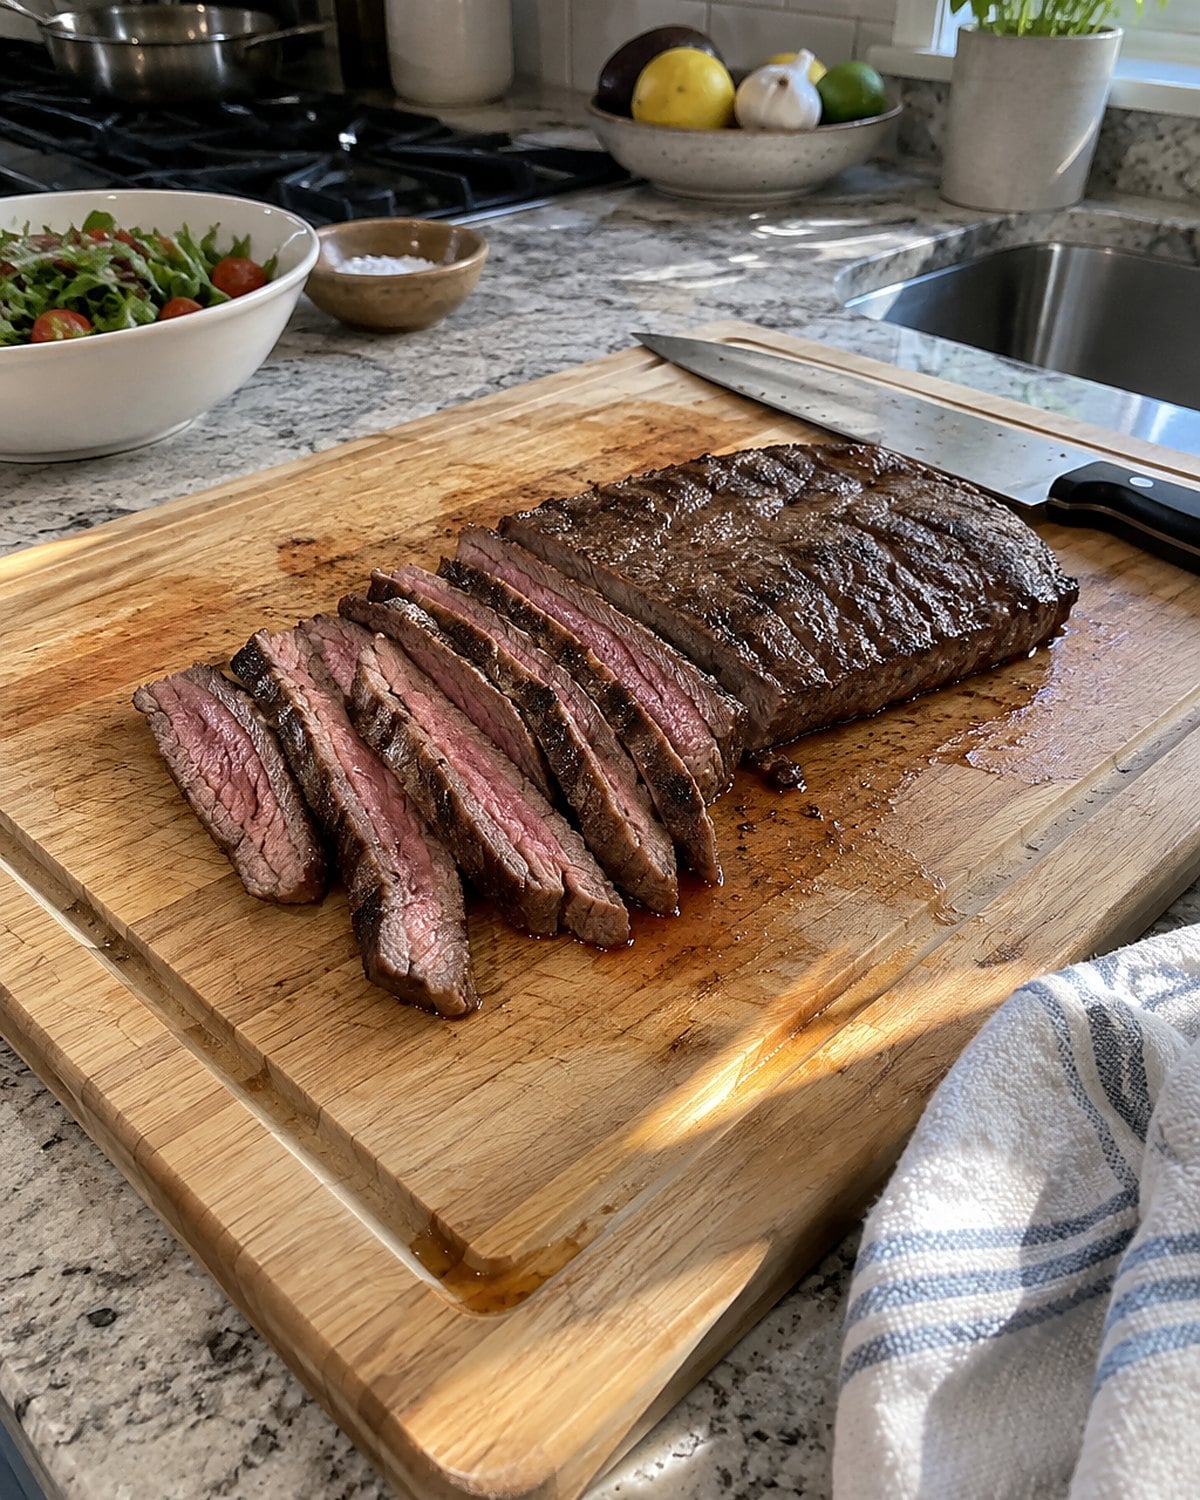
Flat iron steak comes from the shoulder, a place your mother associated with long cooking. The surprise is what happens when the tough central seam is removed. The meat on either side is tender enough for a fast, hot pan.
That's why the name matters. A flat iron steak isn't a reason to toss any shoulder steak under the broiler. Look for a broad, fairly even piece with the hard seam already taken out. If the package shows gristle through the center, ask what you're buying.
At home, lay it on the board and check the grain before it touches the heat. The fibers are less obvious after browning. Cook it as a steak, rest it, and slice across the fibers. Then serve it with the potatoes you were going to make anyway.
The butcher's trimming changes what belongs in your pan. Ask what was removed, not just what the label calls the meat.
#15 Tri-tip in the Sunday roasting pan
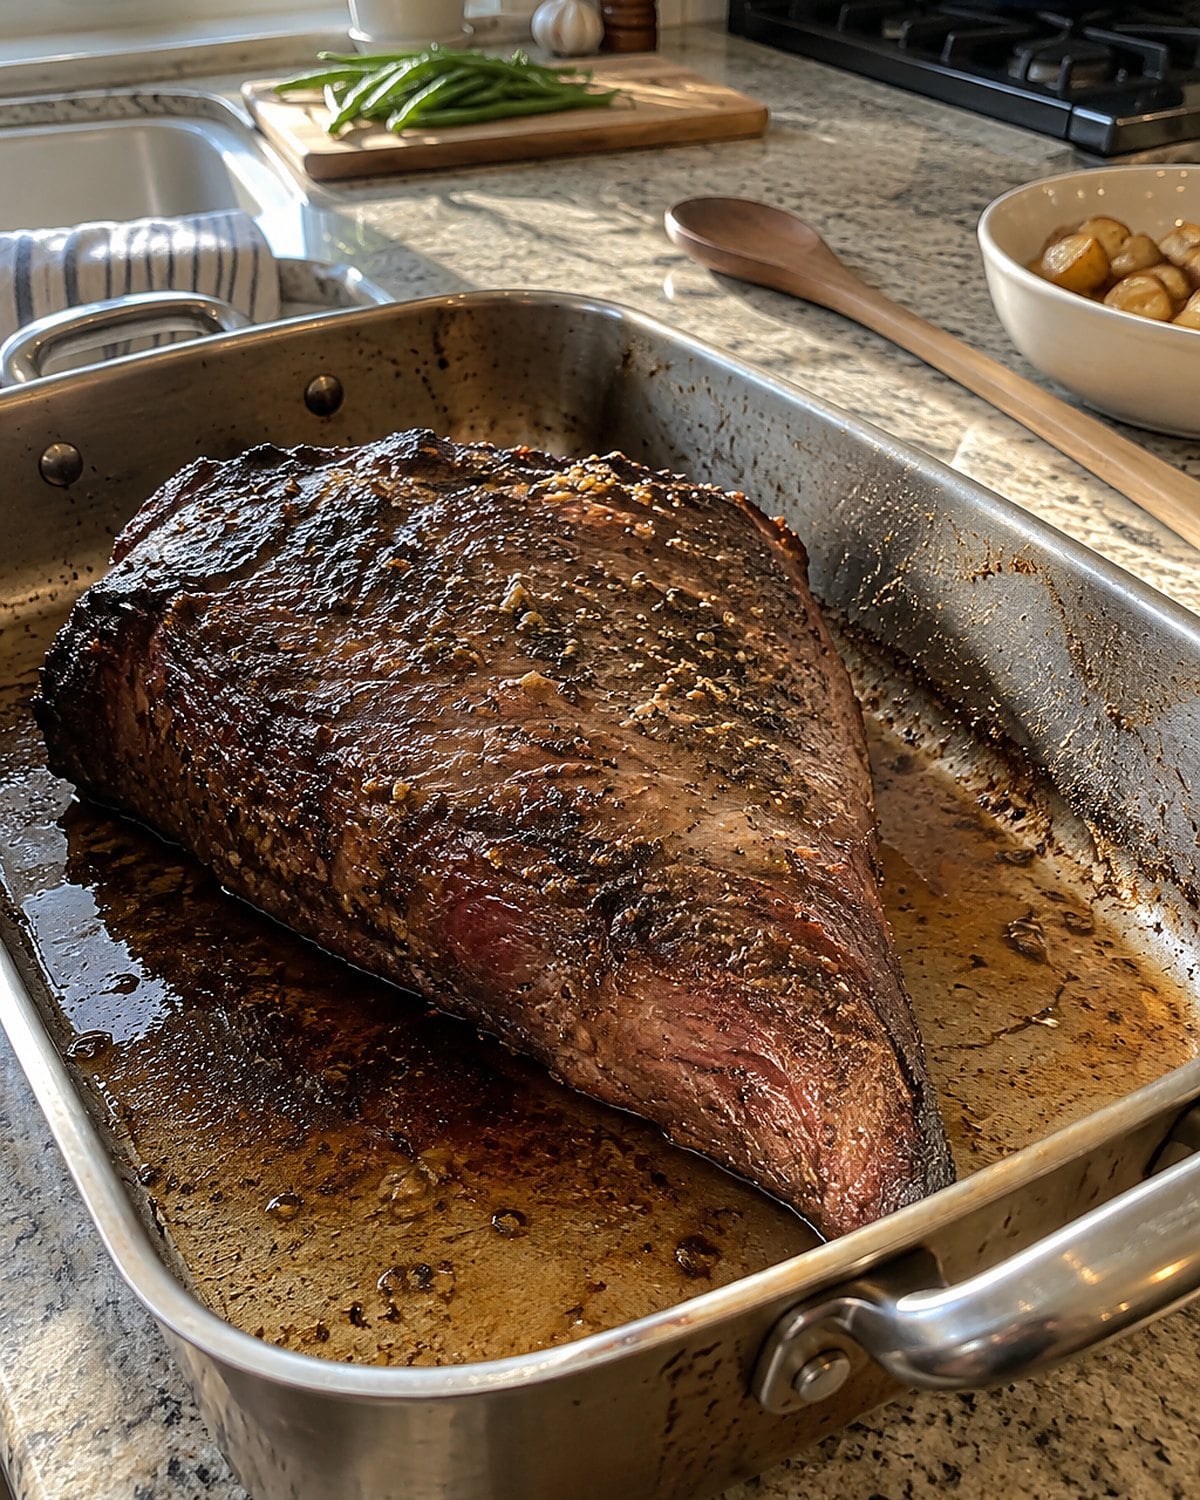
A triangular roast looks tidy in the butcher case. In the oven, its narrow point and thick end tell different stories. That's tri-tip, a cut with a long following in California and a place in meat cases elsewhere.
If you roast it whole, tuck the thin point under if it flops far from the rest. Check the thickest part with a thermometer rather than guessing from the browned outside. Under USDA guidance, a whole beef roast needs 145°F and a 3-minute rest.
Now look at the cutting board. The grain changes direction across a tri-tip. Turn the roast as you cut, keeping your knife across the fibers on each side.
Put the thin slices in the roasting pan with their juices. The pointed end has already given you a few smaller pieces for the person who wants a sandwich later.
#14 Bavette steak with a butcher's explanation
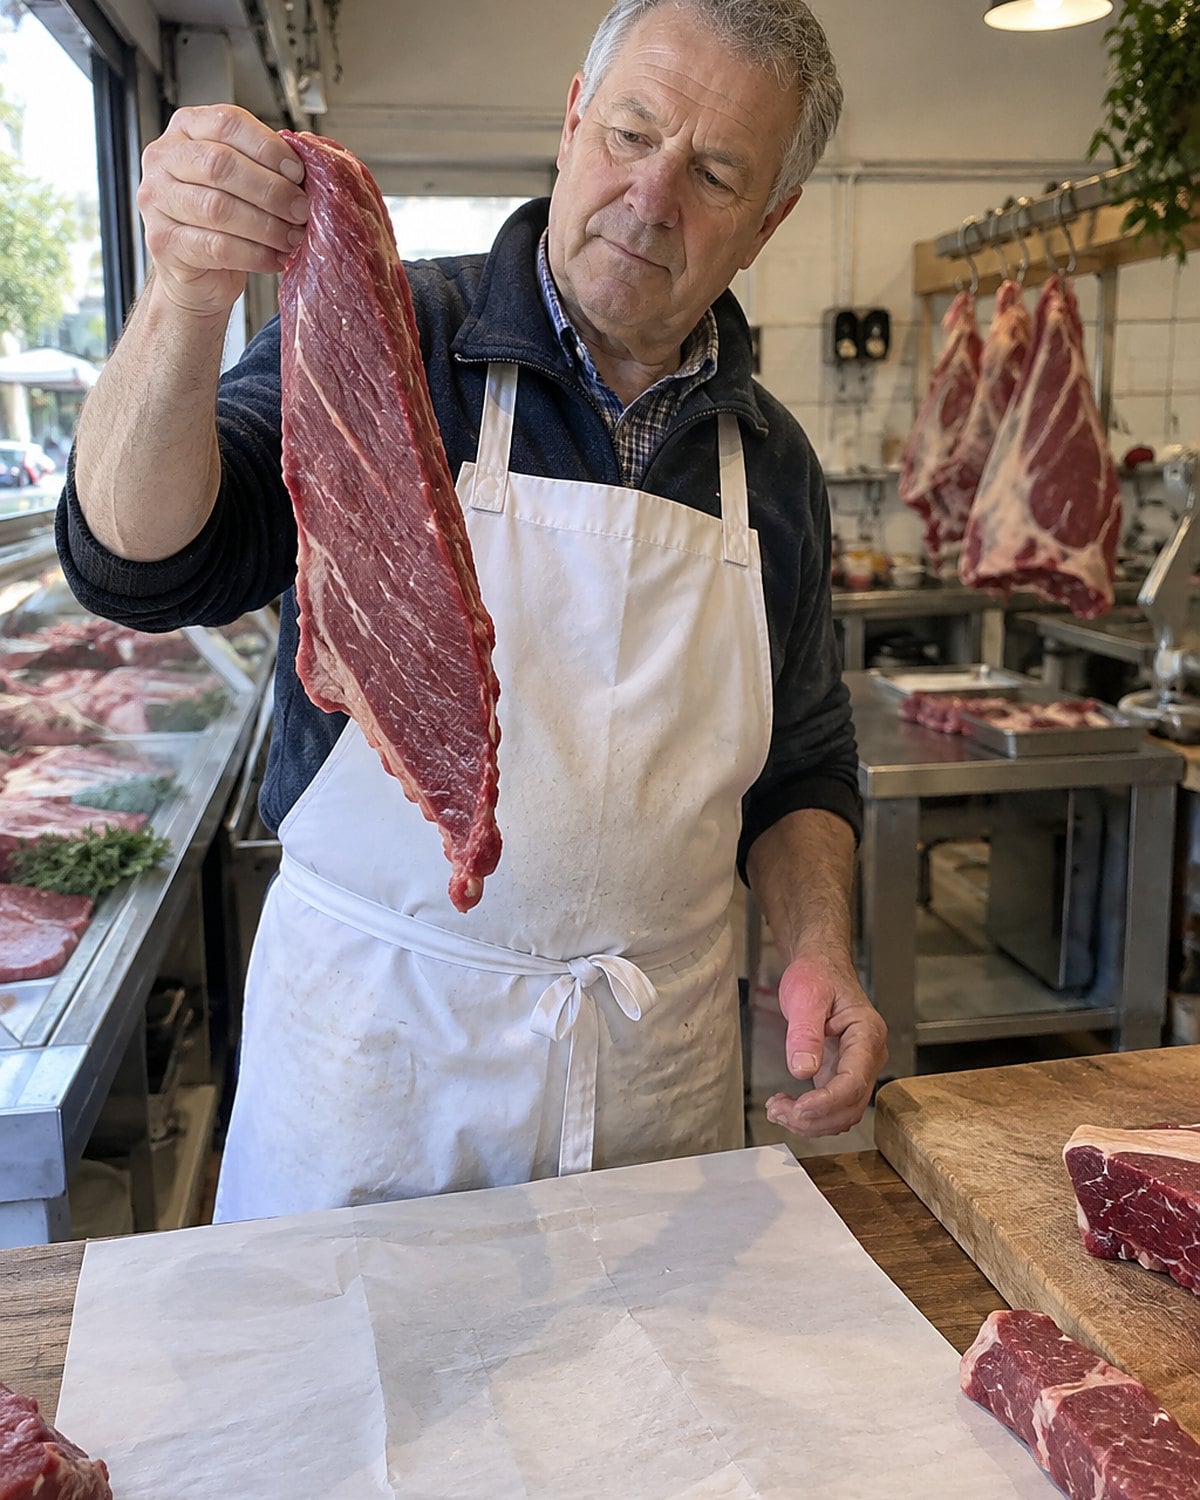
Bavette is a name worth asking the butcher to explain. Meat-counter labels for loose-grained steaks vary. What matters is the piece in front of you: its thickness, its shape, and the direction of its fibers.
Try asking, “Would you show me the grain and tell me how you'd cut this after cooking?” You've cooked steak before. You're asking about the particular piece they're selling today.
At home, treat the visible fibers as a map. A marinade flavors the surface, but it won't undo a slice made with the grain. Use a hot pan or grill, check the thickest part, and rest the meat before cutting thin pieces across those lines.
If the steak tapers, move its thin end away from the hottest spot. Ask for the butcher's answer while the meat is still on the counter, then set it on your board the same way at home. You'll know which direction the knife should travel.
#13 Beef shank beneath the Italian label
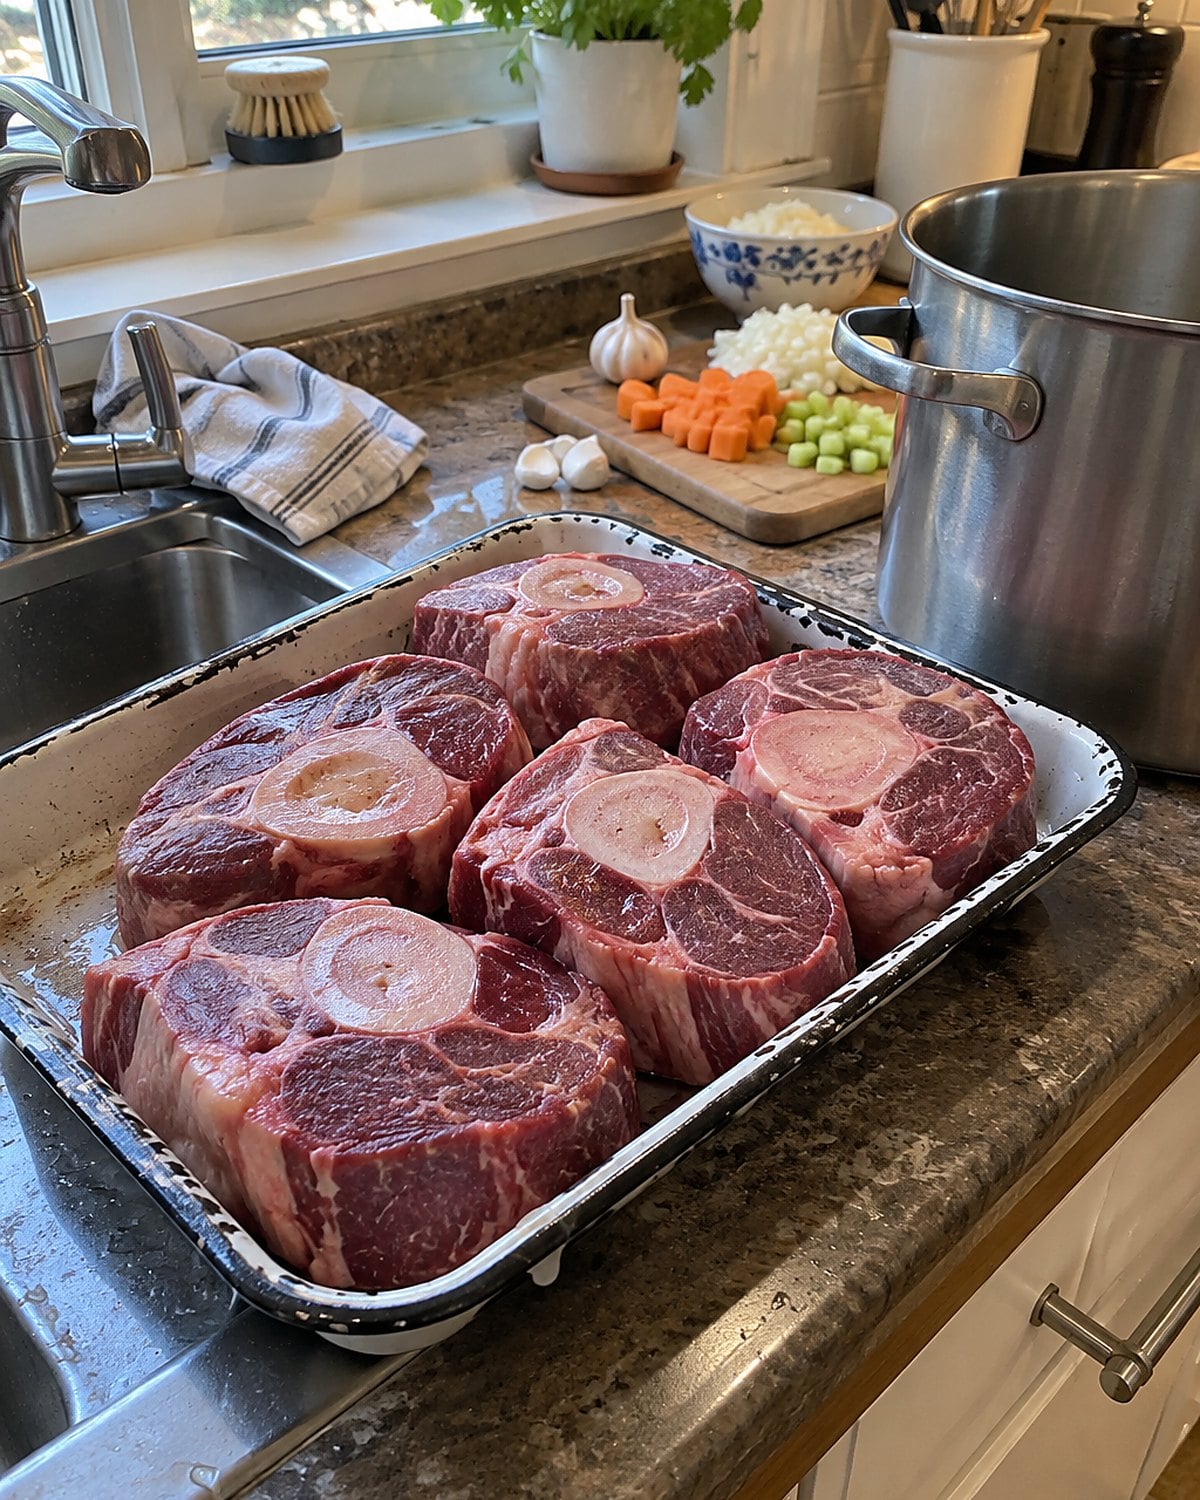
Beef shank is a slice of leg with a round bone at its center. Osso buco is the name of a braised shank dish, not a different muscle hidden behind the butcher's sign. The surrounding meat has done hard work and needs a covered pot.
Ask for crosscut pieces of similar thickness. Look at the meat around each bone as well as the bone itself. Thick, even pieces sit upright for browning; thin ones curl sooner.
Brown the shanks in a single layer. Add onion and liquid partway up the meat, cover, and let the pot simmer until a fork slips in and the meat pulls from the bone. Add quick-cooking vegetables later, after the shanks have made progress.
The marrow softens inside the bone as it cooks. Set a small spoon beside the plates if someone likes it. What else goes on the plate is up to you; the shanks have already made a broth worth keeping.
Try it: Instant Pot Osso Buco & Rice
#12 Pork shoulder on the porch table
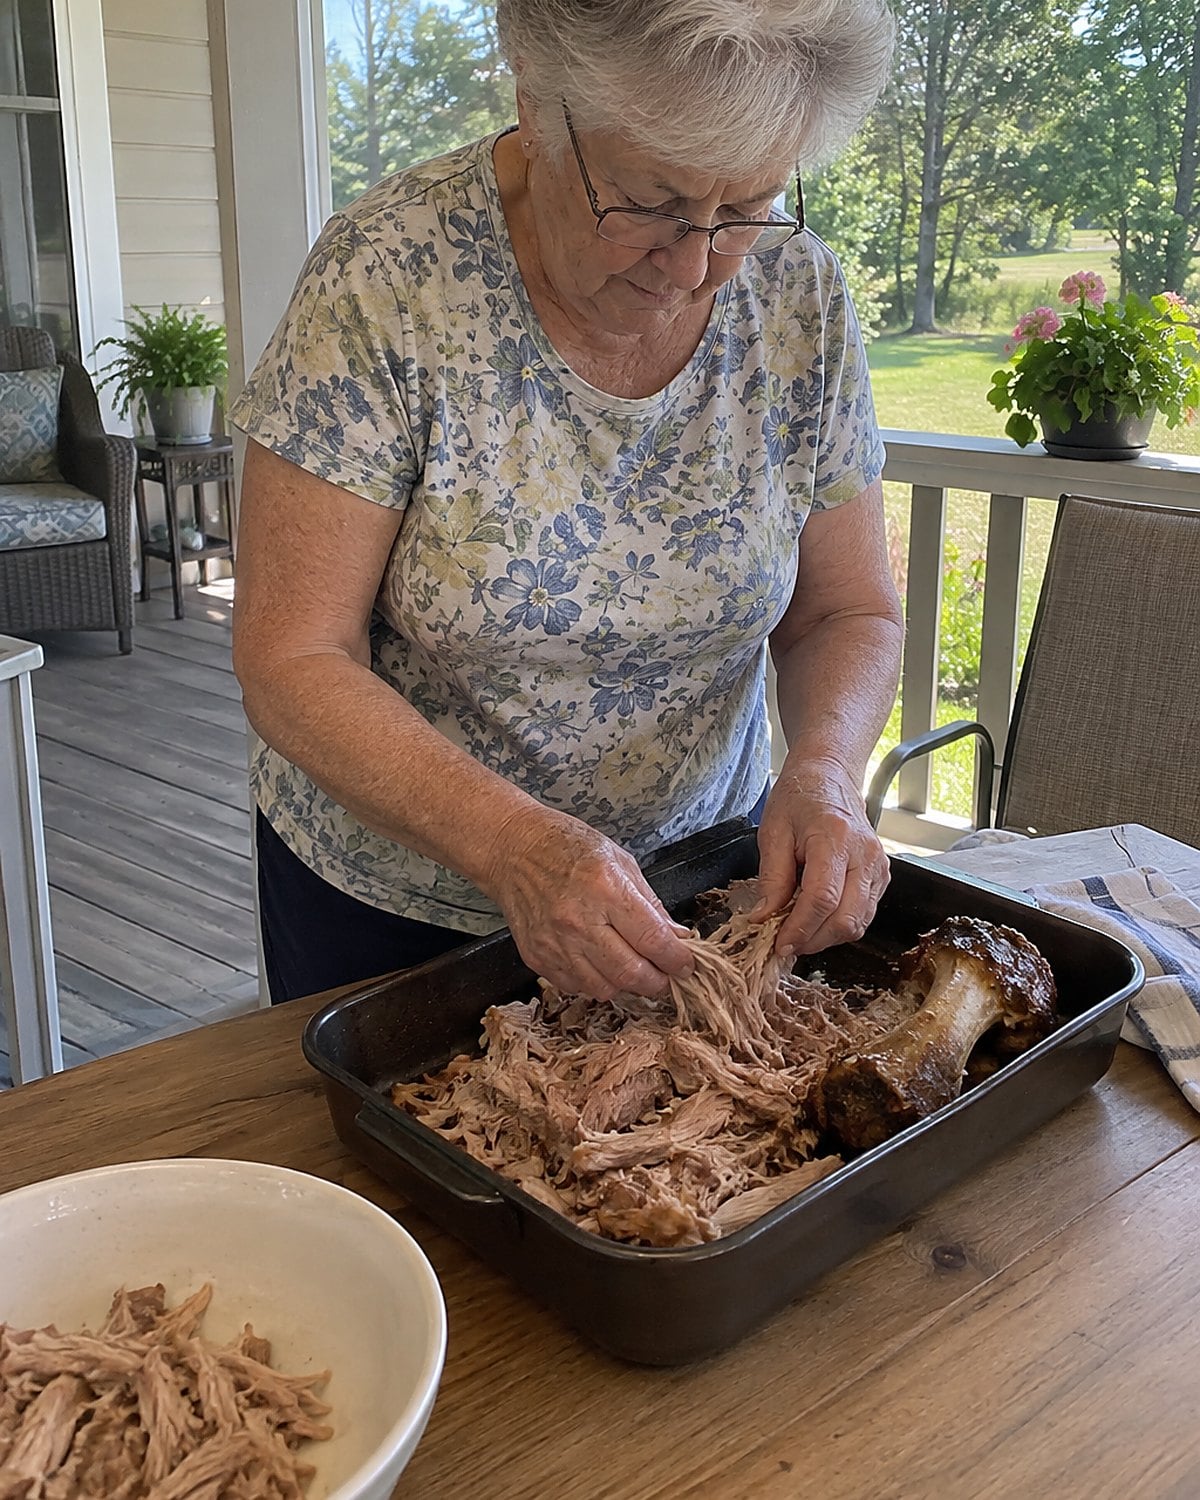
A pork shoulder has fed more porch suppers than its restaurant name, “pulled pork,” suggests. Fat and connective tissue run through the meat, which is why it stays satisfying after a long cook.
Choose a size that fits your household. For a covered oven pot, season the shoulder, add a little liquid, and cook until a fork turns easily in the thickest part. Remove large pieces of fat as you pull the meat apart. Taste before adding sauce; the cooking juices deserve a chance.
The USDA gives 145°F with a 3-minute rest as the safe minimum for a whole pork cut. Pulled pork needs longer cooking for a different reason: the meat has to loosen enough to shred.
Set the pulled meat on the porch table beside the sauce. Let everyone decide how much of it belongs on their plate.
Try it: Instant Pot Pork Shoulder & Gravy (Step-By-Step)
#11 Pork belly from the old stew pot
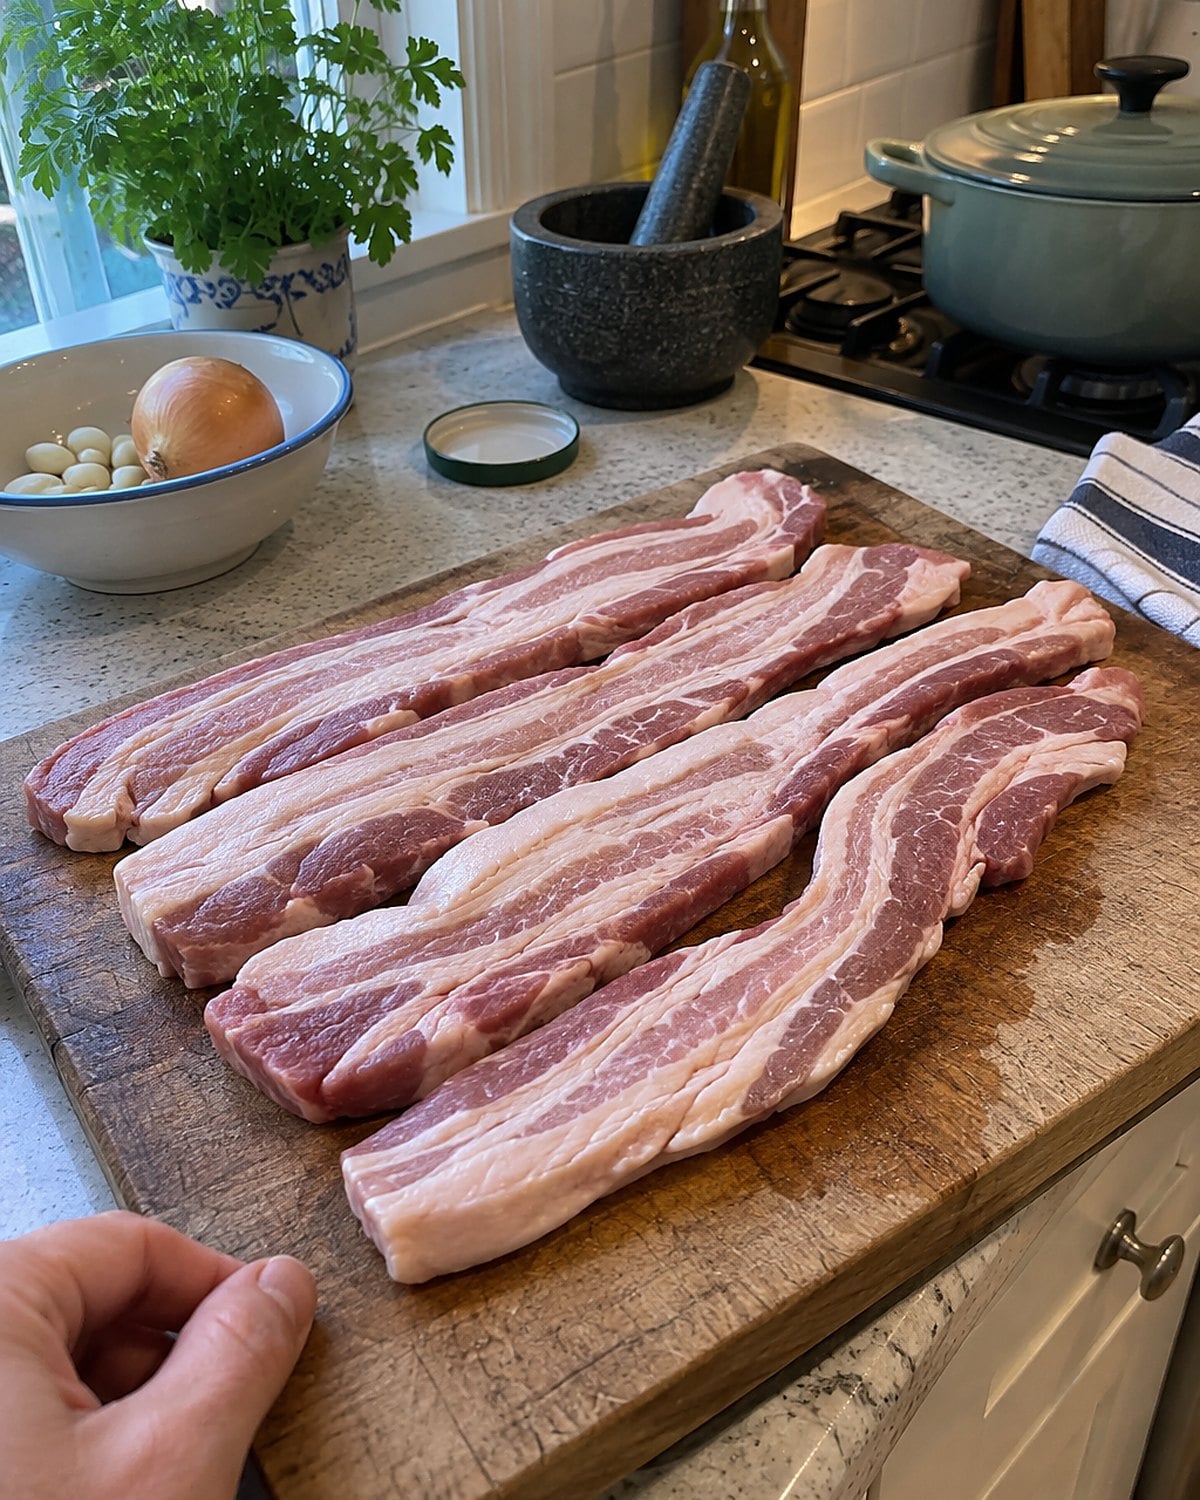
Pork belly sits beneath bacon's reputation. Before curing or smoking, it's a fresh cut with bands of meat and fat. That fat makes it rich, so a small portion goes a long way beside vegetables or beans.
For a braise, cut the belly into pieces that fit against the bottom of the pot. Brown the surfaces, pour off excess fat, then add liquid and cover. The meat softens while more fat renders. You'll see it collecting on top of the liquid.
For a crisp surface, check whether the skin is still on before you shop for the rest of dinner. Dry the skin before roasting and score it with a sharp knife without cutting deep into the meat.
At the counter, compare the lean and fat bands. Some pieces look almost entirely white. Pick a piece with enough meat for the way you intend to cook it, then give that fat a job in the pot.
#10 Ham hock in the bean pot
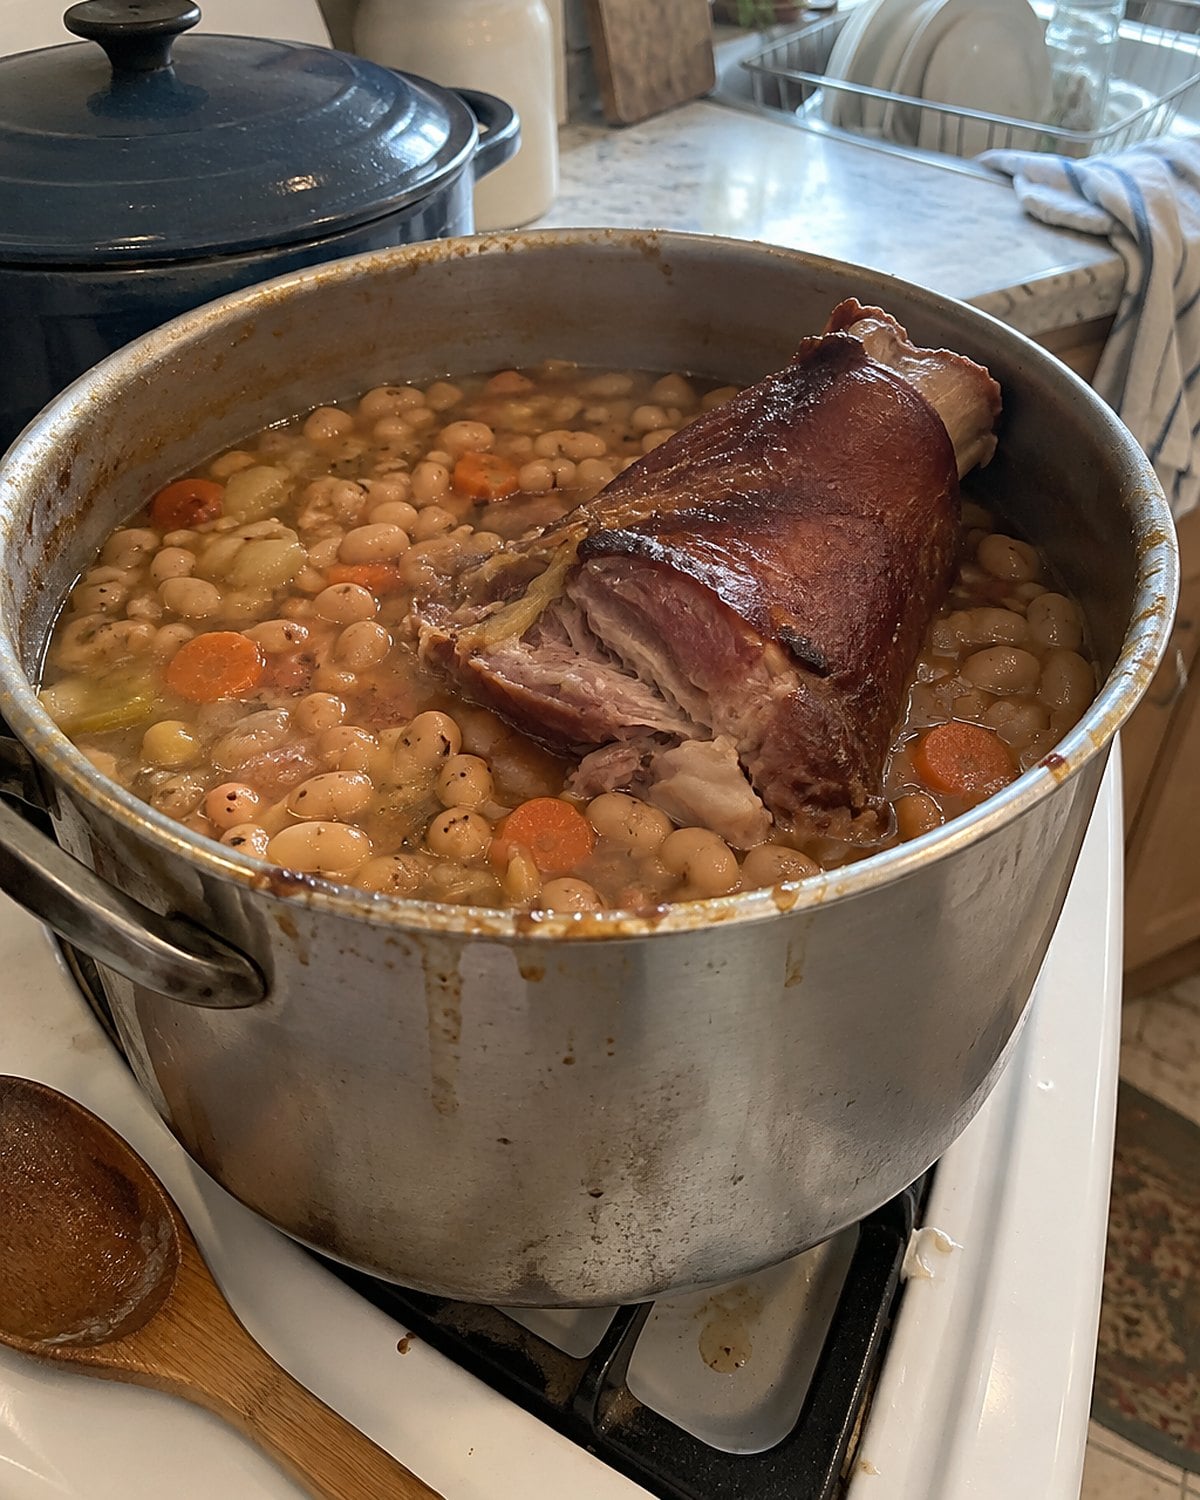
The ham hock used to ride home with a bag of beans. It wasn't there to provide a neat slice of meat. It lent smoky flavor and body to a pot that fed whoever showed up.
Check whether your hock is smoked or fresh. That choice changes the flavor and the salt you add later. A smoked hock brings its own seasoning, so taste the beans near the end before reaching for the salt crock.
Pull out the cooked hock and let it cool enough to handle. Return any usable meat to the pot. A small fork helps you find it between the skin and bone.
You'll also see pork hocks dressed up as a main course. For the bean pot, ask for the one you remember. The broth will tell you what it contributed.
Try it: Instant Pot Ham And Beans
#9 Lamb shanks beneath the pot lid
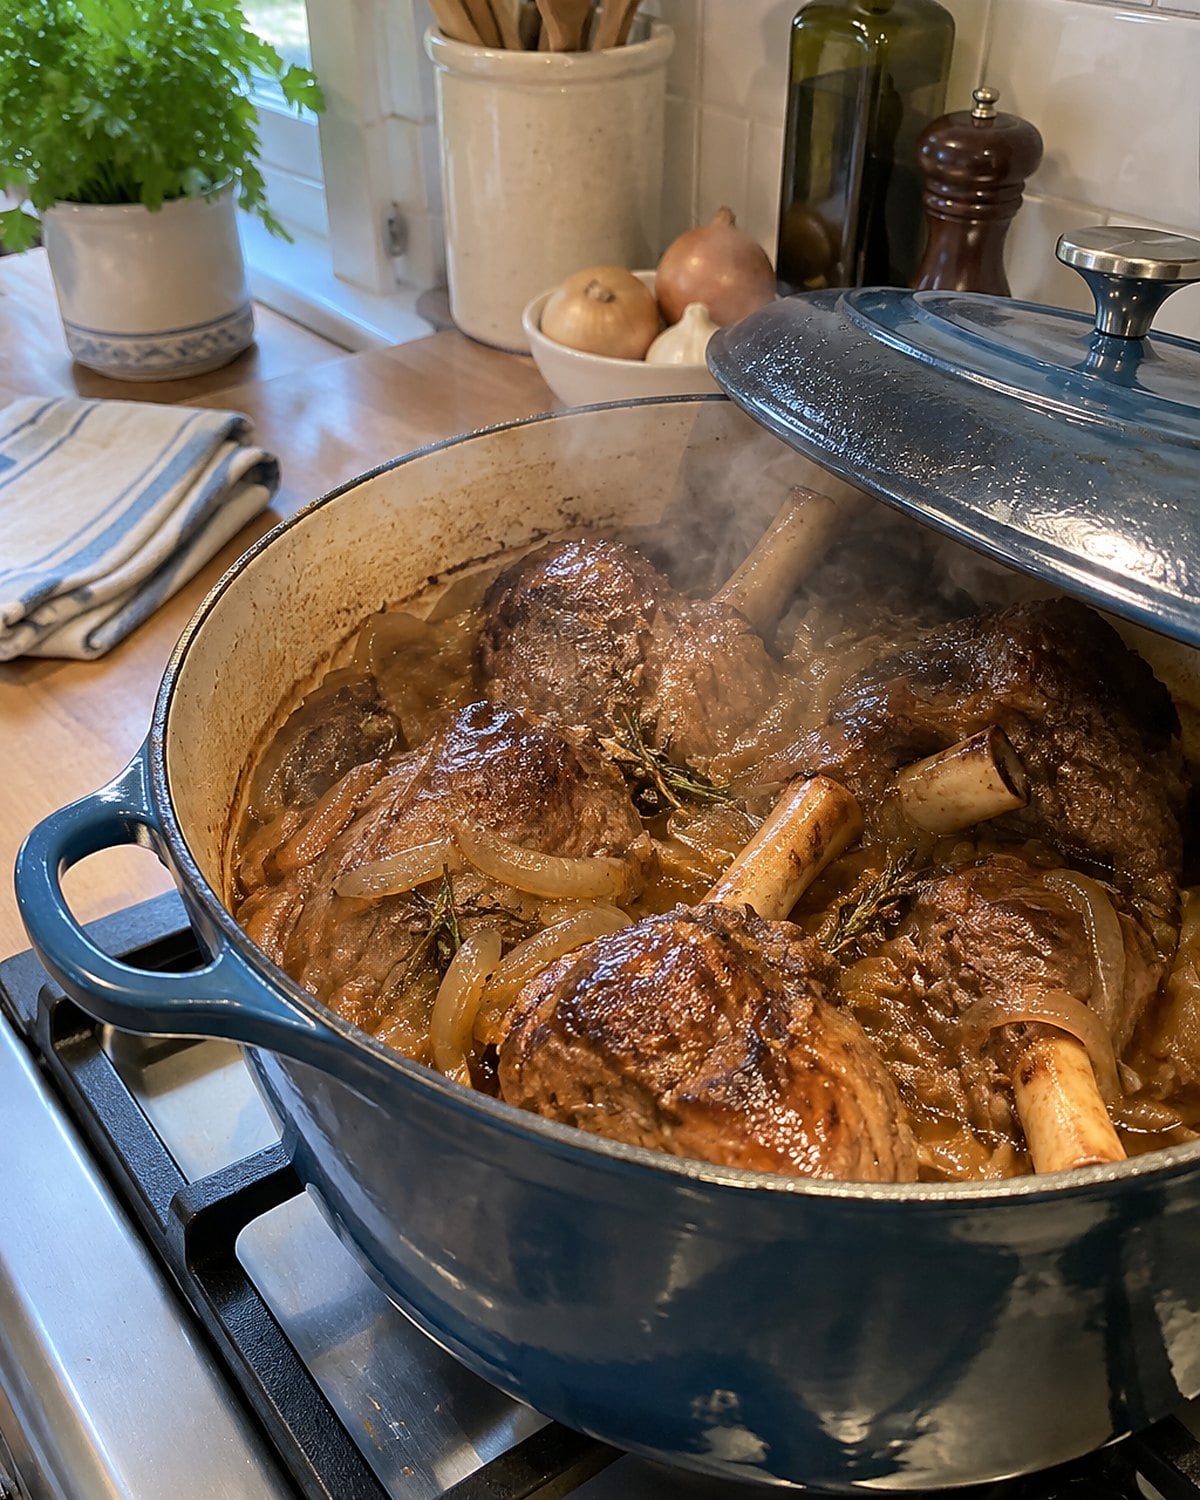
Lamb shanks have the shape of a special dinner and the habits of a working muscle. They start firm. A covered braise turns the meat tender and gives the liquid a deep flavor.
Brown the shanks in a heavy pot, then take them out while you cook onion and garlic. Add liquid, scrape the browned bottom, and return the lamb. Cover and keep the liquid at a low simmer. Turn the shanks if their upper surfaces look dry.
Check the thickest part with a fork. When the meat yields and pulls back from the bone, taste the sauce. If it still tastes sharply of wine, let it simmer after lifting out the meat.
One shank looks generous on a plate, yet its weight includes a large bone. Put it beside another lamb cut at the counter and look at what will reach the table. Then bring your choice home to that heavy pot.
Try it: Italian-Style Instant Pot Lamb Shanks With White Beans
#8 Lamb neck for two bowls
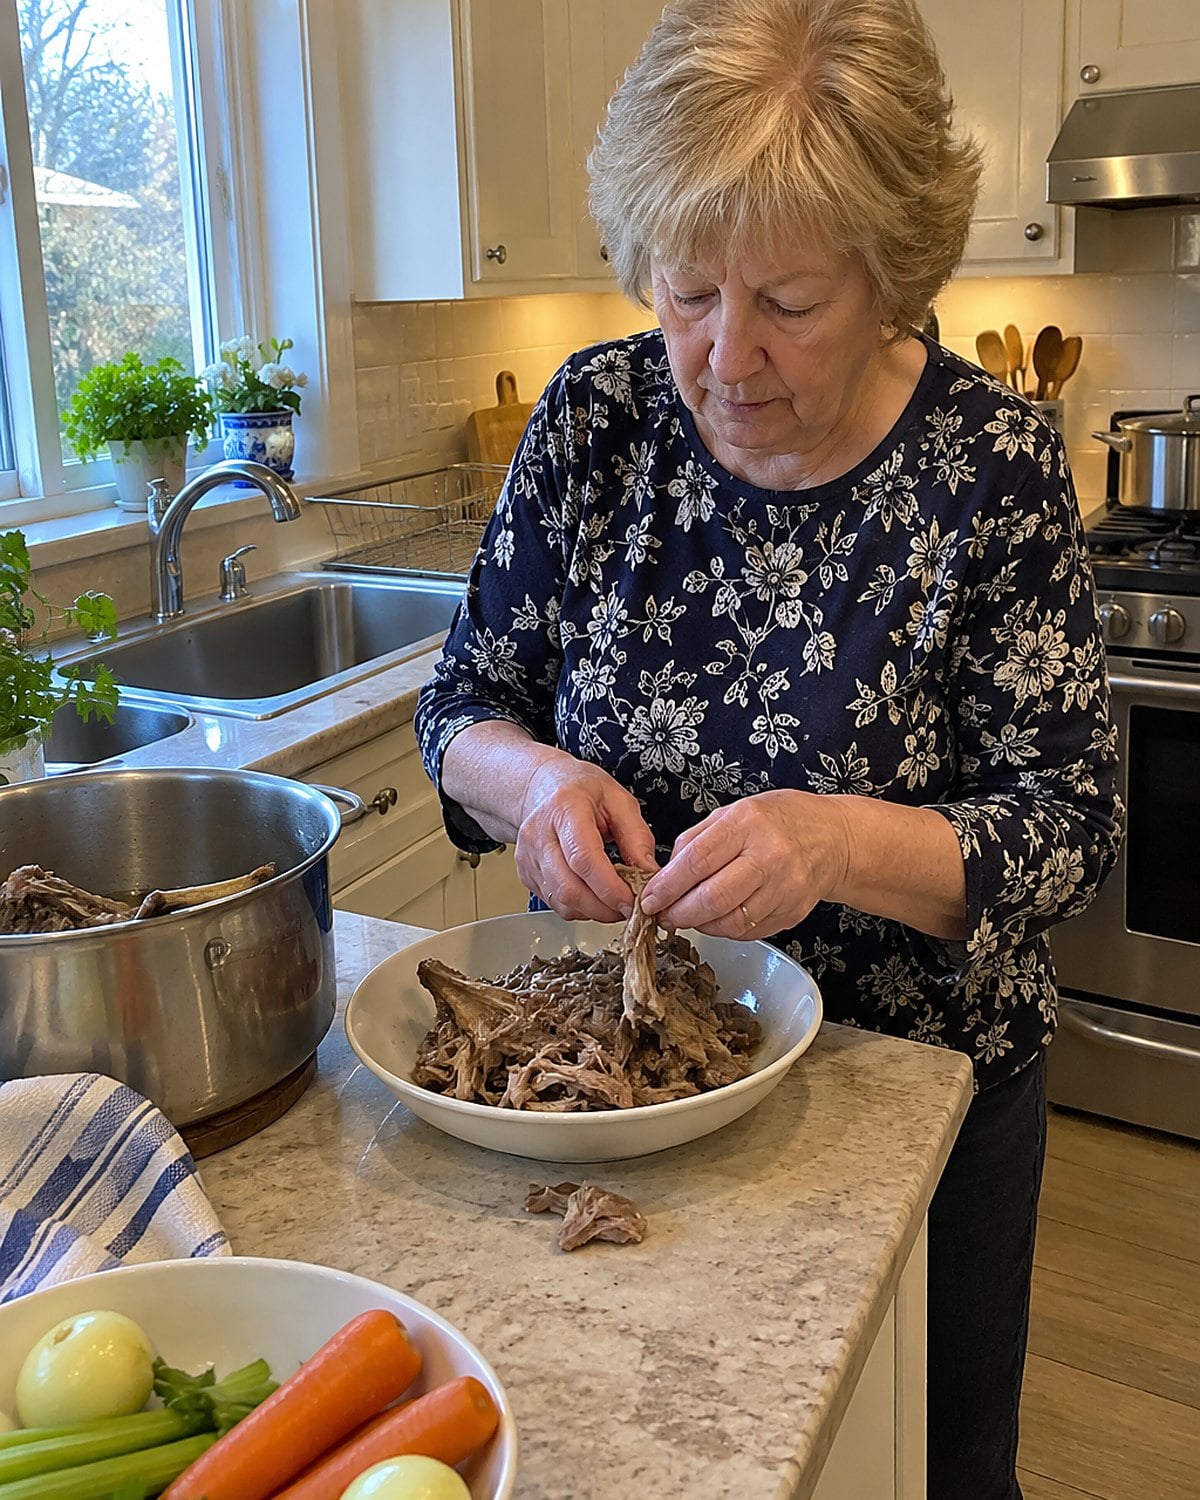
Lamb neck doesn't arrive looking like a tidy chop. It has bone, small pockets of meat, and connective tissue. That's why it belongs in a pot where the broth matters as much as the pieces you lift out.
Ask for the neck cut into pieces that fit your saucepan or Dutch oven. Brown them, add onion and liquid, and keep a lid on while the meat softens. Once it's tender, lift out the pieces and pick the meat from the bones. Return the meat to the broth.
For two bowls, add beans or potatoes rather than filling the pot with neck. Pick through the meat carefully for small bones before serving it to anyone, especially a child.
The soup won't look like a row of chops. It will smell like lamb when you lift the lid, with enough broth left for another ladle.
#7 Chicken backs and the broth pot
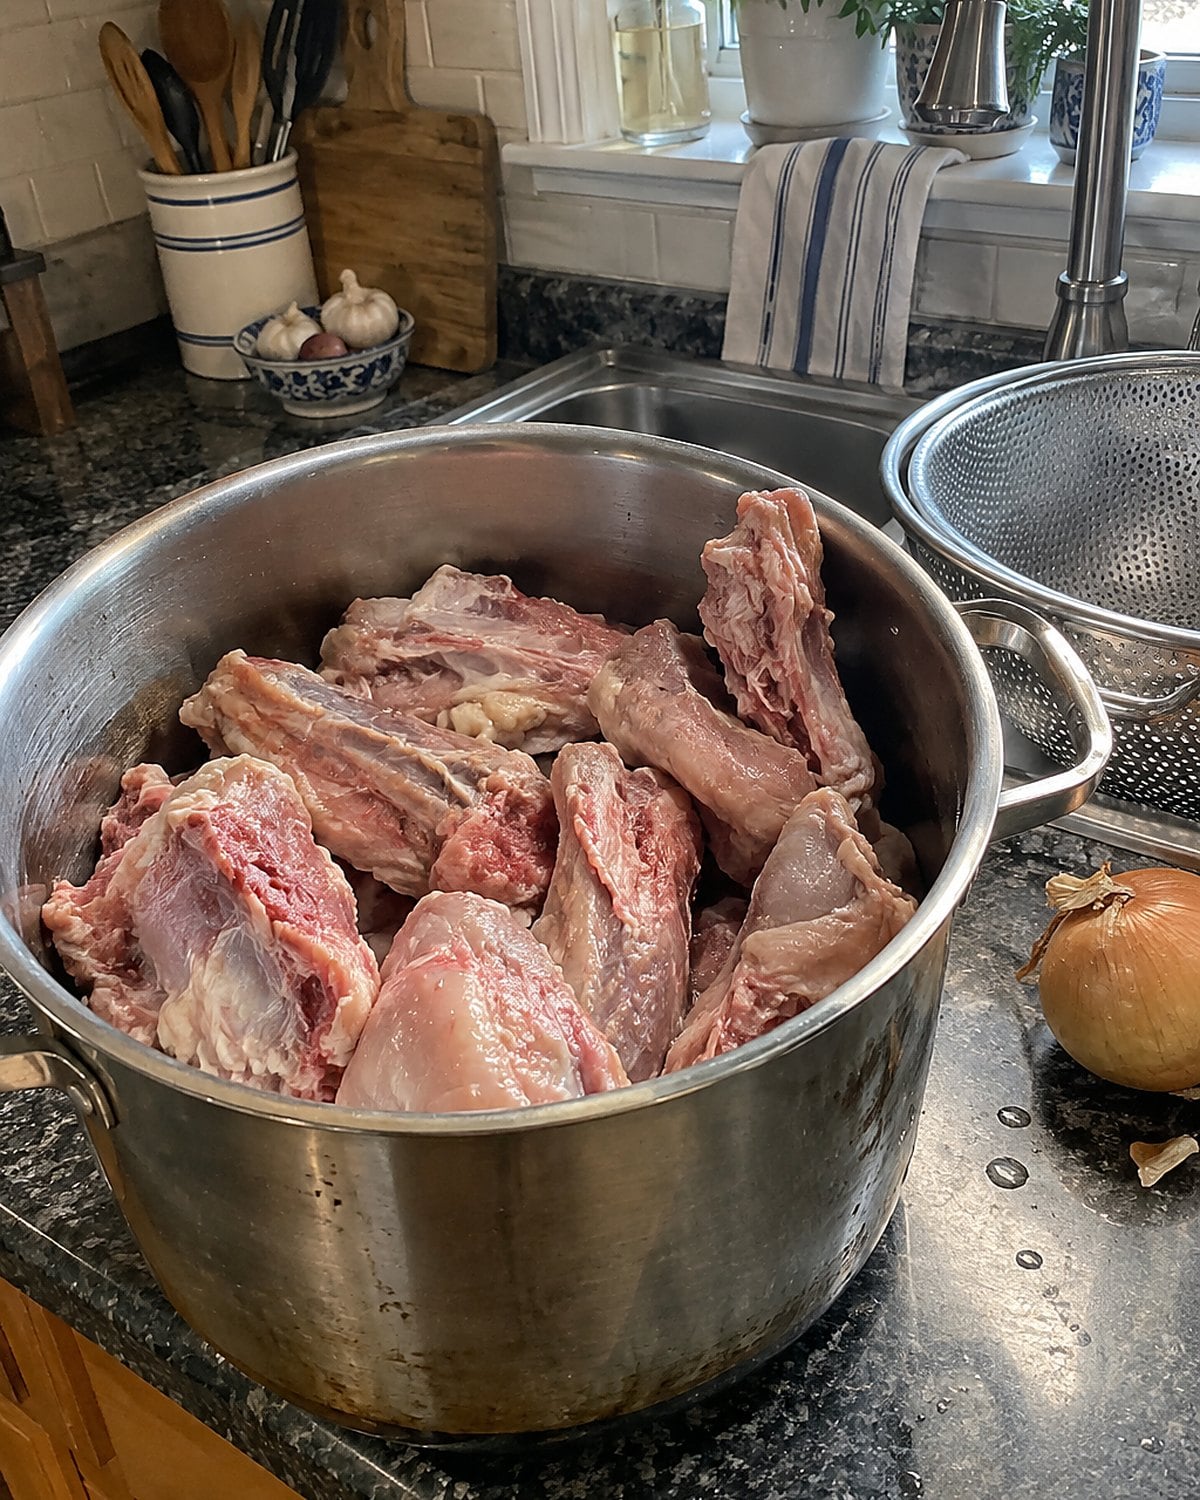
Chicken backs rarely looked grand in the old kitchen. Bones, skin, and small bits of meat gave stock a full chicken flavor. Now you might see backs packaged under a broth-friendly name.
Ask what is in the package before buying. A back isn't the same as a meaty leg. At home, put the pieces in a pot with onion and enough water to cover them. Bring the water to a simmer, then turn down the heat. A rolling boil stirs fat and particles through the broth.
Strain the finished stock and put it promptly into shallow containers to cool. The FDA's food safety guidance says to keep the refrigerator at 40°F or below. For storage times, use the USDA's cold storage chart; freeze stock you won't use within its guidance.
A back earns its space when you want broth. For chicken meat on the plate, reach for a meaty cut instead.
#6 Turkey wings after the holiday rush
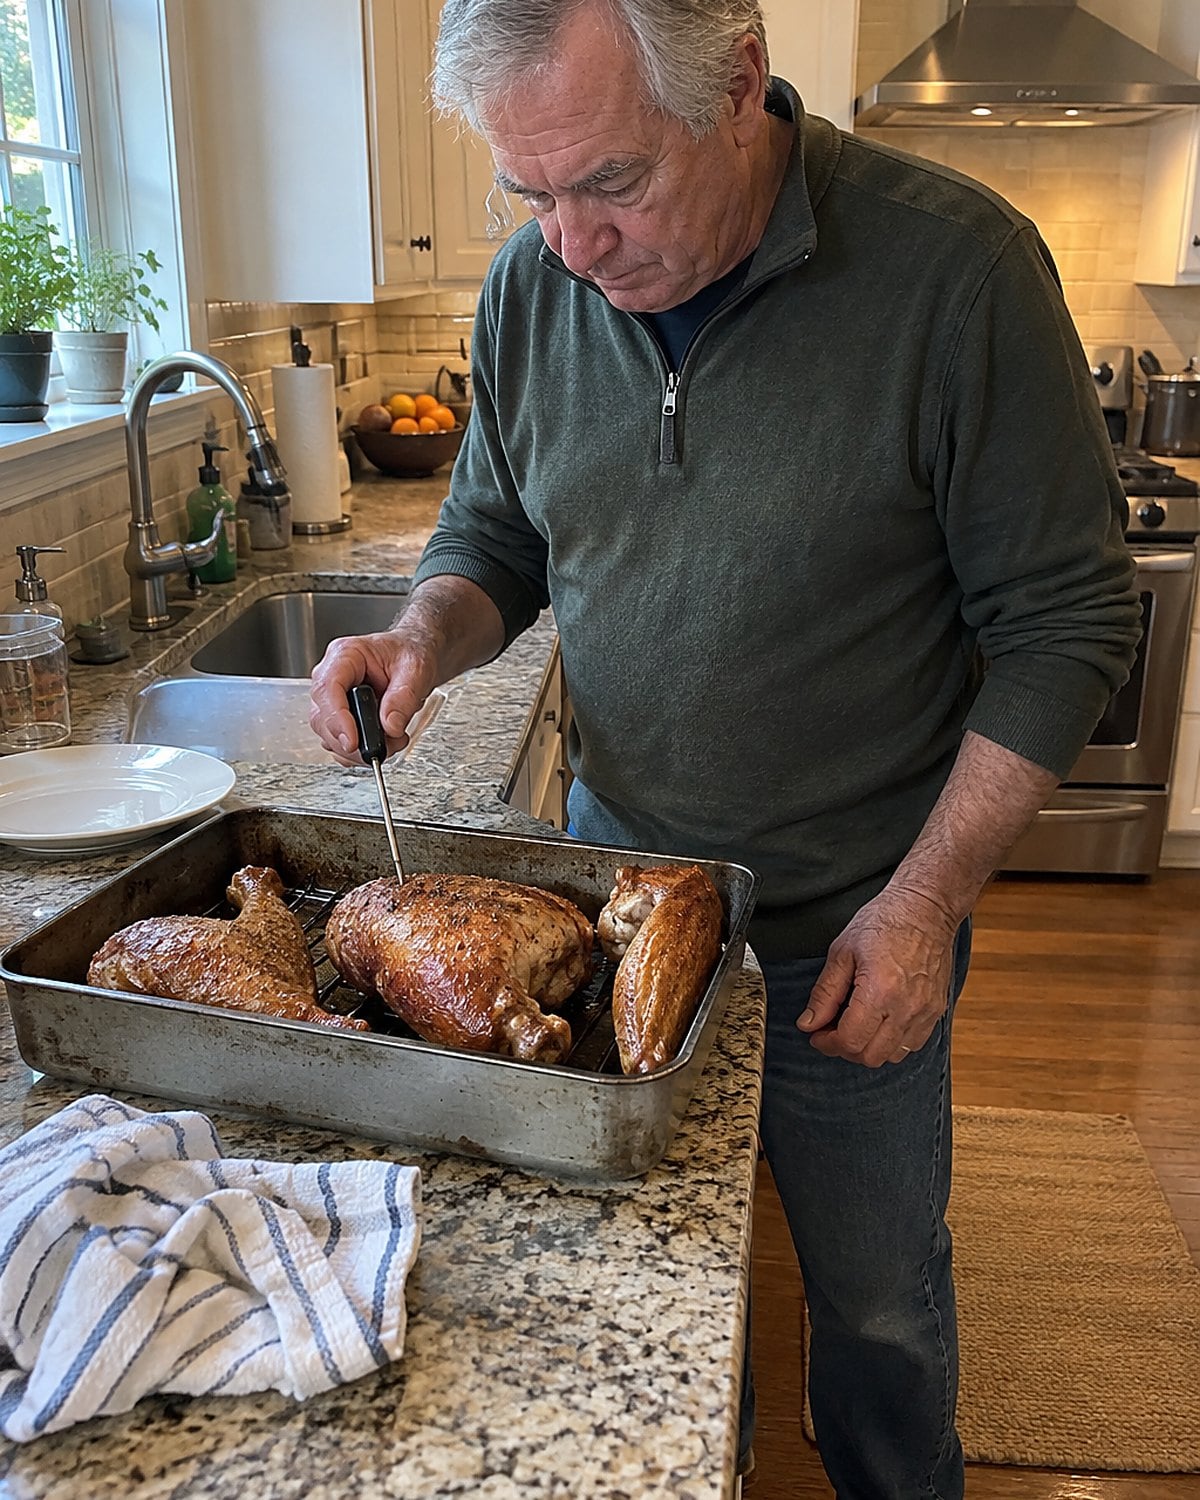
Turkey wings show up beside the holiday birds, then fade from the case. They're large and bony, with enough flavor for a pot of gravy. A whole turkey is a lot of bird when just two people are eating.
For a covered pot, brown the wings, add onion and a little liquid, and cook until the meat loosens from the bones. Pull it off once it's cool enough to handle. Watch for slender bones as you work, then strain the cooking liquid.
If you're roasting wings, don't judge doneness by browned skin. The USDA poultry guidance gives 165°F as the safe minimum. Put the thermometer into the thickest meat without touching bone.
Use the picked meat for sandwiches and the strained liquid for gravy. You get the holiday smell without clearing a shelf for the whole bird.
#5 Chicken feet at the butcher counter
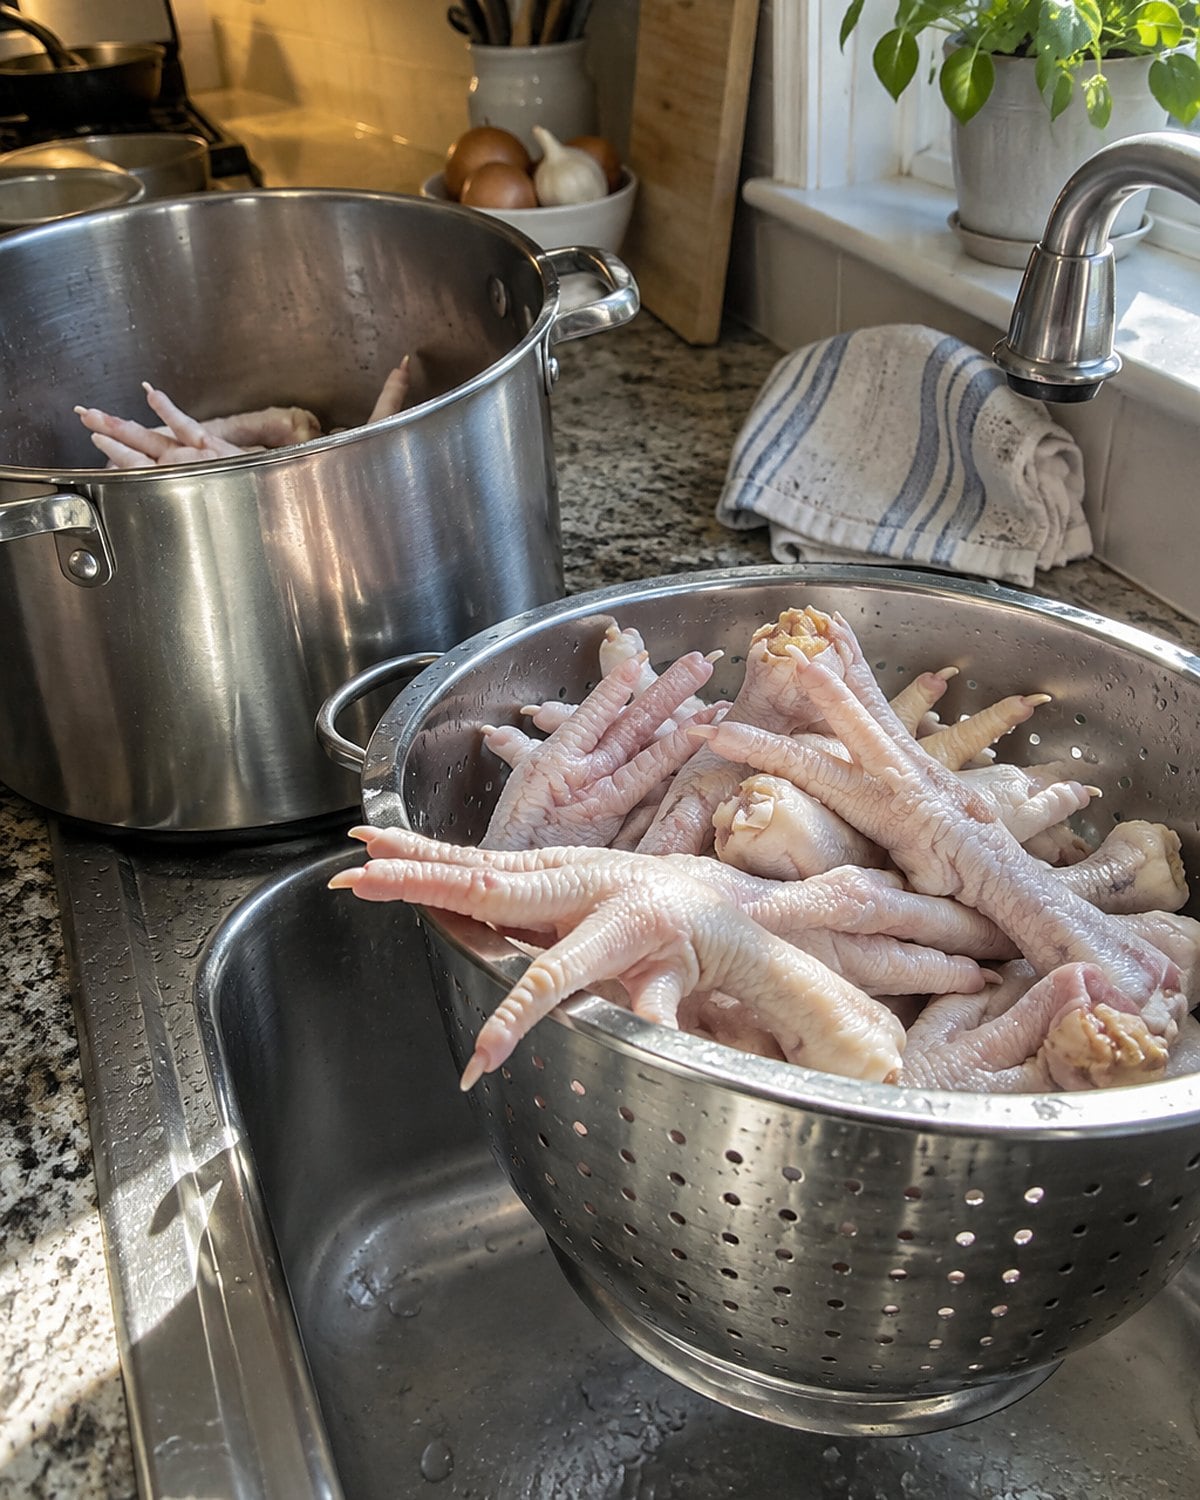
Chicken feet have a purpose in stock: skin, cartilage, and connective tissue give the chilled broth a firm wobble. You don't need to pretend they're a familiar Sunday roast to appreciate what they do.
Ask whether the feet have been cleaned and prepared for cooking. Inspect them at home and ask the butcher what trimming remains. Put them in a stockpot with other chicken parts for a fuller chicken flavor. Feet bring body, not the taste of roast meat.
Keep the stock at a low simmer rather than a churn. Strain it carefully, then move it promptly into shallow containers to cool. Cold stock that sets like loose jelly tells you gelatin came out of the connective tissue. It turns liquid again when heated.
At the counter, remember what you're making. If the broth also needs meat, ask what other chicken parts are available before the feet go in your basket.
#4 Pork jowl under a crisp edge
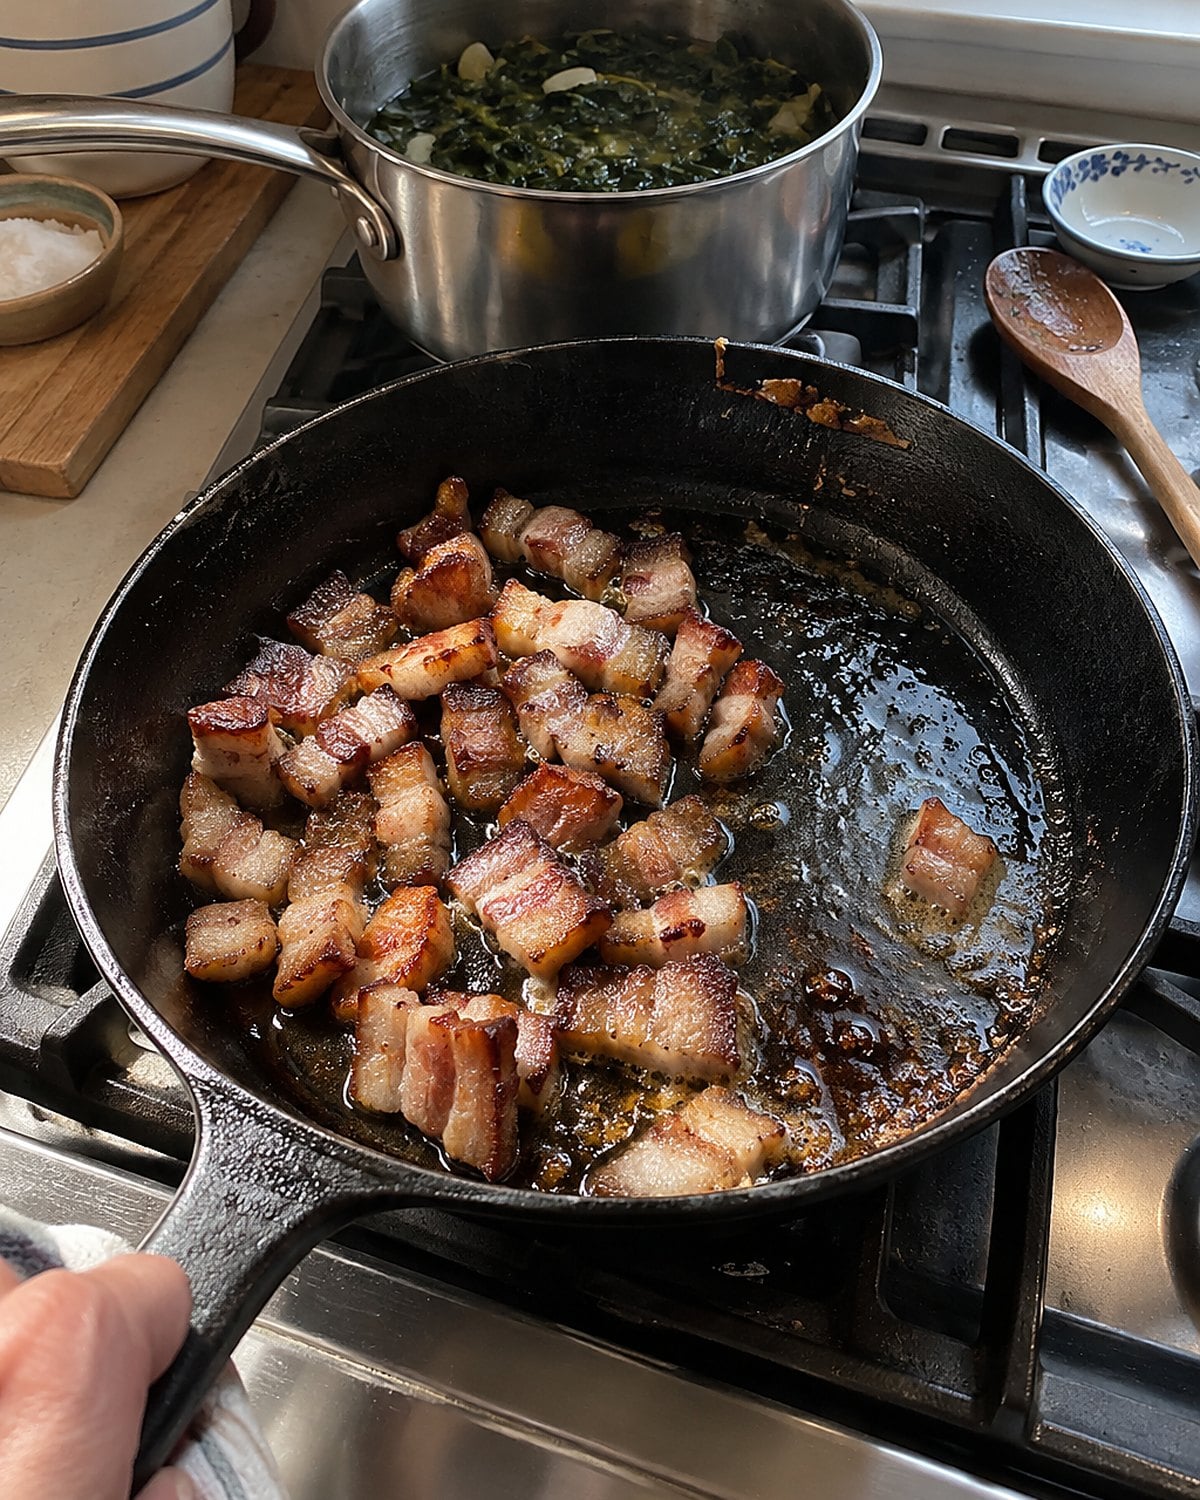
Pork jowl comes from the cheek area and carries plenty of fat. Cured jowl has its own following; fresh jowl needs a different plan. Check the label so you know which one you're taking home.
Slice cured jowl into small pieces and start it in a cool pan. The fat renders as the pan heats, leaving browned bits for greens or beans. Pour off what you don't need before adding the next ingredient. Too much rendered fat will bury those crisp pieces.
With fresh jowl, ask how it was trimmed and plan for a slow cook. The old kitchen treated a flavorful fatty piece as seasoning as much as supper.
Listen when the small pieces start to sizzle. Once they brown, slide in the greens and turn them through the pan.
#3 Beef tongue beside the high chair
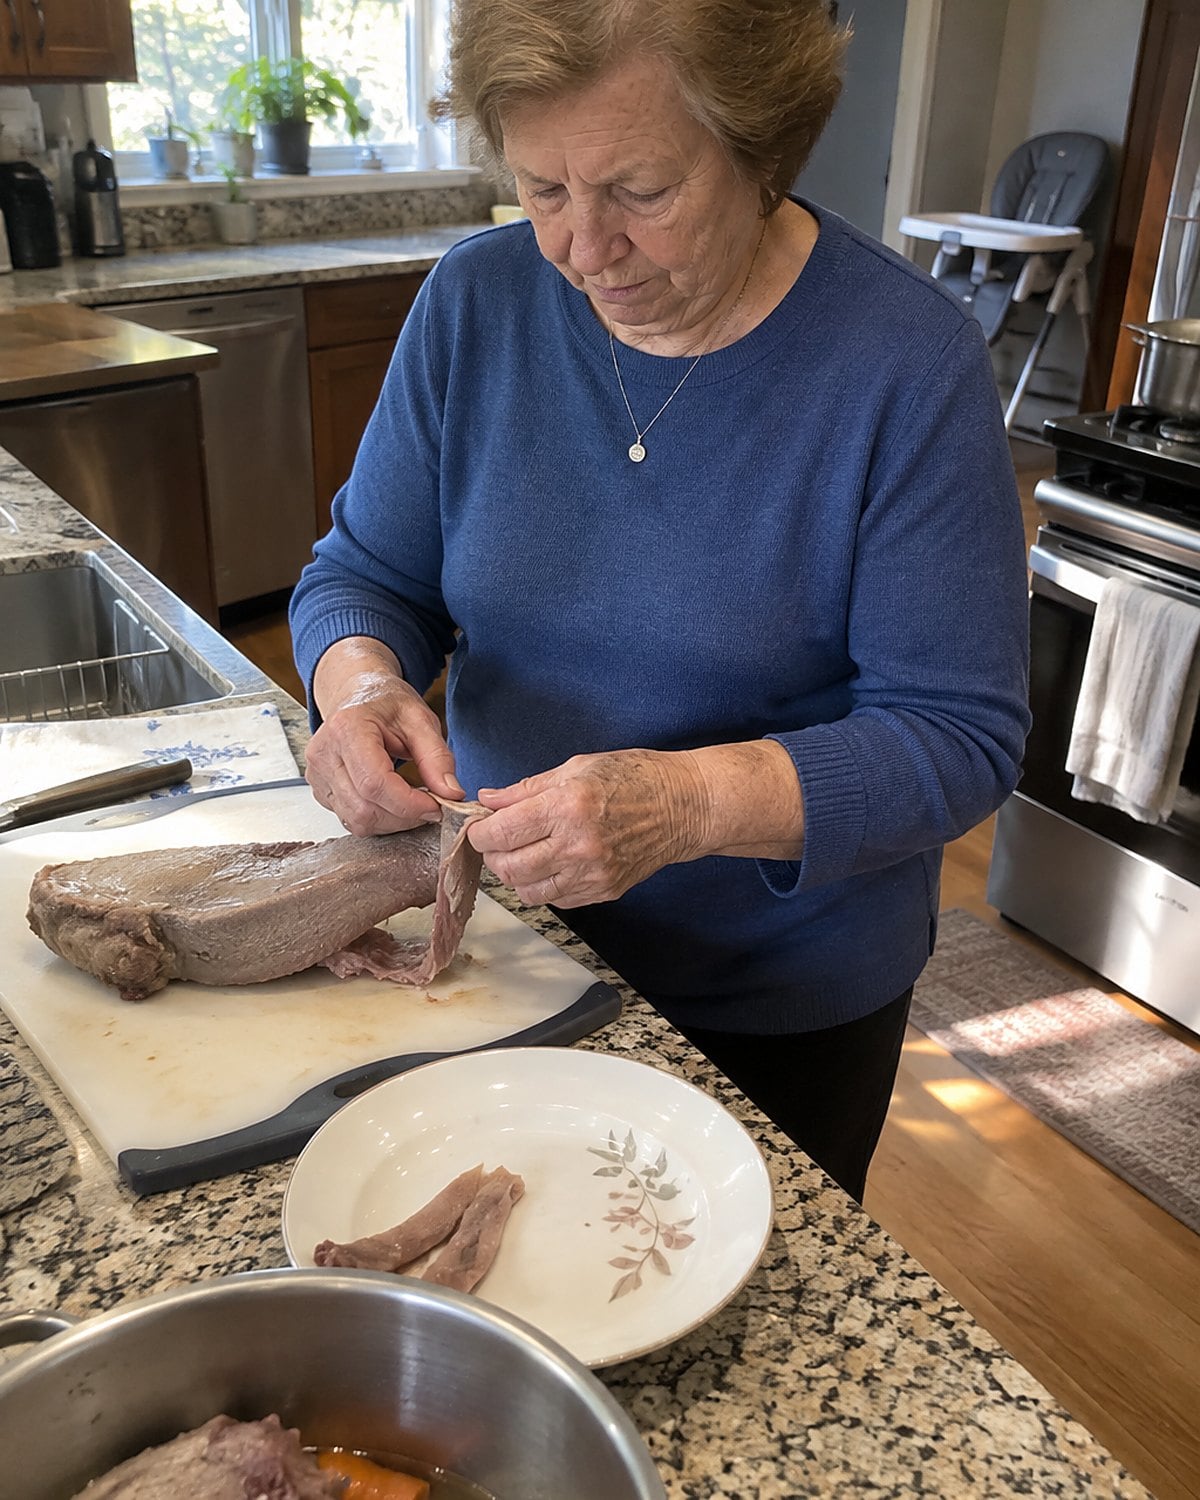
Beef tongue asks you to look past its shape. It's a dense muscle with an outer skin that comes off after cooking. Slice the peeled meat thinly, and you have tender beef for sandwiches or tacos.
Set the tongue in a covered pot with water, onion, and seasonings. Cook it until a knife slides into the thick part without resistance. Lift it out, let it cool enough to handle, and peel it while it's still warm. If the skin clings hard, return it to the pot.
Cut away firm bits at the base before slicing. A grandchild at the high chair doesn't need an anatomy lesson before tasting chopped beef. Check the piece for tough skin and make it easy to chew.
Look at the whole tongue when you buy it. Its skin and firm base won't reach the plate. Your mother's useful trick was knowing which parts to peel away before reaching for the bread.
#2 Beef heart in a hot skillet
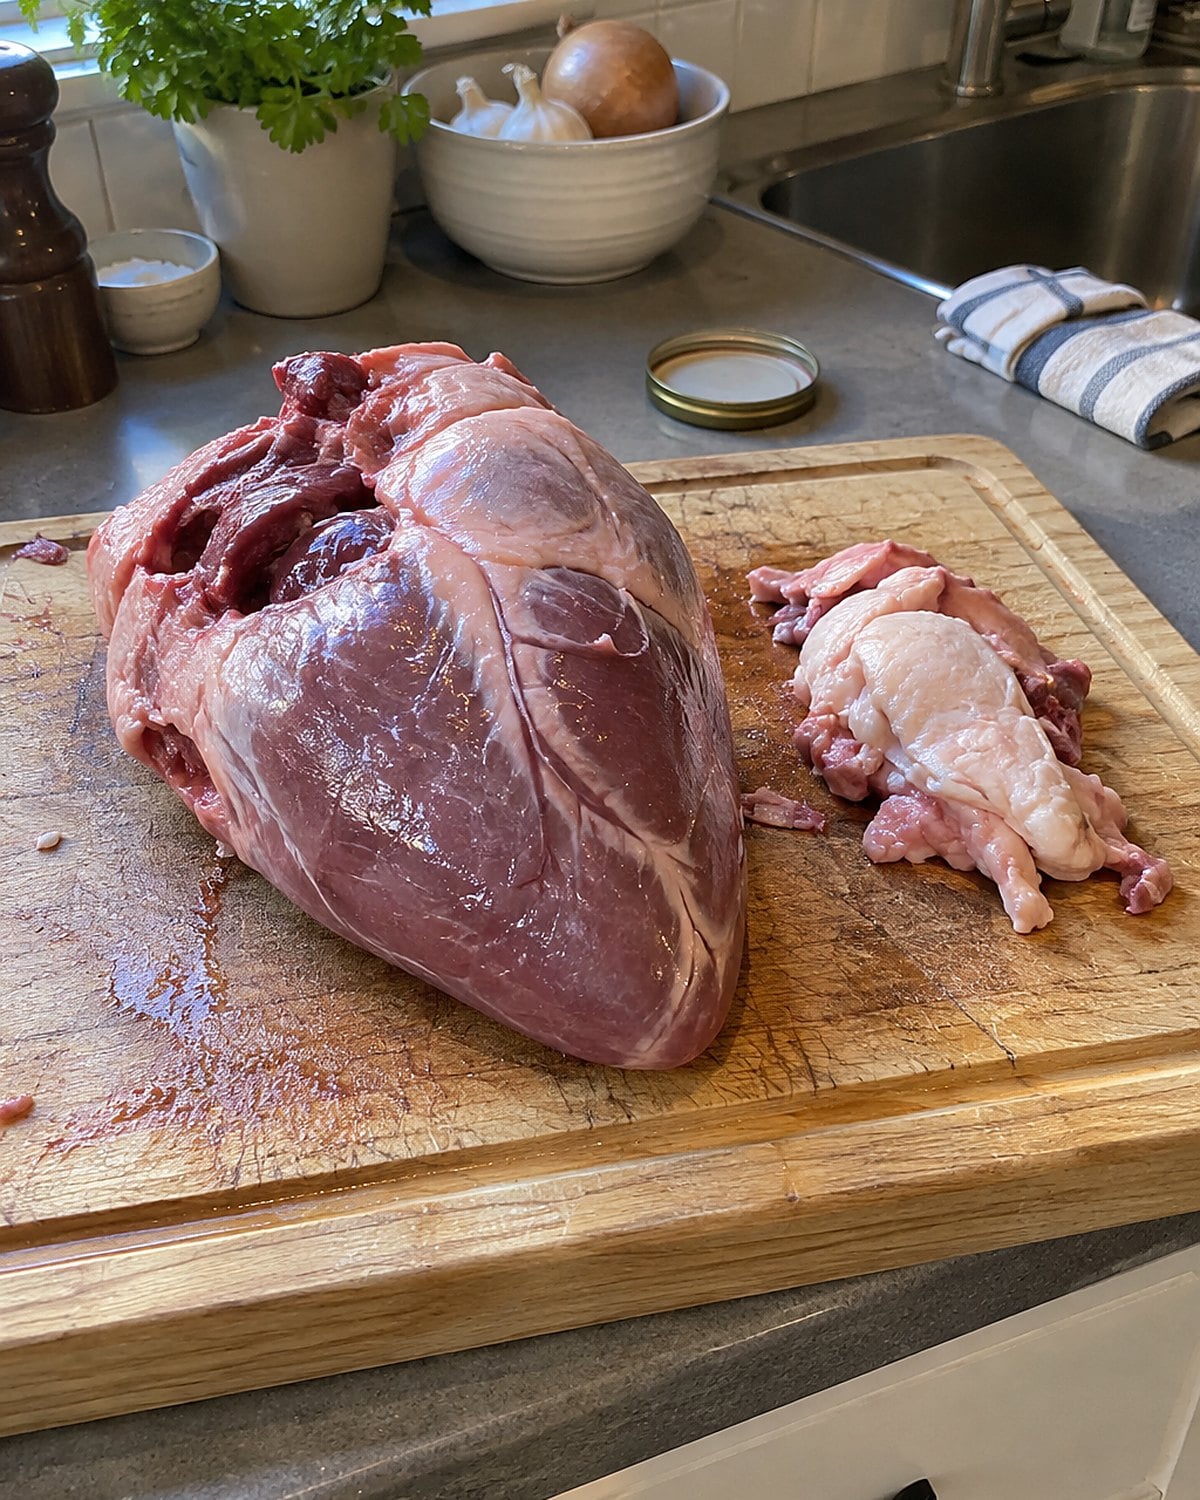
Beef heart is a muscle, not a shortcut to rich stew. It's lean and firm, with fat and connective tissue that need trimming. The butcher's work on that piece changes how much work waits for you at home.
Ask for the heart opened and trimmed if the shop offers it. At home, cut away the hard white parts and slice the lean meat thinly. A brief cook in a hot skillet keeps those slices from tightening into a tough bite.
If you're making a long-cooked dish instead, cut it into small pieces and give it the time that dish needs. The choice starts at the cutting board, not after the pan is hot.
Look at the trimmed piece beside other lean beef. Buy heart when you want its beefy flavor and have time for the knife work. Put the slices in the skillet without piling them up.
#1 The brisket slices on the cutting board
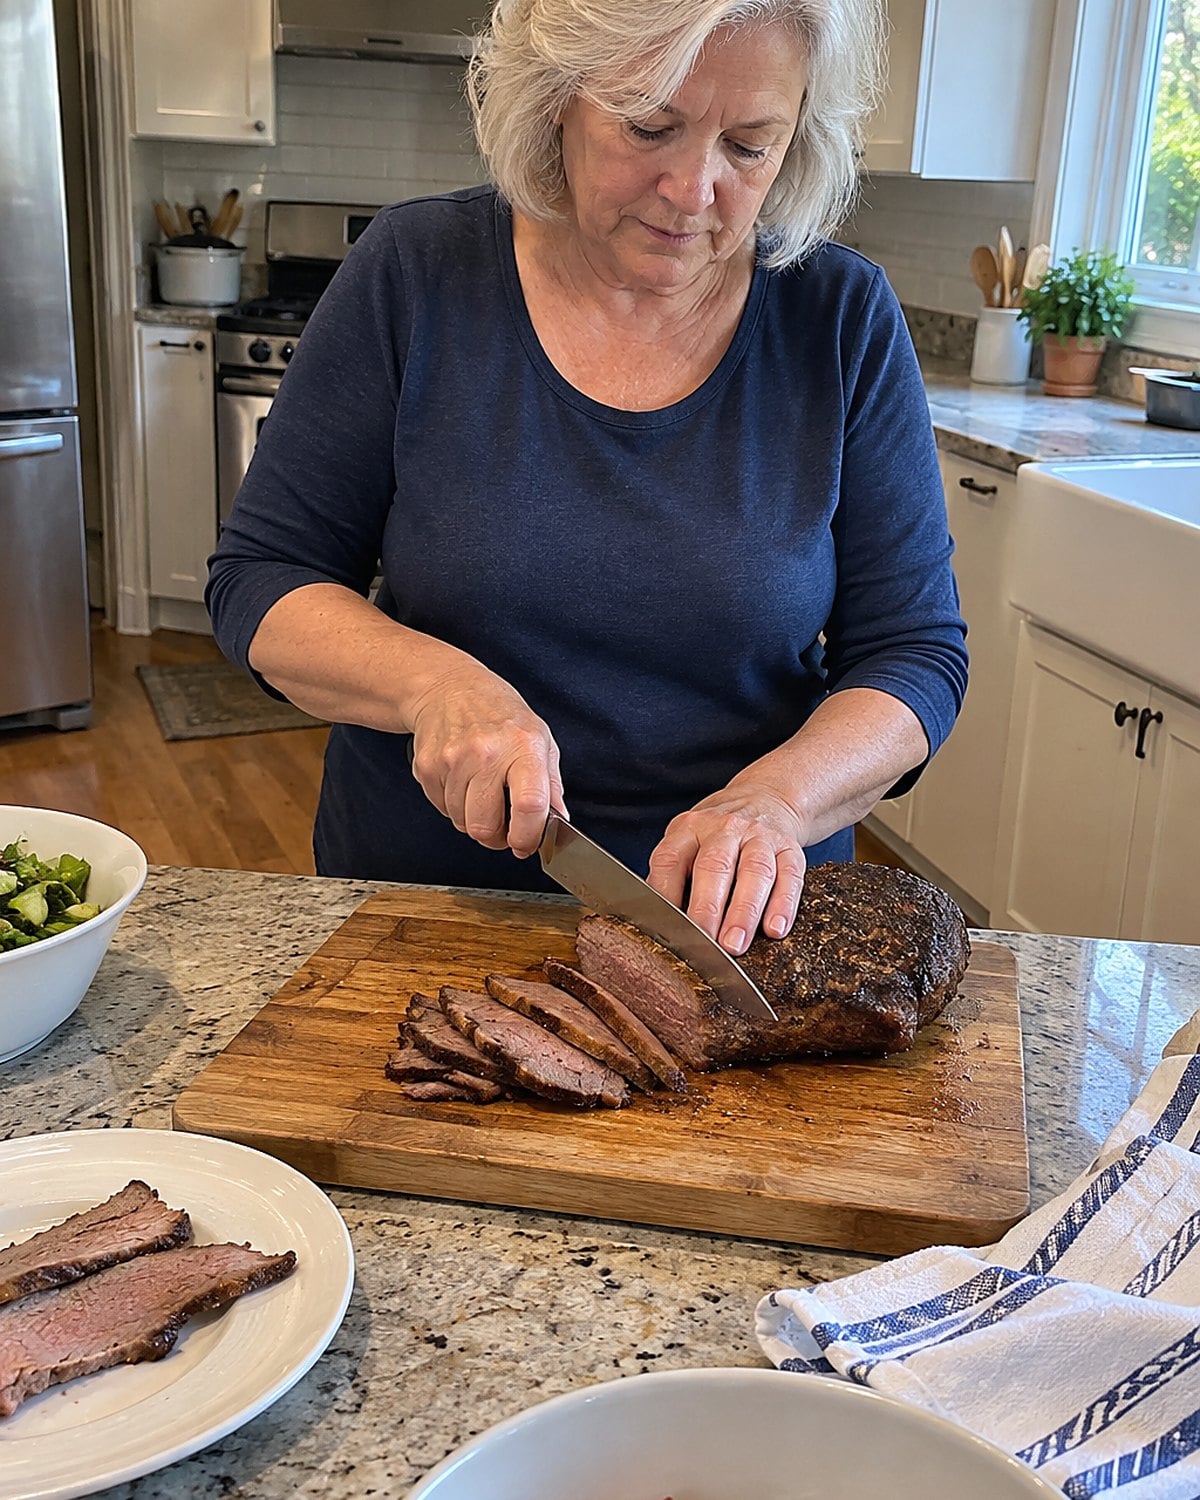
The brisket has rested. The gravy is warm. Now take one look at the grain before the family gathers around the stove, because the direction of your knife still matters.
Find the long fibers on the surface and set the blade across them. Make a thin slice and bend it between your fingers. Short fibers let it yield; long strands pull against you. If the slice feels stringy, turn the brisket and cut from another side.
The grain changes direction on a large brisket. Stop when the lines turn, move your board, and start across them again. Keep the slices together as you work so they hold their warmth.
This is the last bit of cooking your mother did before serving a tough cut. No extra hour under the lid will fix slices cut along the grain. Set a few in the gravy, then carry the board to the table.
The bottom line
These cuts became specialties because patient cooking makes tough muscles, bones, and overlooked parts worth eating. The pot didn't change. The tags did.
The well-prepared version of you has looked through the wrapping, picked the right pan, and left room in the freezer for what won't be eaten tonight. Which cut from your old kitchen would you bring home now?

Leave a Reply