In this beginner-friendly recipe, we are going to teach you how to make super easy Instant Pot chicken breasts and gravy. With detailed instructions, step-by-step photos and cooking tips, you will have perfectly cooked, succulent chicken and flavorful gravy all prepared in one pot. Great for dinner with your favorite side or as part of meal prep.
In This Post:
- ℹ️ Recipe Overview
- 👩🍳 How To Make It
- 🥦 What To Serve With
- 📝 Full Recipe
- ⭐️ Comment On & Rate This Recipe
👉 Want more easy, tasty chicken recipes? Check out our Instant Pot poached chicken breast, easy shredded chicken here, and for more inspiration explore these 47 Best Instant Pot Chicken Recipes.
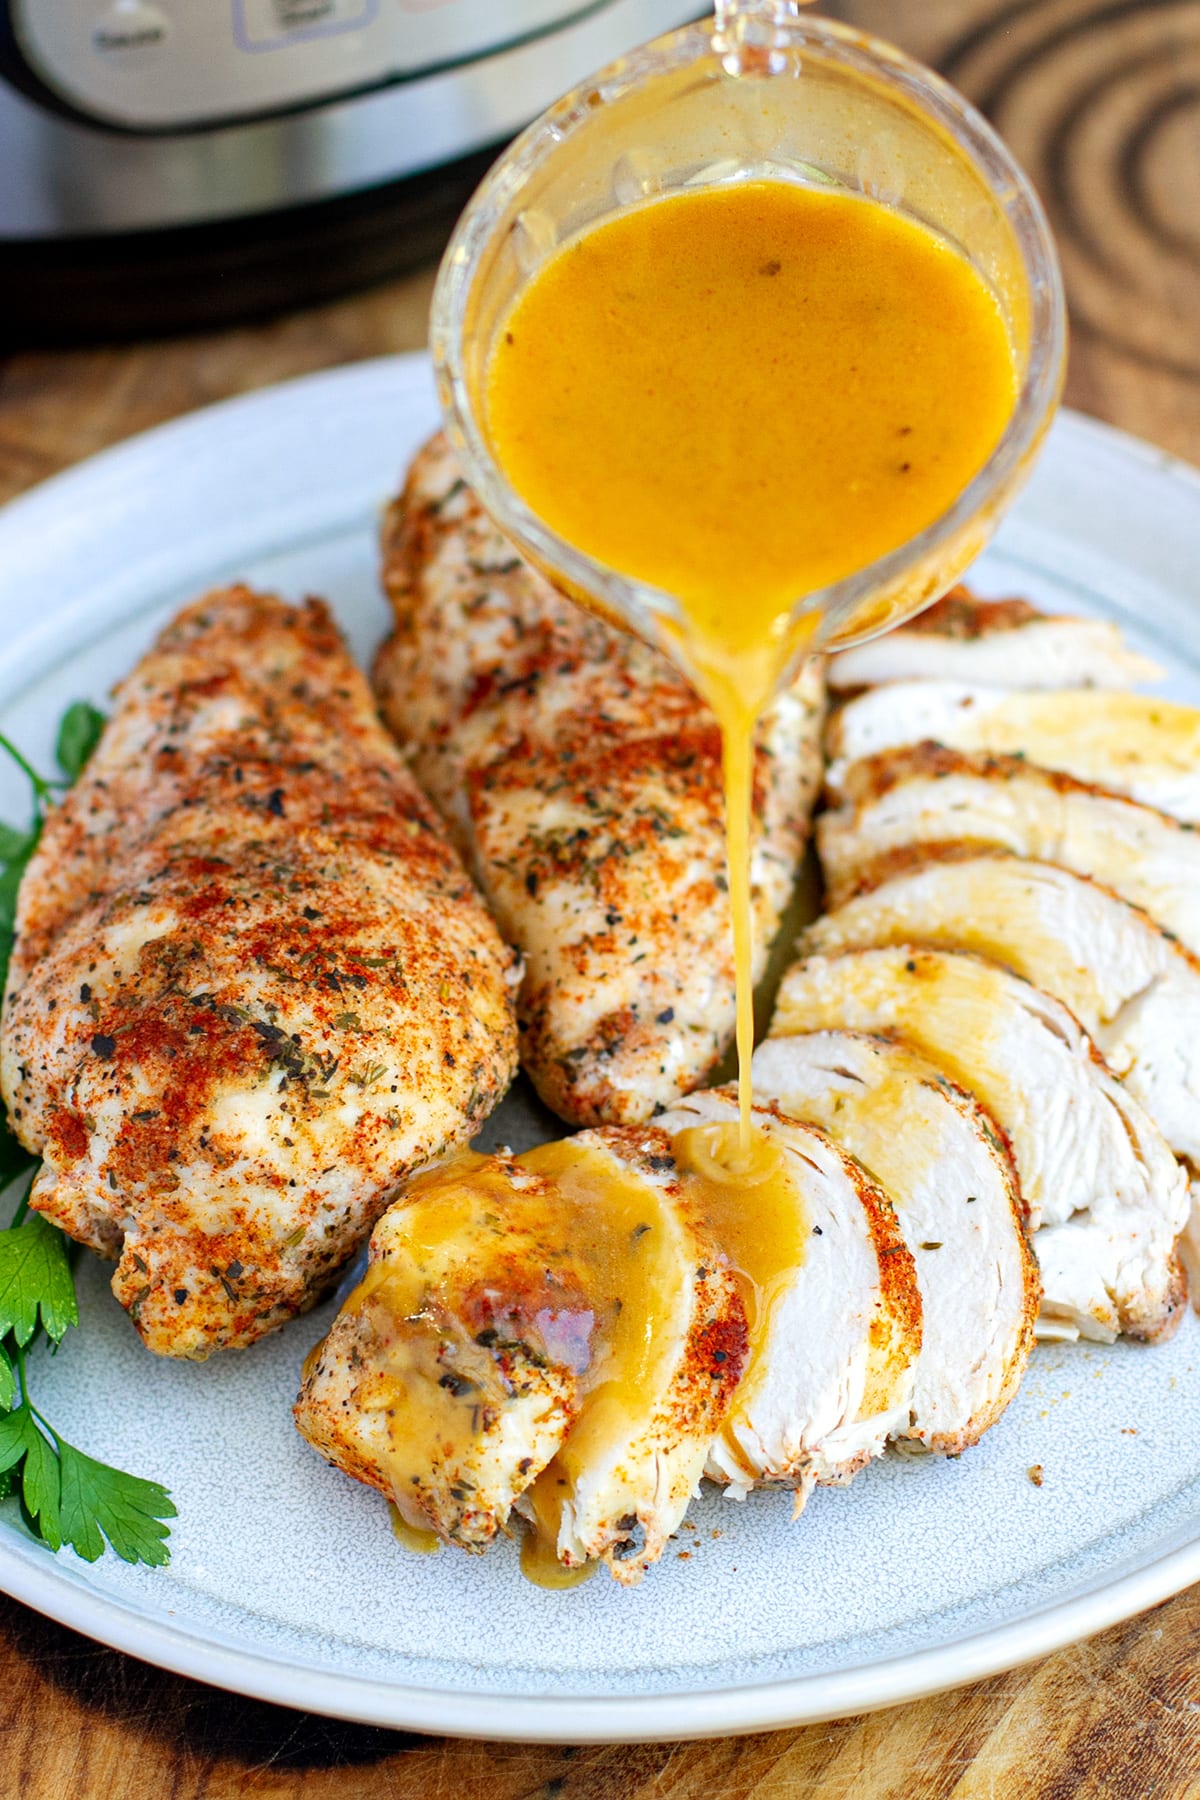
Instant Pot Chicken & Gravy
Cooking chicken breasts in the Instant Pot is super easy, although there are a few little tricks to make sure your meat is succulent and full of flavor. As well as making the chicken, this recipe includes Instant Pot gravy made using the cooking broth which you make once the meat is done.
Pressure cooking chicken breasts is fast and easy and you will be surprised by how tender the meat is. You can serve the chicken sliced and topped with gravy or you can make shredded chicken to use up in various dishes. While we did include gravy in the recipe, you don't have to make it. Oftentimes, you might want to just make the chicken as part of meal prep, which you can then use in salads, sandwiches, wraps and so on.
How To Make Chicken Breasts In Instant Pot
Here are step-by-step instructions for making chicken breasts in the Instant Pot. We used Instant Pot Duo Nova 6-quart pressure cooker for this recipe.
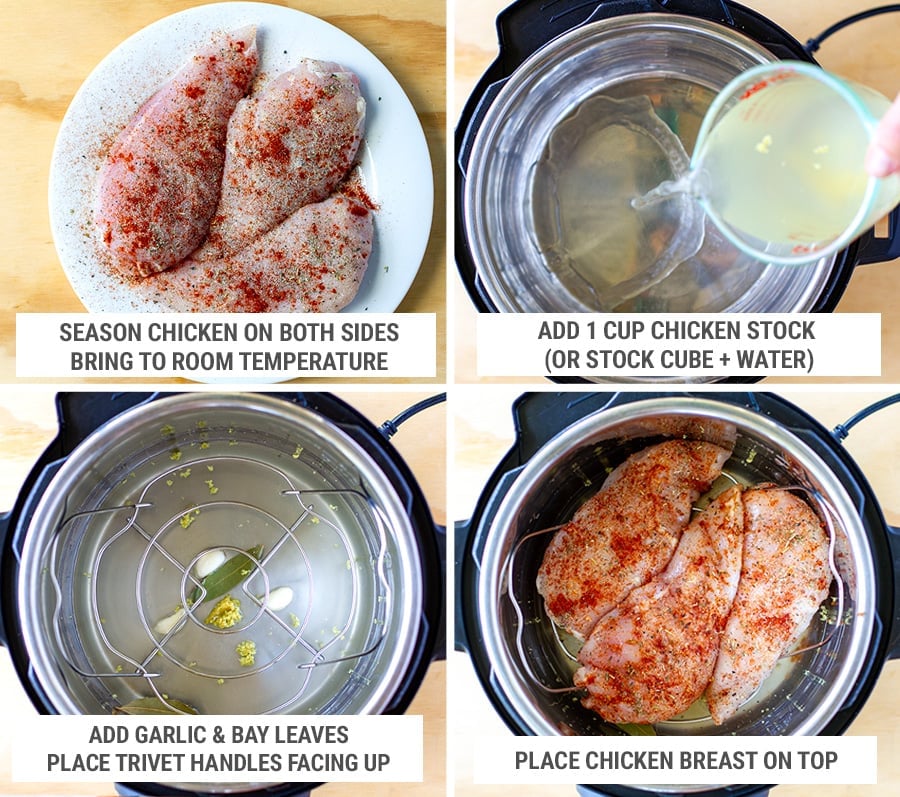
- Step 1. Season the chicken breasts evenly with salt, pepper, paprika, garlic and onion powders on both sides. Leave to come to room temperature if you just took them out of the refrigerator, about 15 minutes. This will ensure even cooking.
- Step 2. Add the chicken stock (we used a stock cube and water), garlic cloves and bay leaves to the Instant Pot. Place the trivet on top with handles facing up. Place the chicken breasts on top of the trivet.
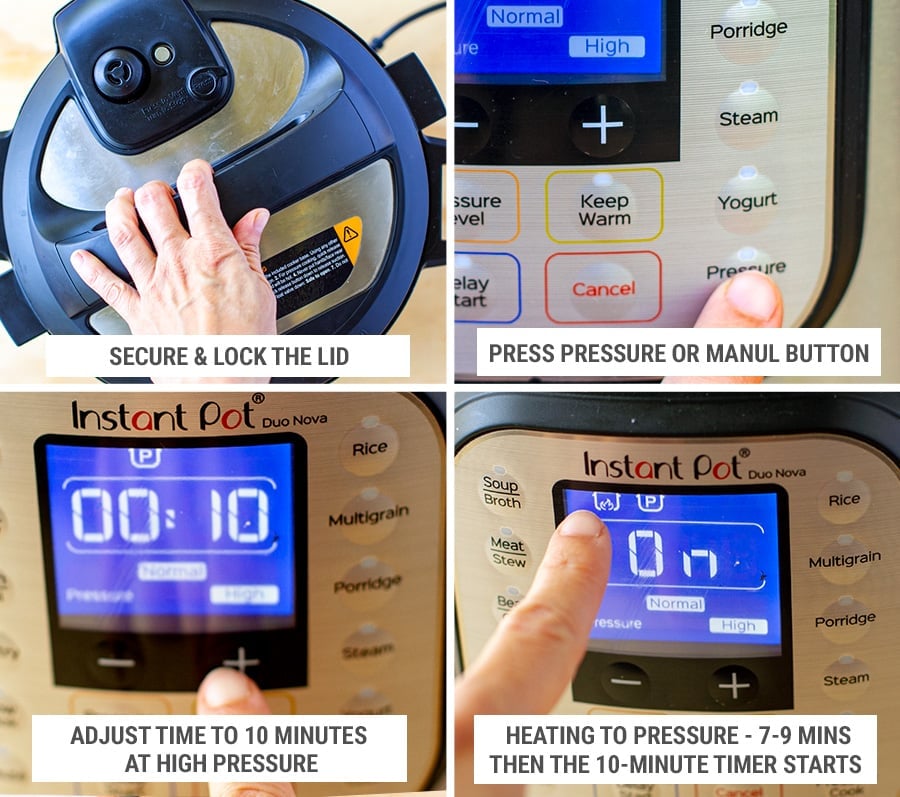
- Step 3. Secure and lock the lid; make sure the pressure handle is pointing to Sealing on Duo Classic. Select Manual/Pressure Cook and adjust the timer to 10 minutes on HIGH pressure. After a few beeps/seconds, the ON sign will come on indicating the pot is heating up and the pressure is building; pressurizing will take about 5-7 minutes and then the 10-minute timer will begin.
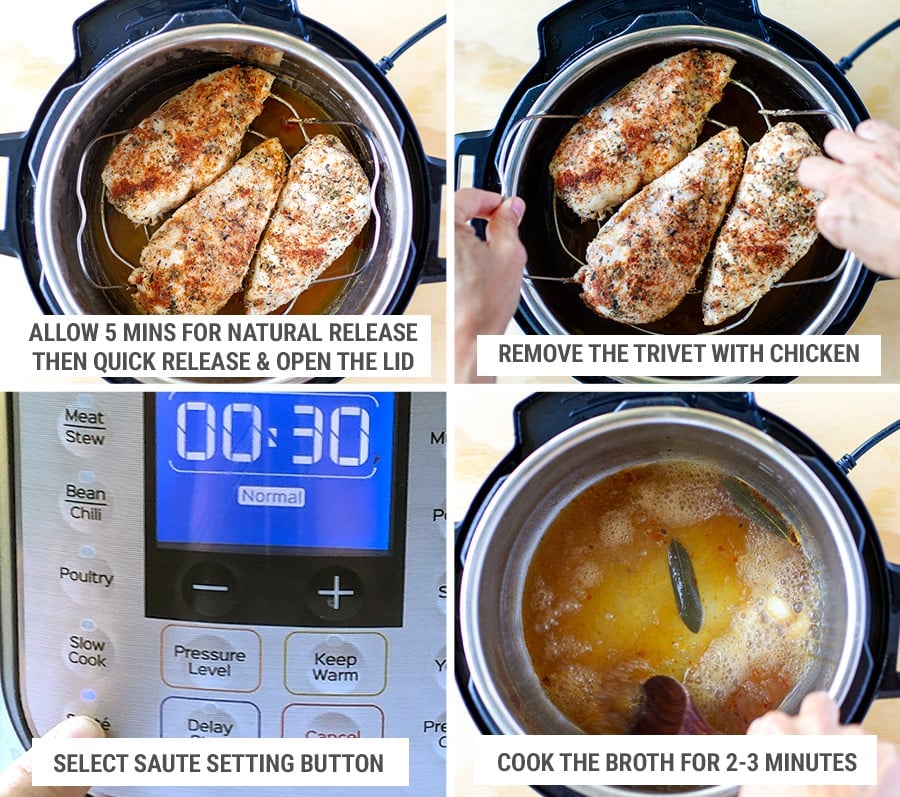
- Step 4. Once the timer is done, allow the pressure to release naturally for about 5 minutes. Then use the quick release method to let off the remaining pressure (press the steam knob down or point to Venting on older models). Carefully open the lid and use the handles to remove the trivet with the chicken. Place the chicken on a plate or a cutting board and cover with foil or a lid to keep warm.
- Step 5. Now we're ready to prepare Instant Pot gravy using the cooking broth leftover in the pot. Press the Saute button once, it will say 30 minutes as a default timer. Allow the broth liquid to come to simmer and cook for 2-3 minutes, stirring a few times. This will evaporate some of the liquid and thicken it.
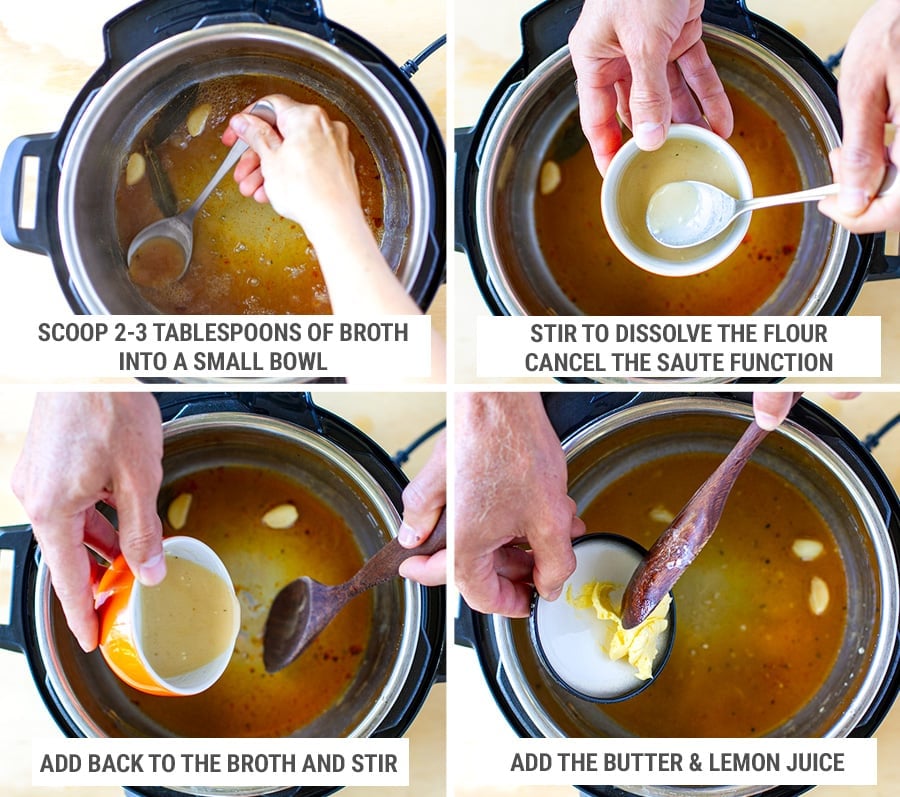
- Step 6. Press Cancel to stop the Saute function at this stage. While still very hot, scoop a couple of tablespoons of the liquid into a small bowl. Dissolve a tablespoon of flour or cornstarch in this liquid; pour and stir back into the stock. Add the butter and lemon juice and stir again.
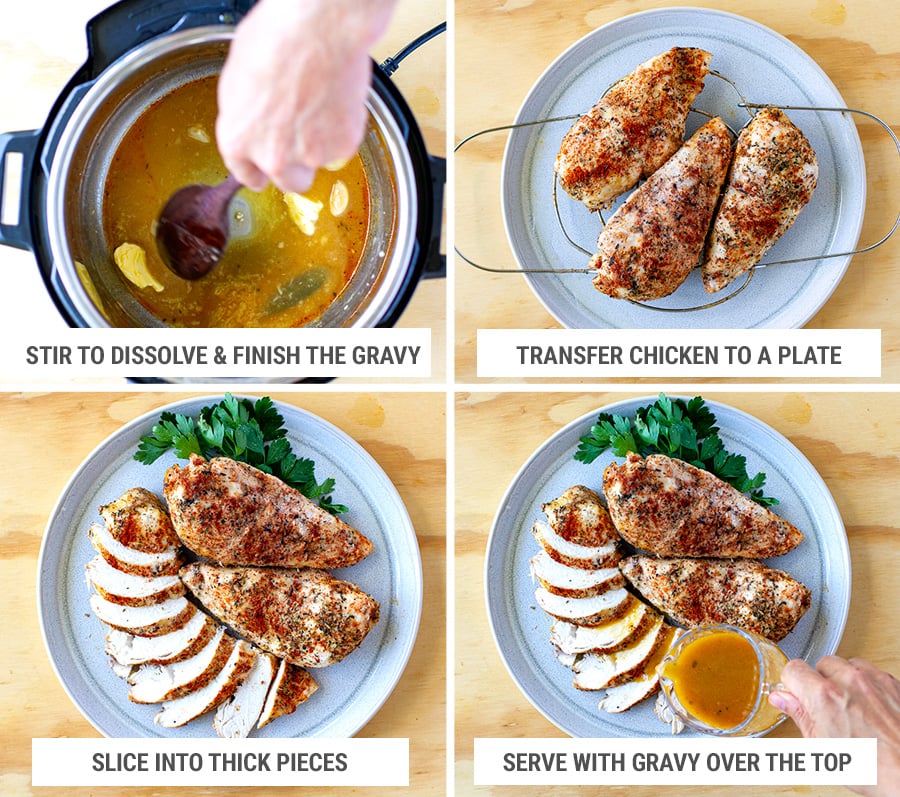
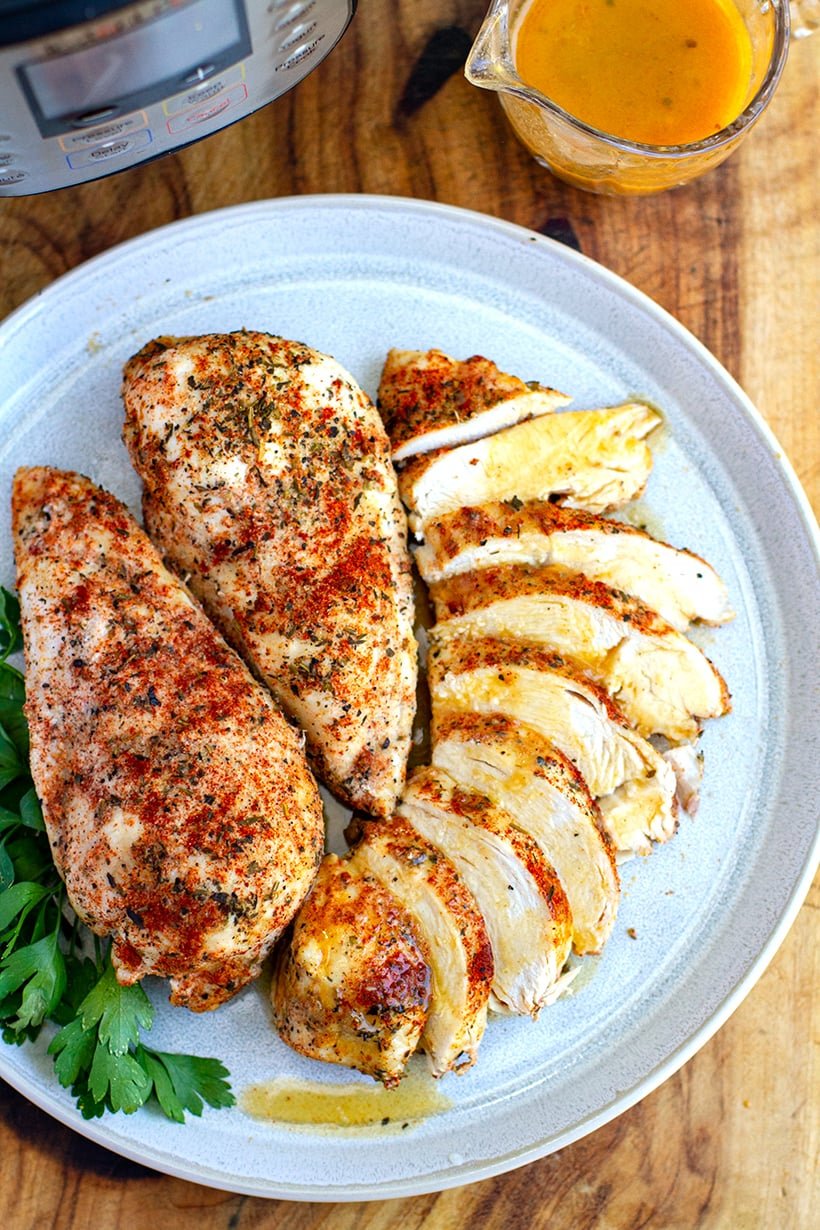
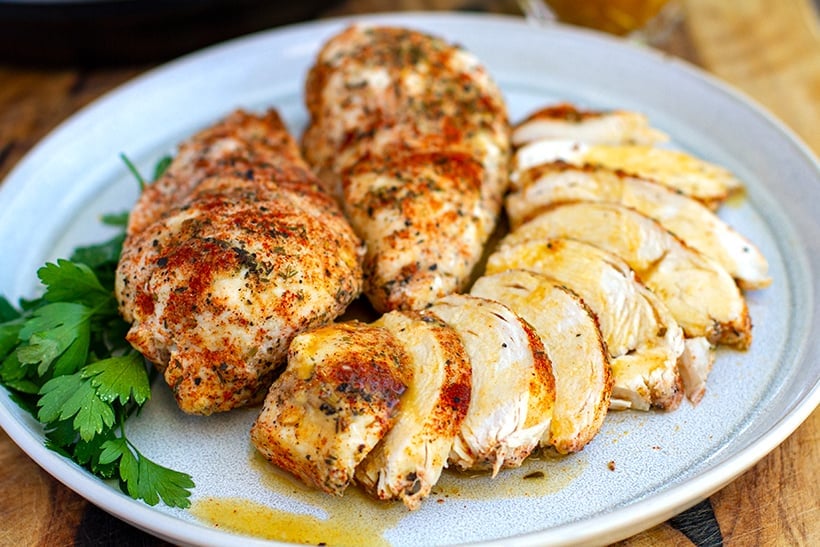
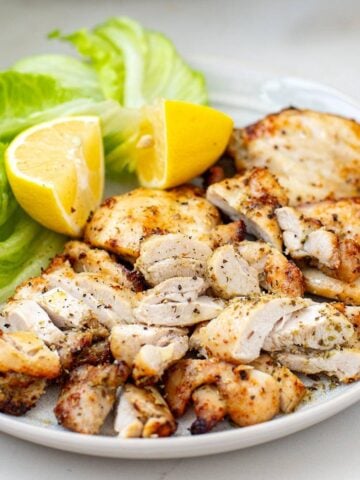
- Step 7. Slice the chicken breasts into thick pieces and pour the gravy on top or serve on the side.
Here is a handy recipe from iFoodReal on how to cook frozen chicken breasts in the Instant Pot.
Serving Instant Pot Chicken Breasts
If you do make this Instant Pot chicken and gravy as we did here, you can serve it with your favorite side dish such as our easy mashed potatoes, simple white rice or Instant Pot quinoa.
For a low-carb or Whole30 version, you could serve some steamed garlic broccoli or green beans on the side.
You might like more recipes from our Instant Pot For Beginners series:
- How To Cook Rice In Instant Pot
- Instant Pot Tuscan Chicken Pasta (Step-By-Step)
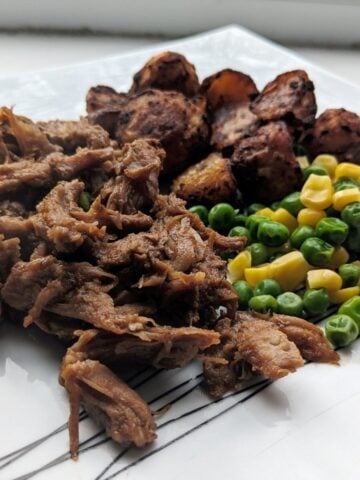
- Easy Instant Pot Pork Shoulder & Gravy (Step-By-Step)
- Instant Pot Settings & Buttons Explained (Not Just For Beginners!)
Full Recipe
Find the full list of ingredients, instructions, and a nutritional breakdown below. If you have questions or cook this recipe, please let us know in the comments, and make sure to rate this recipe so it’s easy for others to find.

Rate This Recipe
Instant Pot Chicken Breasts & Gravy
Ingredients
- 3 chicken breasts skinless/boneless, about 0.5 lb / 270 g each
- 1 teaspoon salt
- ½ teaspoon pepper
- 1 teaspoon sweet or mild paprika powder
- 1 teaspoon garlic powder
- 1 teaspoon onion powder
- 1 cup low-sodium chicken stock
- 2 bay leaves
- 3 garlic cloves
To finish:
- 1 tablespoon butter or ghee for Whole30
- 1 tablespoon all-purpose flour see notes for other options, like Whole30-friendly
- 1 tablespoon lemon juice
Instructions
- Prep. Season the chicken breasts evenly with salt, pepper, paprika, garlic and onion powders on both sides. Leave to come to room temperature if you just took them out of the refrigerator, about 15 minutes. This will ensure even cooking.
- Add ingredients. Add the chicken stock, garlic cloves and bay leaves to the Instant Pot. Place the trivet on top with handles facing up. Place the chicken breasts on top of the trivet.
- Set & cook. Secure and lock the lid; make sure the pressure handle is pointing to Sealing on Duo Classic. Select Manual/Pressure Cook and adjust the timer to 10 minutes on HIGH pressure. After a few beeps/seconds, the ON sign will come on indicating the pot is heating up and the pressure is building; pressurizing will take about 5-7 minutes and then the 10-minute timer will begin
- Once the timer is done, allow the pressure to release naturally for about 5 minutes. Then use the quick release method to let off the remaining pressure (press the steam knob down or point to Venting on older models).
- Prepare the gravy. Carefully open the lid and use the handles to remove the trivet with the chicken. Place the chicken on a plate or a cutting board and cover with foil or a lid to keep warm.
- Press the Saute button once, it will say 30 minutes as a default timer. Allow the broth liquid to come to simmer and cook for 2-3 minutes, stirring a few times. This will evaporate some of the liquid and thicken it.
- Press Cancel to stop the Saute function at this stage. While still very hot, scoop a couple of tablespoons of the liquid into a small bowl. Dissolve a tablespoon of flour or cornstarch in this liquid; pour and stir back into the stock. Add the butter and lemon juice and stir again.
- Finish and serve. Slice the chicken breasts into thick pieces and pour the gravy on top or serve on the side.
Notes
- Storage: You can store the chicken for up to 3 days in the refrigerator or freeze it for up 3 months. If storing or freezing, keep the gravy in a separate container, then defrost/reheat and use once serving.
- Flour options: You can use all-purpose or plain flour cornstarch to thicken the gravy; gluten-free flour can also be used; and, for a paleo/Whole30 version, swap with tapioca/arrowroot flour.

Jen
I had some serious doubts about this recipe when I started. Followed directions exactly and needless to say, I was happy and so was my family. I didn’t use the gravy personally because I made mashed potatoes to go with it as well as broccoli and cauliflower mix. I was 100% expecting dry chicken as I’ve never had the best luck with instant pots but wasn’t dry at all, my picky kids (8&6) ate all their food and didn’t complain at all.
Ann Fabrizio
Thanks so much for the feedback Jen. We really appreciate hearing how things work out with our recipes. Especially happy that the kids enjoyed.
MichelleSmith11
Easy and delicious, the whole family likes it. I don't use the Instant Pot for meals very often but appreciate this recipe for its use of both the pressure cooking and saute options to make a great meal. I think it would be a good recipe for guests, it can be paired with potatoes or rice, and any kind of vegetable (I prefer broccoli and cauliflower or green beans). I did find the pressure cooker intimidating at first but now that I'm used to it I really love it, thanks for the recipe!
Betsey
Can you use frozen chicken breast?
Ann Fabrizio
Yes but the time would have to be adjusted and you won't be able to season as directed. Please check this out https://instantpoteats.com/instant-pot-frozen-chicken-how-to/
Kendra
This may be a silly question, but have you ever tried this recipe in the oven? We love this recipe so much I wanted to make it for Christmas, but we have so many people coming that my instapot isn’t big enough.
Instant Pot Eats
Hey Kendra, I haven't tried it in the oven but you can use the same seasoning and just look up how long to bake chicken breasts in the oven. If you want to do more chicken breasts in the IP itself, you can layer them on top of each other but I probably wouldn't do more than 2 layers. That could give you enough for say 12 servings, which might be okay if you're doing side dishes and other protein mains.
Bree L.
This gravy is oh so good! I was judging it as I looked at
it simmering in the instant pot, but the flavor is rich! I did the Whole30 option with ghee and tapioca starch and it came out delicious!
Instant Pot Eats
Thanks, Bree. Great to know it worked well as a Whole30 option.
Ammi
One of the best chicken dishes I’ve ever made in my instant pot!
Instant Pot Eats
Awww, thanks so much 🙂
Lorie
This looks belish. Curious how much time you would add if its bone in breast meat
Instant Pot Eats
I would add 2 extra minutes.
Montse
I’ve made this many times for the fam! Everyone loves it. I add more broth to make more gravy. One tip about the cornstarch is that it’s better to dissolve it in some cold water, NOT the hot broth or you’ll end up with clumps of starch that are hard to mash down.
Instant Pot Eats
Thanks, Montse. Great tip on corn starch, too.
Suzanne Osgood
Excellent! Tender chicken & the gravy was a great compliment. Quick fix and absolutely delicious...will definitely make it again.
Instant Pot Eats
Thank you Suzanne 🙂
phillip cox
I did 7 min on low pressure (only 2 breasts) and followed everything else. Chicken was tasty but a little dry. Hadn't used trivet before - usually just let chick cook in down liquid & it seems to come out better (IMO).
Joe
Gravy was great, everybody loved it.
Julie Lind Wall
I am an old cook but new to using the instant pot so I appreciate your detailed recipes including the pictures. Can I use frozen chicken breasts?
Ann Fabrizio
Yes but the time would have to be adjusted and you won't be able to season as directed. Please check this out https://instantpoteats.com/instant-pot-frozen-chicken-how-to/
Instant Pot Eats
Hi Julie,
Yes, you can. You will need to increase the cooking time by around 5-7 minutes (depending on the size/amount). When seasoning, salt and pepper etc might not stick to the meat as well when it's frozen so you might have to adjust those once the breasts are cooked.
IPE team
Rhonda
Is it possible to cook more chicken breasts at one time? Can you stack them or will they not cook well?
Instant Pot Eats
You should be able to cook another layer of chicken, maybe increase by 2-3 minutes cooking time.
MaryAnn Dean
The recipe is great -but your idea of a picture of every move is, in my estimation, the the ultimate Dumbing Down of America -unnecessary -annoying and just plain silly -but then I suppose it does provide work for your photographer friends-
Instant Pot Eats
Dear MaryAnn,
We surveyed our readers and Instagram followers and a very large percentage of them are intimidated to use the Instant Pot because they are beginner cooks and aren't sure which button to press or which setting to use etc. As we mention at the start, this recipe was created specifically for beginners and step-by-step photos are provided after the recipe, so if you're a proficient cook, you don't need to look at them. Our photos are shot in house by our team (1 person actually) and NOT by some photographer friends. We take pride in the amount of effort we choose to put in to help those readers that need more guidance.
I hope this clarifies WHY our beginner-designed recipes have such detailed picture instructions.You don't have to use them.
IPE team
PS. Our audience is not just Americans 😉
Wild Child
Thank you for publishing recipes for beginners and those very new to cooking in an Instant Pot! I like the step by step pictures, and I do not think it is dumbing down the cooking at all. If it helps someone get comfortable cooking in their IP, it's worth it. Everyone starts somewhere. As the recipe states, this is for beginners. There are many recipes out there for the more advanced cooks without step by step pictures. Keep up the great recipes for all of us!
Instant Pot Eats
Thank you so much and glad you think these recipes are useful for those starting out.
Cheryl Foster
I guess MaryAnn didn't notice the full recipe written out without pictures BEFORE any pictures appear. You can choose to view whichever version suits your needs. Chill!
P.S. Thank you for the wonderful research and recipes you provide.
Instant Pot Eats
Glad you find it useful 🙂
Rebecca
This recipe is absolutely phenomenal. The flavors of the chicken and that gravy work so well together. Thank you for creating such an easy and tasty dish. Now I'm searching your site for tomorrow night's dinner!
Christine
Did you really nean to say stir corn starch into hot liquid to thicken sauce? Corn starch should never be stirred into hot liquid. Use cold water and corn starch and add that to sauce to thicken the sauce.
Instant Pot Eats
We mean to stir the corn starch slurry into the hot liquid in the pot. To be honest, from our experience of using corn starch or flour to thicken the sauce, you can actually make the slurry using cornstarch and the hot liquid from the pot if you wanted to, it works just as fine.
Robin S.
This looks amazing!! Can you use frozen chicken breasts, and what would change in the recipe if using? Thanks!
Instant Pot Eats
Hi Robin, you could use frozen chicken breasts. You won't be able to season them prior to cooking in the same way as the meat will be frozen and the seasoning won't stick, so you might need to season afterwards. Increase the cooking time to 12 minutes and natural release to 10 minutes. If they are very large breasts, then maybe 13-14 minutes at HIGH.