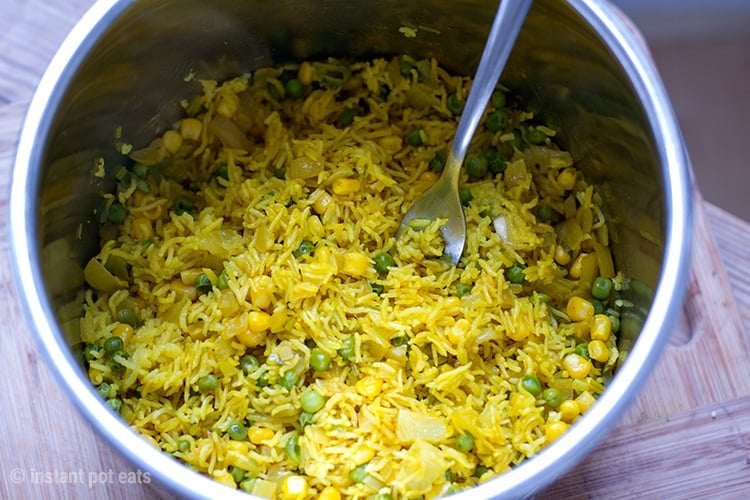
This homemade Instant Pot yellow rice recipe is free of MSG, additives or preservatives. It's also naturally gluten-free and is made with sweet corn and peas adding even more nutrients. Vegetarian and vegan-friendly.
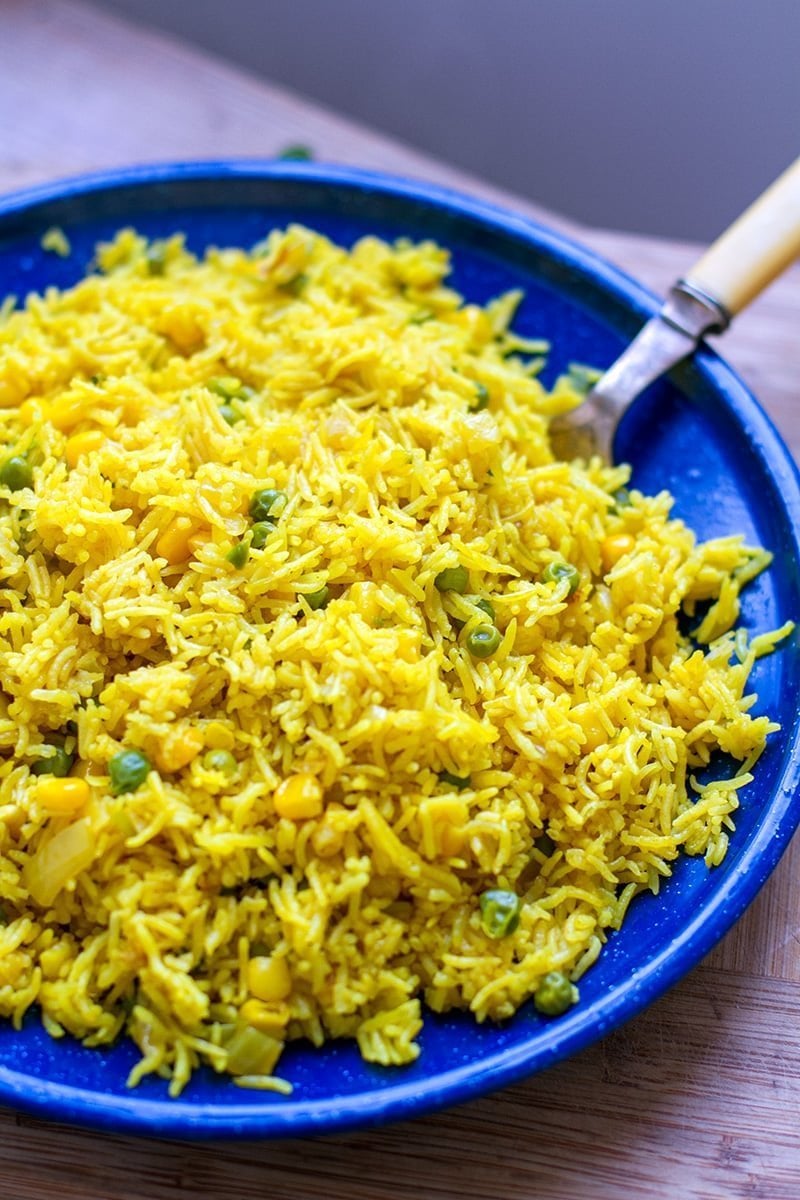
As a kid, I used to love yellow rice. Simply because it's YELLOW. As an adult, I appreciate it both for the vibrant colour and the flavour. But, I am not talking about the yellow rice you cook out of a packet (you know the one that's full of added colours, preservatives and MSG). Oh no! This recipe is all homemade with no nasty additives insight.
The best part - it is super quick and easy to make yellow rice in the Instant Pot. I show you how to get gorgeous, fluffy, nourishing rice every time.
WHICH TYPE OF RICE TO USE FOR YELLOW RICE?
For this recipe, I am using basmati rice, which has a lower glycemic index and doesn't spike your blood sugar as much as other types of white rice. I am also using turmeric spice, which gives this dish that beautiful yellow colour and has amazing health benefits.
RECIPE TIPS
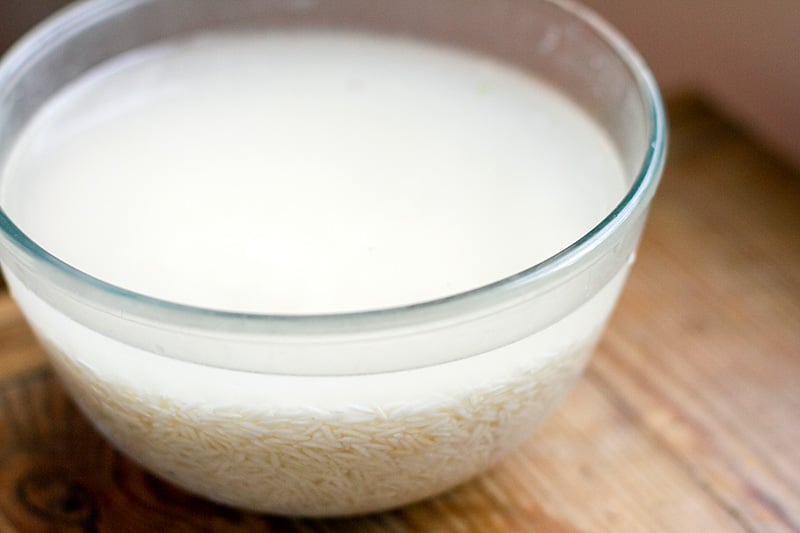
The key to getting super fluffy, separate rice is giving it a really good rinse before cooking. Add the rice to a large bowl of water and soak it for a few minutes. The water will get very cloudy as the starch from the rice dissolves into the liquid. Stir it well, then strain the water. Fill up the bowl with fresh water, stir and strain. Do this 4-5 times, until the water stops getting so cloudy. This means that most of the starch has been rinsed away and the rice is will keep its lovely texture and won't get cloggy during cooking.
You can also rinse the rice in a sieve for a few minutes until the water runs clear.
If you're making risotto, it's the starch in the rice that makes it so creamy hence you never rinse Arborio risotto rice.
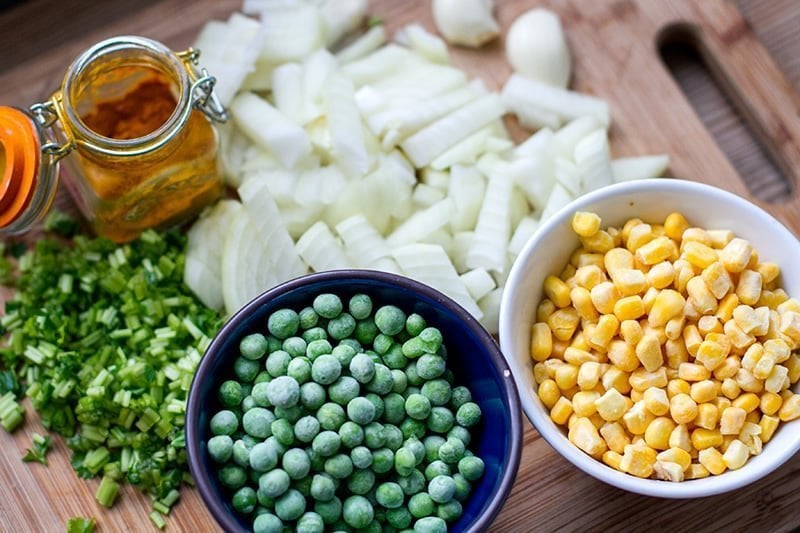
OTHER INGREDIENTS YOU'LL NEED
Besides the star of the dish - rice - we're also using onion, garlic and cilantro, which are also fantastic for your health and add so much flavour to this Instant Pot dish. Plus, using leftover cilantro stalks is a great way to avoid food waste.
Frozen peas (or fresh) add a bit of extra protein, and the sweet corn just takes it to the next level. Bonus: all of these ingredients are affordable and easily available.
HOW TO MAKE INSTANT POT YELLOW RICE
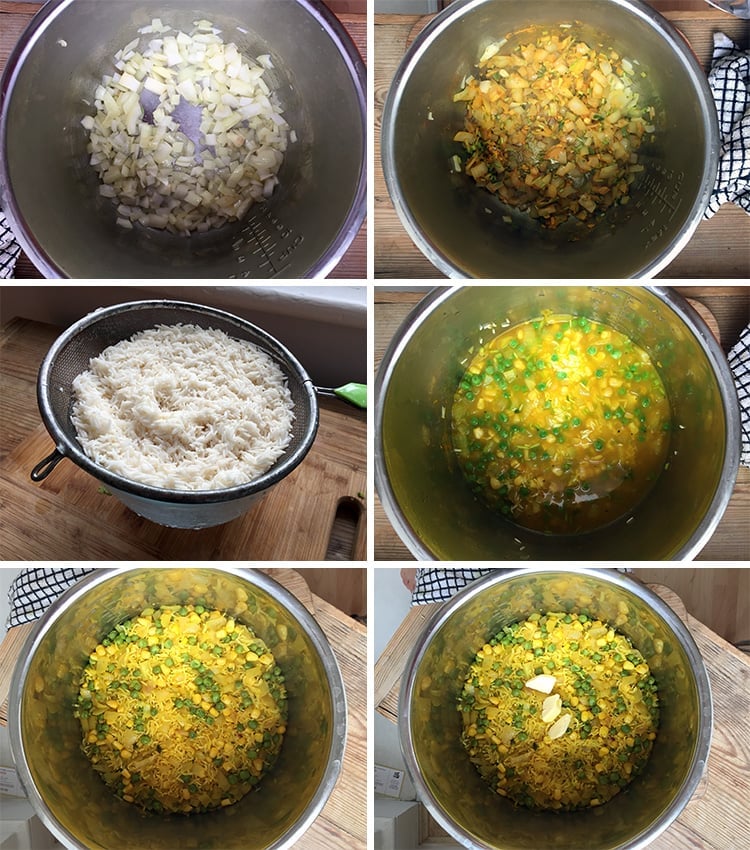
You will find full ingredients, instructions and nutritional value in the recipe below but here are some handy step-by-step pics. There are three main steps to making this yellow rice dish.
- Step1. Saute the onions, cilantro and garlic and add the spices.
- Step 2. Rinse the rice and add to the pot with frozen peas and corn.
- Step 3. Pressure cook on HIGH for 4 minutes with 5 minutes natural release. Finish the rice with a little drizzle of olive oil or butter. Stir, taste for seasoning and serve.
The recipe makes a large batch of yellow rice. I usually keep cooked rice in the fridge for no longer than 2-3 days. You can reheat it and enjoy with veggies or a fried egg on top. It can also be turned into a casserole, fishcakes or veggie burgers.
You can also freeze it. If freezing the rice, make sure to do so soon after it's cooked and cooled down. Keep in the freezer for up to one month.
MORE INSTANT POT RICE RECIPES
- Instant Pot Rice & Chickpea Pilaf
- Instant Pot Spanish Rice With Chorizo
- Instant Pot Brown Rice Salad With Peanut Butter Dressing
- Instant Pot Sushi Rice How-To
- Delicious Instant Pot Biryani Rice Recipes

Rate This Recipe
Instant Pot Yellow Rice With Corn & Peas
Ingredients
- 2 cups basmati rice see notes above
- 2 tablespoons olive oil
- 1 onion diced finely
- ¼ teaspoon salt
- 3 tablespoons of chopped cilantro stalks optional
- 2 large cloves of garlic finely diced
- 1 heaped teaspoon of turmeric powder
- 1 cup sweet corn kernels frozen
- 1 cup frozen peas
- 2.25 cups chicken stock
- Optional: A dollop of butter to finish (or olive oil can also be used)
Instructions
- Rinse the rice in cold water 4 times to remove as much of the starch as possible. This will help to keep the rice nice and fluffy.
- Turn the Instant Pot on and press the Sauté function key button. Add the olive oil, onions, and salt and cook for 5 minutes, stirring a few times until softened.
- Add the chopped cilantro, garlic and turmeric powder and stir through. I like to add a little extra drizzle of olive oil but that’s not essential. Now add the corn, peas and rice and pour over the chicken stock. Stir through and turn the Sauté off by pressing the Keep Warm/Cancel button.
- Place and lock the lid, make sure the steam releasing handle is pointing to Sealing. Set to Manual, HIGH Pressure and adjust the time to 4 minutes. You will hear 3 beeps letting you know you the Instant Pot is starting to build pressure and cook (this should take about 5-7 minutes).
- Once the timer goes off, turn the Instant Pot off and let the pressure release naturally for 5 minutes. Then, use the quick release to let off the rest of the steam.
- Open the lid and add a dollop of butter or extra olive oil, if using. Let it melt into the rice, then fluff it with a fork. Transfer to a serving platter.
Nutrition
SAVE THIS YELLOW RICE RECIPE TO PINTEREST


Rhea
This was pretty easy, considering I rarely cook and hardly ever use my instant pot! Just didn’t have much flavor until I added some garlic salt and pepper. Could me my taste buds are off, but would be a great base for some protein, tofu even!
Barb
I made this rice with asparagus instead of peas and corn because we have an abundance of asparagus. It is delicious. A fast easy recipe too.
instantpoteats
Thanks, Barb. Love the idea of using seasonal asparagus in this dish. Anything green will go well here 🙂
Joseph D'Ercole
Could this be done with brown rice?
instantpoteats
You would have to cook the brown rice separately as it needs longer than white rice and corn and peas would get a bit overcooked if made together at the same time.
Dave
Worked like a charm! Thanks for the simple instructions. My first Instant Pot recipe. Paired nicely with a Costco rotisserie chicken and black beans. I’ll be back for more great recipes.
instantpoteats
Thanks, Dave. Chicken and beans on top sounds like a delicious combo 🙂
Candis
Could this be made in a rice cooker?
instantpoteats
Yes, but you will need to follow the time instructions for the rice cooker.
CHRISTINE M GRENIER
I didn't have cilantro handy and didn't feel like running to the store, so I added the following in its place:
1/4 tsp dill weed
1/4 tsp parsley
1/4 tsp tarragon
I also used vegetarian broth instead of chicken broth.
It turned out great!
Courtney
Would you know the cooking instructions for using brown basmati rice?
Ann Fabrizio
No soaking of rice
Rice to water ratio – 1:1.25
Pressure Cook / Manual for 22 minutes (high pressure, vent sealed)
10 minute NPR – Manually release the pressure 10 minutes after the instant pot beeps
-------
1 cup Brown Basmati Rice
1 1/4 cup Water
1 tbsp Ghee or Oil (optional)
Instructions:
1. Wash brown rice until the water runs clear.
2. Add water and rice to the instant pot insert. If using, add the oil and salt.
3. Start the instant pot in manual or pressure cook mode for 22 mins at high pressure with vent in sealing position.
4. When the instant pot beeps, do 10 minutes natural pressure release, which means release the pressure manually 10 minutes after the instant pot beeps.