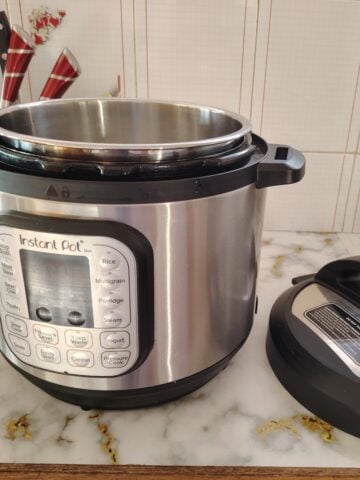
So you just got your Instant Pot. Now what? Well, if you've actually opened up the manual (props to you, by the way), you know the first thing is the Instant Pot water test.
Think of your Instant Pot like a piece of IKEA furniture. Sure - you could go ahead and start building without looking at the diagrams and counting your pieces, but in order to avoid mishaps down the road, you probably want to make sure that things are in working order. That's what the water test is for.
If you're new to Instant Pot, you might also want to check out this post on Instant Pot burn message, check out our Instant Pot 101 series, and get inspired by these 10 Instant Pot meals for beginners.

WHY SHOULD I DO THE WATER TEST?
Not only does it help to ensure that your Instant Pot is in working order, but it also helps you to get familiar with some of its basic functions like using the inner pot. You'll learn to properly seal your lid and make sure there are no defects in that regard. You'll also have a chance to use the venting function, and of course, press a few of those buttons.
Finally, you'll see what it means for the pot to come to pressure. While many recipes boast a quick cooking time, those times do not include the time it takes for the pot to come to pressure - the dirty unspoken truth of the Instant Pot!
This time is not long, but it does depend on how much liquid and food is in your pot. For example, a batch of hard-boiled eggs on your steaming rack that uses a cup of water will take just a few minutes to come to pressure. A big roast including with 3-4 cups of liquid that fills your pot to the brim will take 15-20 additional minutes to come to pressure.
HOW TO DO THE INSTANT POT WATER TEST
You'll basically be cooking water, under pressure. If you're new to your IP, the one thing you need to remember is that liquid is required for every meal - it's what makes the pot come to pressure. This "water test" will come into play with many of the recipes you make, so it's really worth giving a shot, particularly if you've never used a stovetop or electric pressure cooker before.
Instructions:
1. Plug it in! Your Instant Pot automatically turns on when it is plugged in, although it will display 'OFF' until you press a button.
2. Place the inner pot into the cooker. Under no circumstances should you ever cook without the inner pot, so make sure not to forget it. Otherwise, you will destroy your Instant Pot. Food should not come in contact with the housing unit.
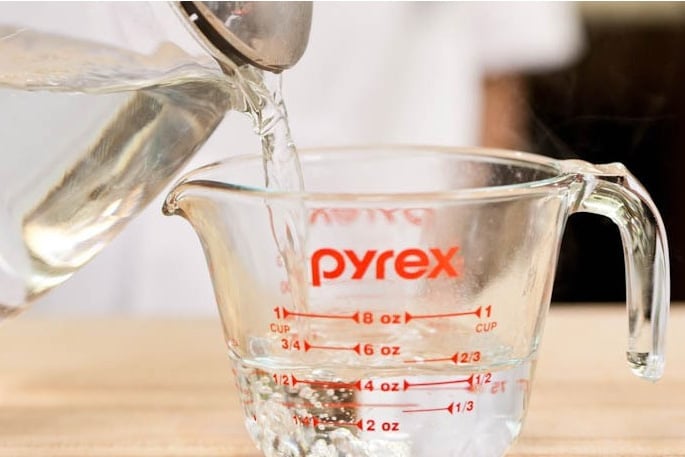
3. Place 3 cups of water into the pot. There are lines on the inner pot that show you measurements, so you can fill until you reach that indicator, or use measuring cups.
4. Check your sealing ring. I can't stress this enough. If your pot is ever not coming to pressure or letting out steam, chances are, you can trace it back to the sealing ring. It should be tight around the lid of your pot. During this step, make sure it is snug and in place. The ring should not move around.
5. Screw on the lid. The lid should suction down nicely, and you'll hear a satisfying noise from your pot. Then, you'll hear another when it's screwed on - a beep three times. Follow the arrows around your lid that indicate which way seals and which way opens the lid. This step is very intuitive!
6. Make sure your steam valve is turned to sealing. Otherwise, in a few minutes, you'll hear steam coming from it. This is the key to building pressure in the pot. Once again, the valve is labelled with easy-to-read arrows indicating which way is which. The Ultra model will do this step for you upon closing the lid.
7. Press the 'Steam' button. No matter which function you cook with (many recipes will call for manual), you can then adjust the times with the +/- buttons. Set the cooking time for two minutes. You do not have to press another button to begin the process. In a few seconds, the pot will do that for you. For the Ultra model, turn your dial to 'Steam' then press 'Start.'
8. After 10 seconds, the "cooking" process will begin. Your steam vent will release a bit of steam until it pops up fully (the silver thing next to your valve). When the pot begins cooking after a few minutes, you will see the timer begin to count down.
9. Wait for the beep! Ah, the moment we've all been waiting for. This beep is how you know your food is done.
10. Release pressure. Some recipes will call for QR (quick release) while others will call for NPR (natural pressure release - not the radio station!). Quick-release simply means flicking the valve so steam releases rapidly. Use a towel over the top of it to soak up any moisture, and avoid placing your hands near the steam as it is very hot. Natural pressure release means simply leaving it to go until the pressure is released on its own. This timing also depends on how much the pot is holding. The pot will automatically go into 'Keep Warm' mode.
INSTANT POT WATER TEST FAQ
How long will it take my pot to come to pressure?
The pot will take 5-10 minutes to reach pressure and begin the countdown.
Help! I'm seeing steam.
This is normal. The valve will sometimes let off a little steam until it floats up. If you continue to see steam, make sure to press down on the lid to ensure it is properly sealed and double-check your steam vent. Note: do NOT place your hand on the stainless steel portion of the pot during cooking - use the edges of the lid.
How do I know if I should use QR or NPR?
Most recipes will specify which method you should use, but the majority of recipes call for quick release.
So yes - you should do the water test if you have a few minutes to spare! You will learn the very basics of the Instant Pot for future cooking, and ensure your first actual recipe goes off without a hitch.


Leave a Reply