If you’re a new Instant Pot owner or just trying to figure out how to get your pressure cooking process going without a hitch, one of the most important skills to master is how to seal your Instant Pot. The sealing ring inside your Instant Pot lid is paramount for creating an airtight seal that allows the pressure cooker to build up steam, which is necessary for pressure cooking.
Whether you're making hard boiled eggs, cooking pinto beans, or trying your hand at tomato sauce, proper sealing ensures your Instant Pot functions correctly, saving time and guaranteeing great results.
Let’s walk through everything you need to know to get that perfect seal every time, troubleshoot common problems, and maintain your Instant Pot to last for years of delicious meals. Read on for more!
Jump to:
- What is the Seal in an Instant Pot?
- Step-by-Step Guide on How to Seal Your Instant Pot
- Common Sealing Problems and How to Fix Them
- How to Maintain Your Sealing Ring
- Troubleshooting: Instant Pot Not Sealing Properly
- Sealing for Different Instant Pot Cooking Methods
- Testing Your Instant Pot Seal: The Instant Pot Water Test
- Final Tips for a Perfect Instant Pot Seal
- Frequently Asked Questions
- Conclusion
What is the Seal in an Instant Pot?
The seal in your Instant Pot is composed of two main parts: the silicone sealing ring and the pressure release valve. Together, they help maintain the right steam pressure during cooking, making sure that the Instant Pot builds and maintains high pressure to cook food quickly and efficiently.
The sealing ring is typically a silicone sealing ring that fits snugly into the lid, and its job is to create an airtight seal. The pressure release valve and the steam release handle are used to control the release of pressure at the end of the cooking cycle.
The float valve is another reason the pot is able to seal itself. It rises when pressure builds inside the inner pot, indicating that the Instant Pot has sealed correctly and is in the sealing position. When you’re pressure cooking, you want to make sure everything is properly seated so that no steam escapes and your food cooks at the optimal temperature.
Step-by-Step Guide on How to Seal Your Instant Pot

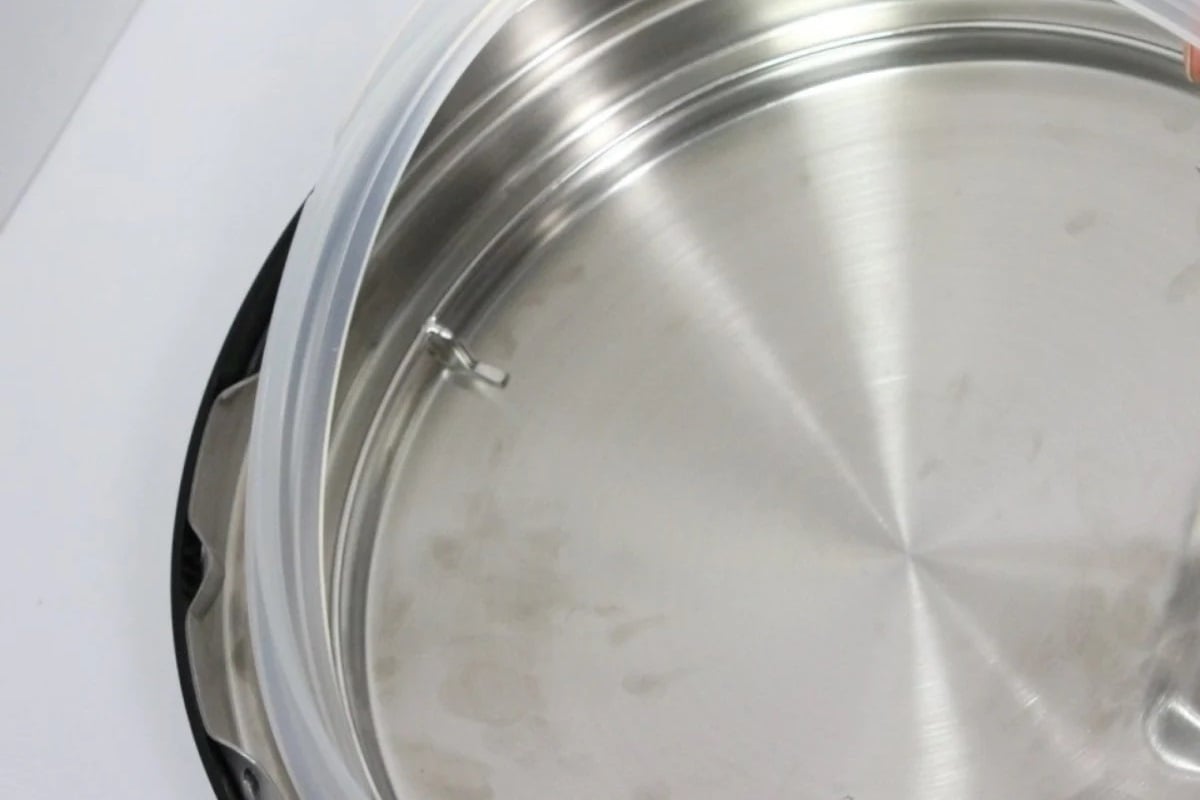
1. Check the Sealing Ring
The first thing you need to do when sealing your Instant Pot is to check the sealing ring. Make sure it’s properly seated in the lid, not twisted, and free from any debris or food particles. If you’ve used your Instant Pot for a while, it’s a good idea to check the sealing ring for cracks or wear—these can prevent a proper airtight seal and might lead to steam escaping during cooking.
Tip: For best results, keep a separate sealing ring for sweet and savory recipes to avoid odors transferring.
2. Close the Instant Pot Lid
Once your sealing ring is in place, align the Instant Pot lid with the base of the pot. Gently close the lid until it locks into place. You should hear a click when the lid drops into position. The lid drops and locks into place, ensuring the airtight seal is intact and ready for cooking.
Tip: If you're not sure the lid is seated correctly, you can give it a gentle push to confirm it's locked.
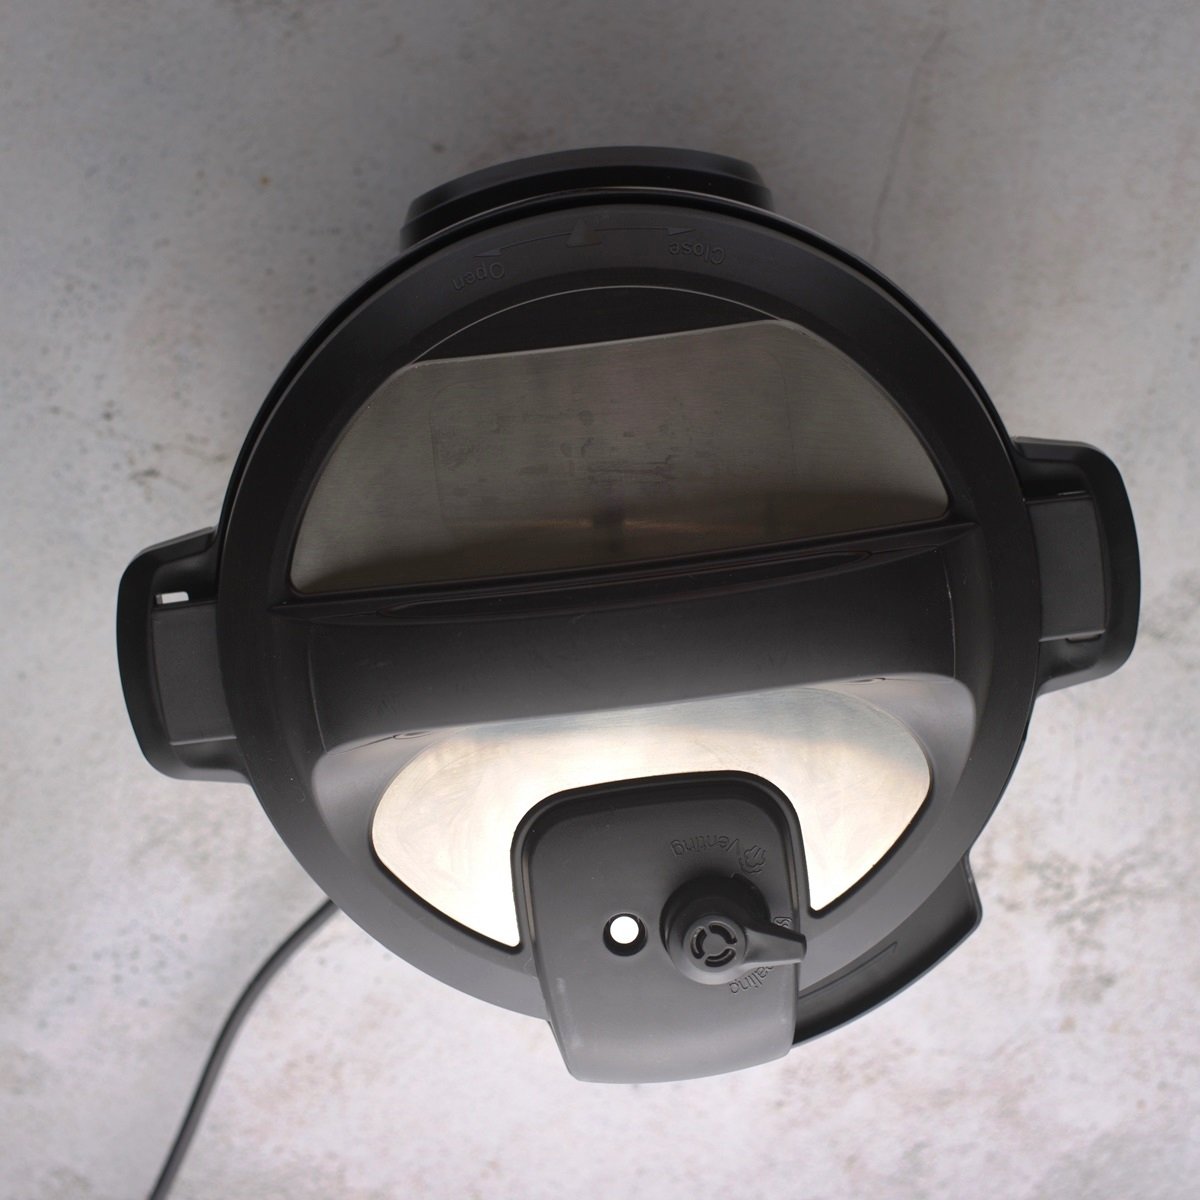
3. Set the Pressure Release Valve
The pressure release valve plays an important role in the pressure cooking process. Make sure that the steam release valve is set to the sealing position. If you set it to the venting position, steam will escape, and the Instant Pot won’t be able to build the necessary steam pressure for cooking.
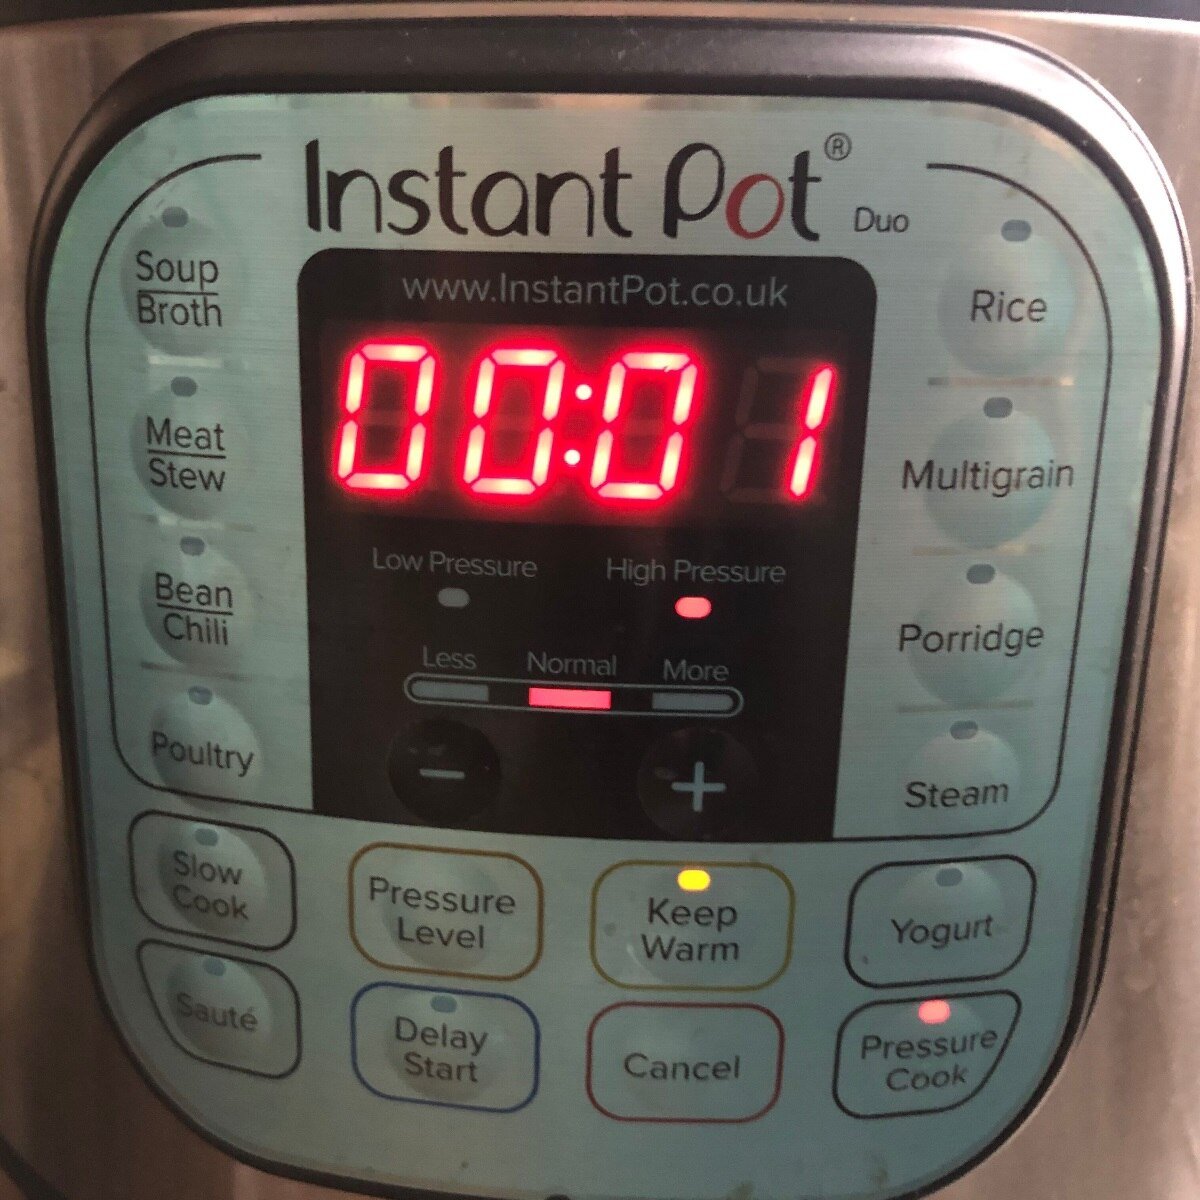
Once your lid is secured and the valve is in the sealing position, your Instant Pot is ready to start building pressure. When you press the pressure cook button, the cooking process will begin, and the pot will start building pressure.
Common Sealing Problems and How to Fix Them
Even with a properly seated sealing ring, sometimes things don’t go as planned. Here are a few common issues and how to troubleshoot them:
1. Instant Pot Not Reaching Pressure
If your Instant Pot isn’t building pressure, check a few things:
- The pressure release valve might not be in the sealing position. If it’s accidentally set to venting, steam will escape, and the Instant Pot won’t be able to maintain pressure.
- You may not have enough liquid. For the Instant Pot to create steam pressure, you need to add at least 1 cup of liquid (water, broth, or tomato sauce depending on the recipe). Not having enough liquid can prevent the Instant Pot from reaching pressure.
Quick Fix: Make sure you’ve added enough liquid and the valve is in the correct position. Check for any blockages in the steam release button or steam release handle.
2. Steam Leaking from the Sides
If you notice steam escaping from the sides of the lid, this could mean that the sealing ring is either damaged or not properly seated. Check to make sure the sealing ring is seated correctly and doesn’t have any cracks. Additionally, ensure that the lid is properly aligned with the base of the inner pot.
Tip: Clean the lid and steam release valve regularly to prevent food particles from causing blockages.
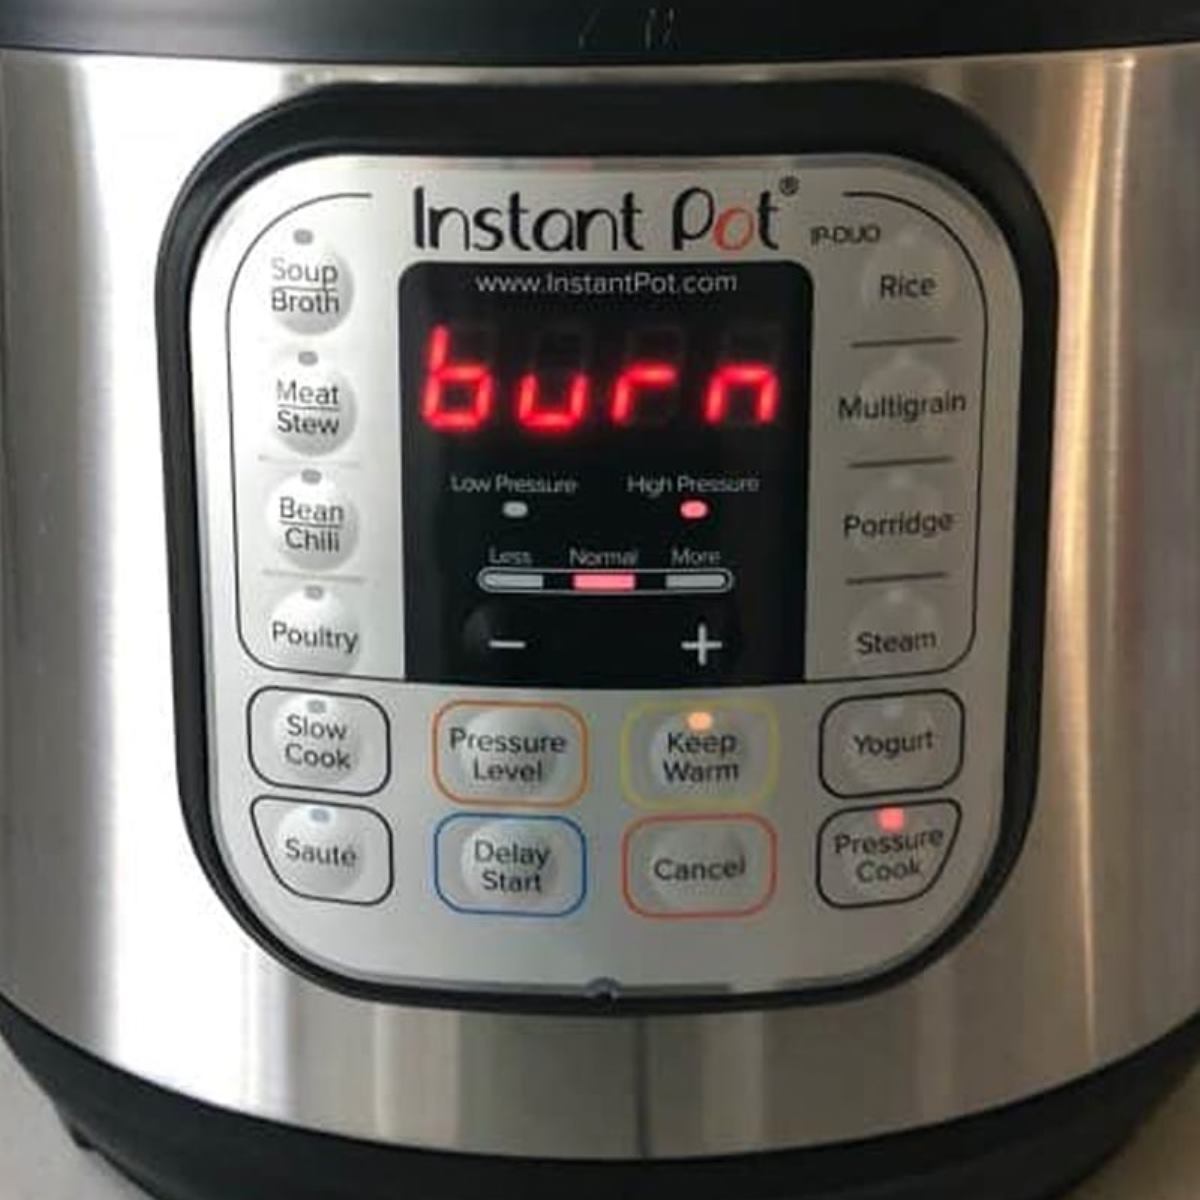
3. Burn Message
The burn message is a common error in the Instant Pot, and it usually happens when there’s not enough liquid or when foods like tomato sauce burn to the bottom of the pot. This typically happens if the food sticks to the bottom before it can reach the necessary steam pressure. To prevent this, always deglaze the pot after browning meats or sautéing ingredients.
Tip: Stir the contents well, ensuring all the pressure is maintained during cooking. If the burn message persists, check the steam release valve for any obstructions.
Be sure to read this: Instant Pot Burn Message Decoded: Tips for Quick Fixes and Prevention
How to Maintain Your Sealing Ring
Even though Instant Pots have decent safety features, you still need to ensure proper sealing every time, and it’s important to take care of your sealing ring. Here’s how:
- Cleaning the sealing ring: After each use, clean the silicone sealing ring thoroughly by washing it with warm soapy water. Avoid leaving it in the Instant Pot lid for long periods, as it can develop odors.
- Replacing the sealing ring: Over time, the sealing ring can wear out. If you notice cracks, a strong odor, or steam escaping during cooking, it’s time to replace it. Check out Amazon's specials like these ones for the Instant Pot Duo, and stock up when you can.
Troubleshooting: Instant Pot Not Sealing Properly
1. Steam Release Valve Not Sealing
Sometimes, the steam release handle can become stuck or not seal properly, causing the Instant Pot to not build pressure. If this happens, check the anti-block shield for any blockages. If it looks dirty, use a wooden spoon or soft cloth to clean it out gently.
2. Instant Pot Not Reaching High Pressure
If you’re not getting to high pressure, you may need to manually adjust the pressure release valve. Make sure that it’s in the sealing position and that there’s enough liquid inside to build pressure. If you’re cooking thicker foods like tomato sauce or pinto beans, you may need to use a manual setting and increase the cooking time.
You may also find this guide helpful: Instant Pot Lid Not Closing? (Common Issues and How to Fix It)
Sealing for Different Instant Pot Cooking Methods
Pressure Cooking:
For most Instant Pot recipes, the sealing process is the same. The sealing ring and lid need to create an airtight seal to allow for high pressure to build.
Slow Cooking:
If you’re using the slow cooker function on your Instant Pot, you don’t need to seal it the same way. In fact, you’ll want to leave the steam release valve in the venting position to allow for slow, gentle heat.
Rice Cooking:
When using the Instant Pot as a rice cooker, it’s still important to ensure a proper seal. The Instant Pot will create enough hot steam pressure for rice cooking, which helps maintain a consistent cooking process.
Read the following for some Instant Pot display tips: Instant Pot Settings And Instructions
Testing Your Instant Pot Seal: The Instant Pot Water Test
Before you start your first big recipe, it’s a good idea to perform an Instant Pot water test to make sure everything works properly. Simply add about 3 cups of water into the inner pot, close the lid, set the pressure release valve to sealing, and press manual or pressure cook. This test will allow you to check if the pot builds pressure, seals correctly, and doesn’t leak steam.
Final Tips for a Perfect Instant Pot Seal
- Always check that the sealing ring is in good condition and properly installed.
- Ensure the steam release valve is in the correct position before starting the cooking process.
- Clean the inner pot and the instant pot lid regularly to avoid food residue buildup.
- Consider doing an instant pot water test before cooking anything complex.
Frequently Asked Questions
To seal your Insta Pot correctly, make sure the sealing ring is properly seated and the pressure release valve is set to sealing. When the recipe calls for natural pressure release, allow the Instant Pot to naturally release pressure for a few minutes before opening the lid.
If your Instant Pot isn’t building pressure quickly, check if the sealing ring is correctly in place and the pressure release valve is in the sealing position. Also, make sure how much liquid you’re using matches the recipe. Too little liquid may prevent the Instant Pot from reaching high pressure, while the cooking process quickly slows down.
Yes, for certain foods like delicate fish or soft vegetables, low pressure is often best. This prevents overcooking compared to using high pressure. Just use your own measuring cups to ensure the right amount of liquid, and let the Instant Pot naturally release pressure to finish cooking.
Perform an initial test run with water to ensure everything is sealed and functioning correctly. This way, you can check the pressure release valve and make sure your Instant Pot is in the right sealing position. Once the cycle completes, check if it’s able to release pressure naturally and is not leaking steam.
You should start counting the cooking time once your Instant Pot reaches full pressure. Keep in mind that the cooking time does not include the time it takes to build pressure, so be sure to factor in that extra time when planning your meal. If your recipe involves a natural release, remember to account for that time too. whether you let your Instant Pot pressure release naturally or go for the quick release method, both are simple ways to get your meal just right.
Conclusion
When you cook compared to traditional methods, an electric pressure cooker like the Instant Pot makes everything so much quicker and easier. Without properly sealing the pressure inside, your meal can become a disaster. We hope these tips above have made it simpler! Now go forth and pressure cook like no one is watching!


Leave a Reply