How do I know if my Instant Pot is cooking? It's a question that's crossed my mind more times than I care to admit. I mean, here I am, staring at this magical kitchen gadget, wondering if it's actually doing its job or just sitting there, mocking me with its silent presence. Sound familiar?
Don't worry, Instant Pot fans! I've been through the same confusion and I'm here to help you master this amazing pressure cooker. Soon enough, you'll know the ins and outs of whether this magical pot is doing its job! Read on for more!
Jump to:
How do I know if my Instant Pot is Cooking?
You’ve got everything prepped and ready to go in your Instant Pot Duo. The lid is locked, the settings are selected, and you press the start button. But then you’re left wondering - is it actually working? How can you tell if your Instant Pot is cooking properly?
I’ve been there, especially when I first started Instant Pot cooking. If you’re a beginner with a new Instant Pot, it’s normal to feel a bit intimidated. Over time, I’ve learned the signs to look for to know my pot is doing its job. Let me share some key indicators with you.
Signs Your Instant Pot is Pressurizing
The first stage of the Instant Pot cooking process is pressurization. When your pot is working to build pressure, you'll notice steam escaping from the float valve and the lid will lock into place. The display will show "On" to indicate it's in this cooking stage.
Once enough pressure has built up, the float valve will pop up and seal the pot. This can take anywhere from 5-30 minutes depending on the amount of liquid and what you're cooking.
Indicators Your Instant Pot is Cooking Properly
So how do you know when your Instant Pot moves from pressurization to actually cooking? One key sign is the display will switch from "On" to showing the cooking time countdown. You'll also notice the float valve stays in the up position with no steam leaking out around the lid.
You may hear gentle hissing or sizzling sounds coming from the steam release valve - this is normal. As long as the valve isn't constantly releasing lots of steam, your pot is maintaining pressure and cooking properly.
Understanding the Instant Pot Display During Cooking
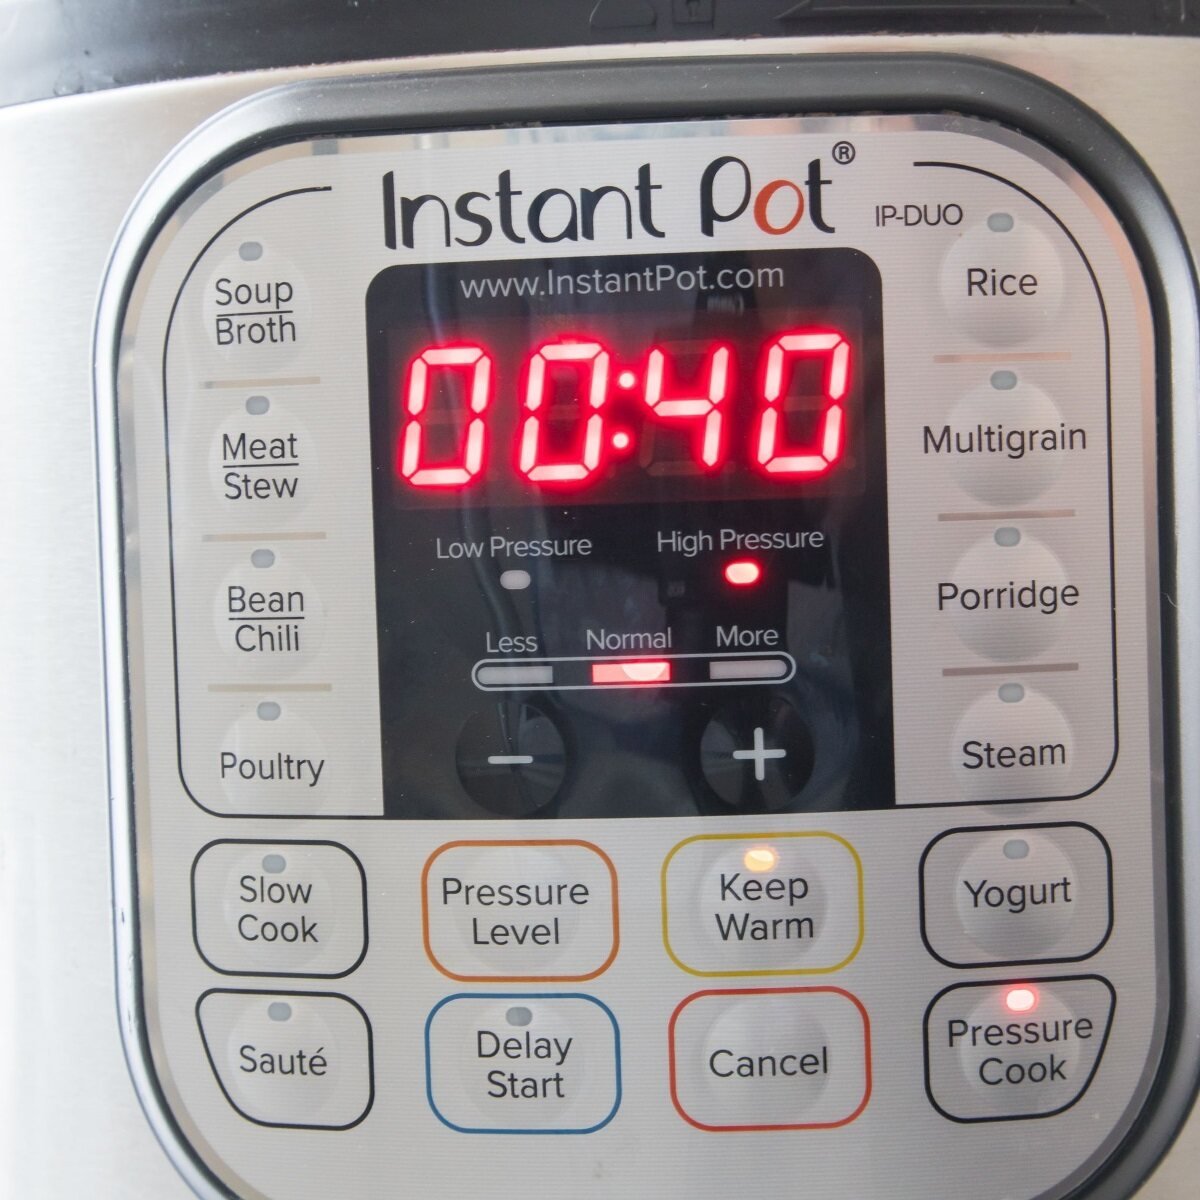
Throughout the pressure cooking process, the Instant Pot display provides helpful information. It will show the remaining cook time, counting down from the time you originally set. If you programmed your pot for 10 minutes of cook time, it will start counting down from 00:10.
The display will also indicate if your Instant Pot is cooking on "Low Pressure" or "High Pressure" mode. Most recipes use high pressure, but some may call for low.
When the cook time ends, the Instant Pot will beep a few times and automatically switch to "Keep Warm" mode in most cases. The display will then begin counting up from 00:00 to show you how long it's been keeping your food warm.
With these key indicators, you'll know your Instant Pot is working perfectly and that your recipes will come out just right. It might take a bit of practice at first, but soon enough, you’ll be reading it like a pro.
Common Instant Pot Issues and How to Troubleshoot Them
While the Instant Pot is a fantastic pressure cooker, it's not without its occasional quirks. Even with all the convenience of pressure cooking, sometimes issues pop up. Don't worry though - most problems are easily resolved once you know what to look for.
As someone who uses their Instant Pot regularly, I've encountered my fair share of challenges. Let me walk you through some of the most common problems and how to troubleshoot them.
Instant Pot Taking Too Long to Start
If your Instant Pot seems to be taking forever to start pressure cooking, there are a few likely culprits. First, make sure the silicone sealing ring is properly in place and the steam release valve is set to "sealing."
Next, check that you've added enough liquid. Most recipes need at least 1 cup of thin liquid like water or broth to build pressure. Without sufficient liquid, your pot won't pressurize.
Dealing with the Burn Message
The dreaded burn message, causing panic in any Instant Pot situation. This warning appears when your Instant Pot detects a high temperature at the bottom of the inner pot, usually due to scorching. To fix it, quick release any remaining pressure and open the lid.
Check for stuck-on food debris and add more liquid to the pot. Use a wooden spoon to scrape up any burnt bits. If the bottom looks clean, the burn message may have been triggered by the pot overheating during pressurization. Let it cool down a bit before restarting.
Resolving Error Codes
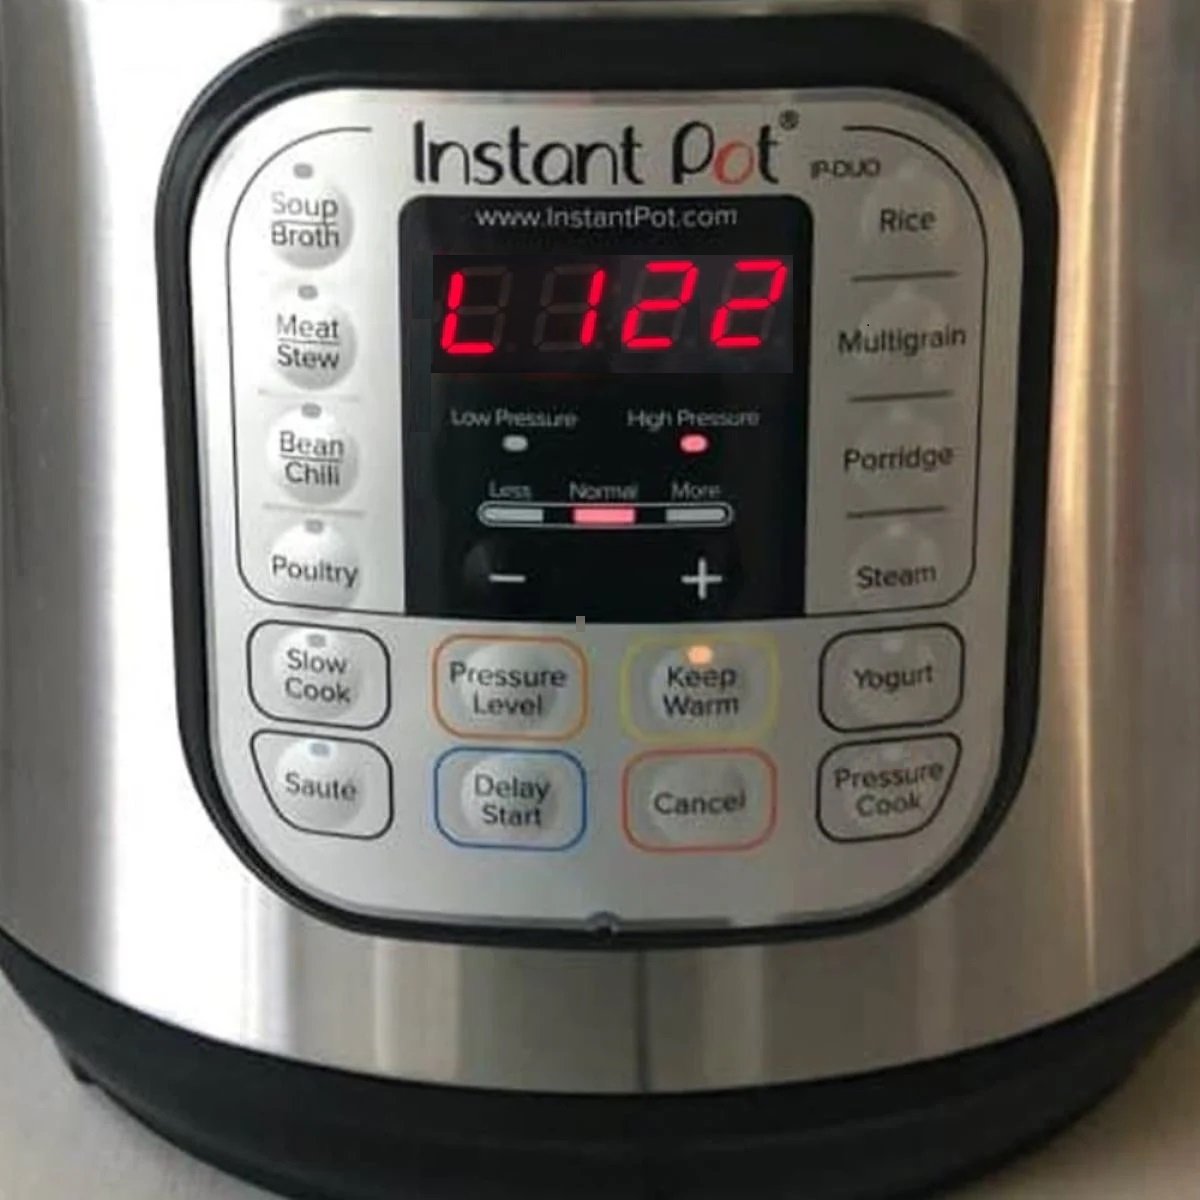
Sometimes your Instant Pot display may show mysterious error codes like "Ovht," "Lid," or "noPr." These indicate specific issues that need to be addressed before cooking can proceed.
- "Ovht" means your pot is overheating. Let it cool down and add more liquid before trying again.
- "Lid" appears when the lid isn't properly closed and locked. Make sure it's fully secured and the steam release valve is set to sealing.
- "noPr" signals that there isn't enough pressure, likely due to insufficient liquid or a leaky lid.
Stopping Instant Pot Beeping
Beeping is your Instant Pot's way of getting your attention, but sometimes it can get annoying. Most often, the beeping happens when your pot has finished cooking and alerts you that it's switched to "keep warm."
To stop the beeping, simply press the "cancel" button. If it keeps beeping after that, check that the float valve has dropped and all pressure has been released before trying to open the lid.
Fixing a Stuck Float Valve
Occasionally, the float valve can get stuck in the "up" position even after pressure has been released. If this happens, first wait for the pot to fully cool down. Then, use a long utensil to gently push down on the float valve until it drops.
If it's really stuck, you may need to remove the lid and clean around the valve housing. Make sure there's no food debris blocking it from moving freely.
Eliminating Instant Pot Odors
If you notice a funky smell coming from your Instant Pot, it's usually due to odors absorbed by the silicone sealing ring. To get rid of the smell, try washing the lid and sealing ring in the dishwasher or soaking them in vinegar.
You can also try storing the lid upside down on the pot when not in use to allow air circulation. Some people find keeping a box of baking soda nearby helps absorb odors too.
Preventing Steam Leaks
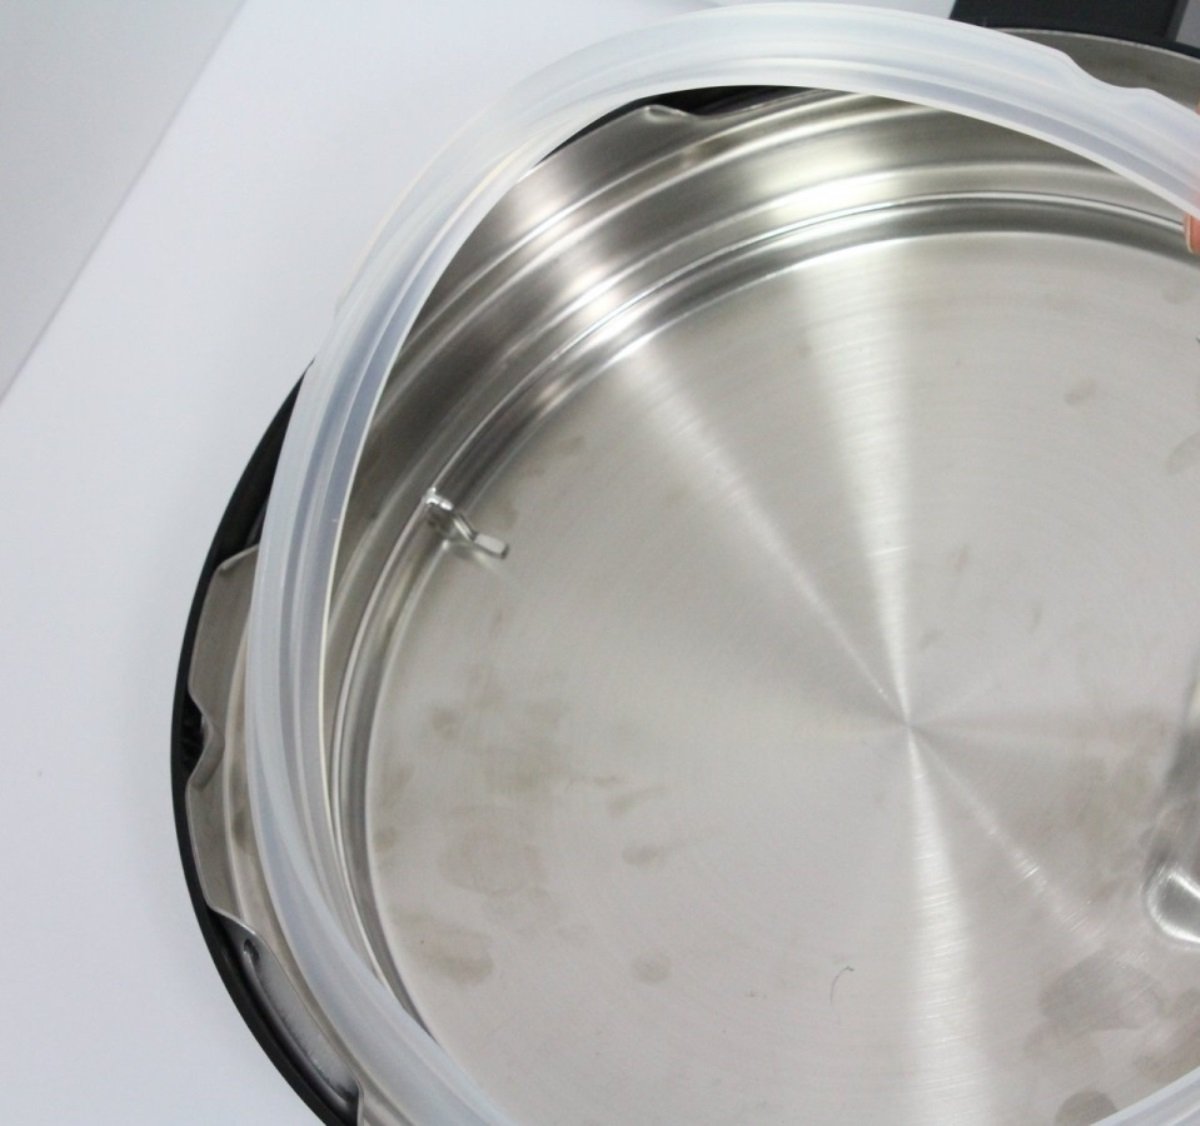
Leaky steam is a common issue that prevents proper pressurization. The culprit is often a worn-out or improperly seated sealing ring. Inspect your sealing ring for cracks, deformation, or looseness. If it looks damaged, it needs to be replaced.
Also, check that the steam release valve and float valve are clean and clear of debris. Any blockage can hinder their ability to seal properly and cause steam leaks.
Building Pressure in Your Instant Pot
If your Instant Pot just won't pressurize, don't despair. First, do a water test to check that all the components are working properly. Add 1 cup of water and run a short-pressure cook cycle. If it comes to pressure normally, the issue is likely your recipe.
Make sure you're using enough liquid and that the steam release valve is set to "sealing." If you're cooking starchy foods like rice or pasta, you may need to add more water than usual to account for absorption.
By knowing how to troubleshoot these common issues, you'll be able to cook confidently with your Instant Pot.
Mastering the Instant Pot Controls and Settings

If you are a beginner using the Instant Pot for the first time, all those buttons may have you wondering what you got yourself into! The control panel on your Instant Pot may look intimidating at first glance, but don’t let all those buttons scare you off!
With a little practice, you’ll be navigating the settings like a pro. One of the most important buttons to master is the Pressure Cook button, which allows you to manually set the cooking time and pressure level for more control over your recipes.
Let’s break down what each button does and how to use them for perfectly cooked meals and peace of mind every time:
Understanding the Instant Pot Buttons
Most Instant Pot models have similar buttons, although the exact labels may vary. You’ll see options like “Pressure Cook,” “Sauté,” “Slow Cook,” “Rice,” “Yogurt,” and more, depending on your model. These are preset cooking programs with suggested times and pressure levels for specific foods.
To use a preset program, simply press the corresponding button until the desired setting appears on the display. The "Pressure Cook" button allows you to manually set the cooking time and pressure level. You can then use the “+/-“ buttons to adjust the cooking time if needed.
Setting the Cooking Time
The cooking time on your Instant Pot can be customized for any recipe. To set a specific time, first press the "Pressure Cook" or "Manual" button (depending on your model). Then use the "+/-" buttons to adjust the time in 1-minute increments.
Most Instant Pot recipes include a suggested cooking time, but you can always adjust it based on your preferences. Just remember that the cooking time doesn't start until the pot has fully pressurized, which can take several minutes.
Related: What Does L Mean On Instant Pot? Learn the Essentials
Adjusting Pressure Levels
Instant Pots typically have two pressure levels - low and high. The default setting is usually high pressure, which cooks food faster but can be too intense for delicate ingredients. Low pressure is gentler and better for things like soft vegetables or seafood.
To change the pressure level, press the "Pressure Level" button until the display shows your desired setting. Keep in mind that cooking times may need to be adjusted when switching between high and low pressure.
Using the Steam Release Valve
Think of the steam release valve as your kitchen's safety guard. With its two modes—"sealing" for building up steam and "venting" for releasing it—you can control how much pressure stays in or escapes from your cooking pot.
To release pressure after cooking, carefully turn the valve to the "venting" position using a long utensil. Keep your hands and face away from the valve to avoid burns from the escaping steam. Always wait until the float valve drops down before attempting to open the lid.
Monitoring the Float Valve
An integral part of using an Instant Pot is understanding its float valve. During operation, when enough steam builds up inside, this small device pops up to lock down the lid securely. It acts as a safeguard by preventing any attempts to open it before releasing all built-up steam first.
You can tell the pot is pressurized when the float valve is in the raised position and the display shows the cooking time countdown. Once pressure is released and the float valve drops, it's safe to open the lid.
Navigating the Control Panel
In addition to the preset cooking programs and pressure settings, the Instant Pot control panel has a few other useful buttons. The "Delay Start" button allows you to set the pot to start cooking at a later time, up to 24 hours in advance. This is handy for prepping meals in the morning and having them ready when you get home from work. Convenient, right?
The "Keep Warm" button tells the pot to maintain a low temperature after cooking is complete, so your food stays hot until you're ready to serve it. This function activates automatically when the cooking time ends, but you can also turn it on or off manually.
Interpreting the Countdown Timer
During pressure cooking, the Instant Pot display will show a countdown timer that indicates the remaining cook time. This timer starts when the pot has reached the desired pressure level and temperature, not when you first select the settings.
It's normal for the display to show "On" for a few minutes before the timer begins, as the pot needs time to pressurize. Once the timer starts, it will count down in 1-minute increments until it reaches zero and beeps to signal the end of cooking.
Utilizing the Manual/Pressure Cook Setting
While the preset programs are convenient, sometimes you need more control over your cooking. That's where the "Manual" or "Pressure Cook" setting comes in handy. This option lets you set a custom cooking time and pressure level for any recipe.
To use the manual setting, simply press the "Pressure Cook" or "Manual" button and use the "+/-" buttons to adjust the time. You can also press the "Pressure Level" button to switch between high and low pressure.
The manual setting is perfect for experimenting with Instant Pot recipes or adapting family favorites to the Instant Pot. Just keep in mind that you may need to do some trial and error to find the ideal cooking time and pressure level for your ingredients.
By mastering these Instant Pot controls and settings, you'll be able to cook a wide variety of dishes with ease. Don't be afraid to play around with different options and find what works best for your needs. With a little practice, you'll be an Instant Pot pro in no time.
Tips for Successful Instant Pot Cooking
When it comes to cooking with your Instant Pot, there are a few key things to keep in mind to ensure your meals turn out perfectly every time. As someone who's been using an Instant Pot for years, I've learned a thing or two about what works and what doesn't.
First and foremost, always make sure you're adding enough liquid to your pot. This is crucial for building pressure and preventing the dreaded "burn" message. I recommend using at least 1 cup of liquid for most recipes.
Avoiding Overfilling
Another important tip? Don't overfill your pot. Your Instant Pot needs some room to work its magic, so make sure you're not filling it more than ⅔ full for most foods. Trust me, I've made this mistake before and ended up with quite a mess on my hands.
Properly Sealing the Lid
Of course, none of this matters if you don't properly seal the lid. Make sure the sealing ring is in place and the steam release valve is set to the sealing position. You should hear a little chime when the lid is closed correctly. The chime is a happy one and cannot be missed!
Allowing Time for Pressure to Build
Now, here's where some patience comes in handy. Your Instant Pot needs some time to build pressure before it starts cooking. Depending on what you're making, this can take anywhere from 5-30 minutes. During this time, you might notice some steam escaping or hear some hissing noises - that's totally normal.
Releasing Pressure Safely
Once your food is done cooking, it's time to release the pressure. There are two ways to do this: natural pressure release and quick release. With natural release, you simply let the pot sit until the pressure dissipates on its own. This can take 10-30 minutes. Quick release, on the other hand, involves manually turning the steam release valve to the venting position. Just be careful - that steam is hot.
Deglazing the Pot to Prevent Burning
If you're using the sauté mode to brown meats or veggies before pressure cooking, don't forget to deglaze the pot. This means adding a bit of liquid (like broth or wine) and scraping up any browned bits stuck to the bottom. Skipping this step is a surefire way to trigger the burn warning.
Cooking for Zero Minutes
Here's a cool tip for your Instant Pot: you can set it to cook at zero minutes. This works wonders for delicate foods like seafood or fresh veggies that need just a quick steam. The pot will still take time to build up pressure, giving your food a flash-cook effect.
Utilizing Pot-in-Pot Method
Lastly, don't be afraid to use the pot-in-pot method. This involves placing a separate oven-safe dish on a trivet inside your Instant Pot. It's an easy way to cook multiple dishes at once or to make recipes that don't require much liquid, like lasagna or cheesecake.
Mastering your Instant Pot is all about getting familiar with it and sticking to a few easy rules. With some practice—and maybe a few hiccups along the way, which happens to everyone—you'll soon be making tasty, perfectly cooked dishes effortlessly.
FAQ's
The slow cooker function on your Instant Pot typically takes 3 to 8 hours to cook, depending on the setting. Check if the display shows the countdown timer corresponding to your selected time, indicating that the slow cook cycle has started.
To slow-cook chicken breasts in your Instant Pot, ensure the lid is securely closed and set the cooking time to 2 to 4 hours. Look for steam escaping from the pressure release valve and the display showing the remaining time, indicating the slow cooking process is underway.
Before starting the cooking cycle, ensure the Instant Pot lid is properly aligned and sealed. Look for the sealing ring around the inner rim and ensure the steam release handle is in the sealing position. Additionally, check for the "lid locked" symbol on the display, confirming a secure seal for the duration of the 5 to 20-minute cooking cycle.
Conclusion
So, there you have it – the tell-tale signs that your Instant Pot is indeed cooking up a storm. From the hissing and steaming to the countdown timer and the float valve, these indicators are your trusty guides on the path to pressure cooking success.
The secret to mastering your Instant Pot lies in being patient and observant. Use your intuition alongside watching out for crucial signs. Soon enough, you’ll find yourself confidently making delicious dishes just like the pros do.
How do I know if my Instant Pot is cooking? Now, you've got the answers. So go forth, embrace the magic of pressure cooking, and let your Instant Pot adventures begin!


Leave a Reply