Wondering what the key is to make the creamiest, dreamiest yogurt in your Instant Pot? It's understanding what temperature the low yogurt setting on your Instant Pot actually uses. And I'm here to spill the beans.
You see, I've been there. Staring at my Instant Pot, wondering why my yogurt's not quite right. Too runny, too tart, just... off. But then I discovered the magic number. And it changed everything.
Jump to:
- What Temperature Is the Low Yogurt Setting on Instant Pot?
- How To Make Yogurt in an Instant Pot
- Understanding the Instant Pot Yogurt Settings
- Choosing the Right Milk for Instant Pot Yogurt
- Selecting a Yogurt Starter for Your Instant Pot
- Flavoring and Sweetening Your Instant Pot Yogurt
- Storing and Serving Your Homemade Instant Pot Yogurt
- Using Your Instant Pot as a Yogurt Maker
What Temperature Is the Low Yogurt Setting on Instant Pot?
The Instant Pot has revolutionized the way we make yogurt at home. With its built-in yogurt function, you can create creamy, delicious yogurt with minimal effort. But have you ever wondered what temperature the low yogurt setting actually is?
According to the Instant Pot manual, the low yogurt setting maintains a constant temperature between 110-115°F (43-46°C). This is the ideal range for incubating yogurt and allowing the beneficial bacteria to grow and thrive.
But why is this temperature range so important? It all comes down to the science of yogurt making.
The bacteria that turn milk into yogurt, such as Lactobacillus bulgaricus and Streptococcus thermophilus, require a specific temperature range to ferment the milk and create that tangy, creamy texture we all love.
If the temperature is too low, the bacteria won't be able to grow properly, resulting in runny or poorly set yogurt. On the other hand, if the temperature is too high, it can kill off the beneficial bacteria, leading to a failed batch.
That's where the Instant Pot's low yogurt setting comes in. By maintaining a consistent temperature within that ideal range, it takes the guesswork out of the process and ensures your yogurt turns out perfectly every time.
How To Make Yogurt in an Instant Pot
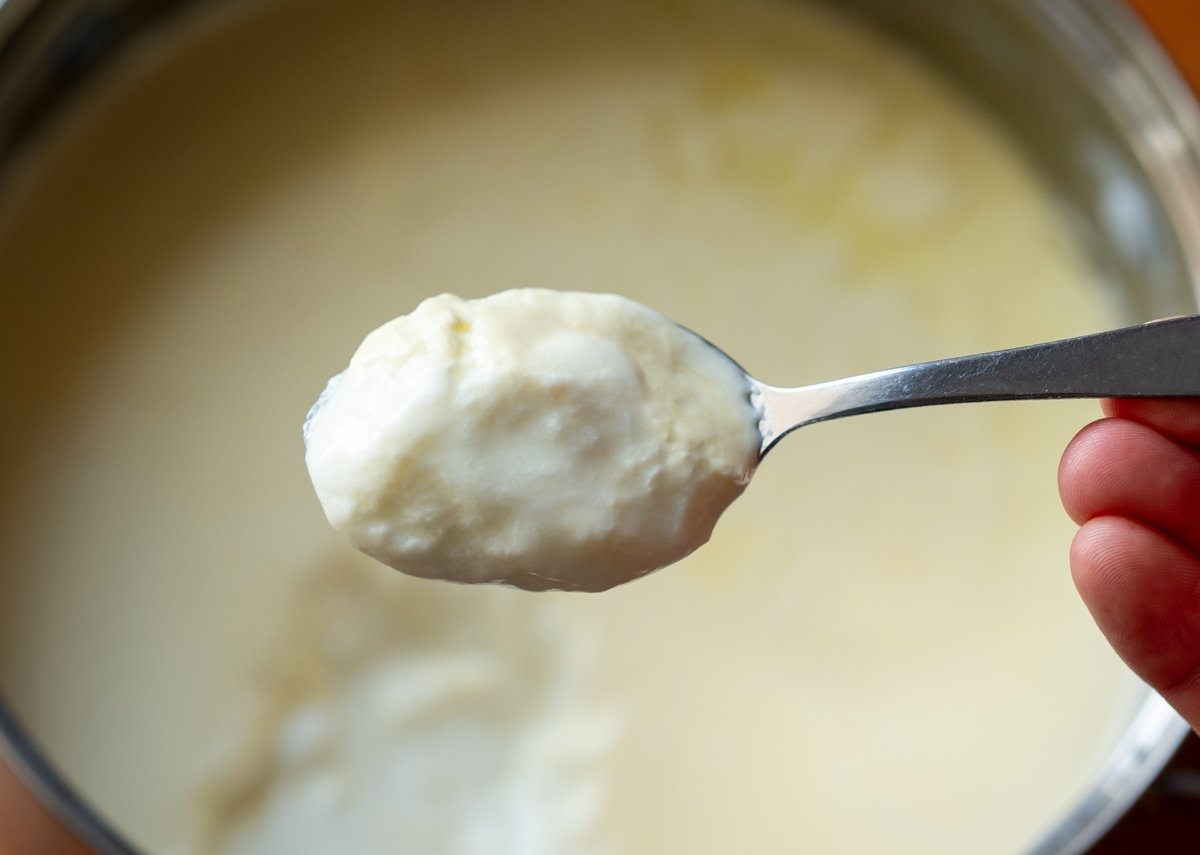
Making homemade yogurt in your Instant Pot is easier than you might think. With just a few simple ingredients and a little bit of patience, you can create creamy, delicious yogurt that's far superior to anything you'll find at the store.
Ingredients Needed for Instant Pot Yogurt
To make yogurt in your Instant Pot, you'll need:
- Milk (whole milk works best, but you can use 2% or skim if you prefer)
- Yogurt starter (you can use store-bought yogurt with live cultures or a yogurt starter powder)
And that's it. With just these two ingredients, you can make a batch that will rival any commercial yogurt you can buy at the store.
Steps to Make Yogurt in an Instant Pot
Step 1: Pour the milk into the inner pot and secure the lid.
Step 2: Press the "Yogurt" button and then press "Adjust" until the display reads "Boil."
Step 3: After you boil the milk, remove the lid and let the milk cool to around 110°F (43°C). Use a thermometer to check the temperature.
Step 4: When the milk has cooled, remove about a cup of the warm milk and whisk in your yogurt starter until it's well combined.
Step 5: Pour the starter mixture back into the Instant Pot and whisk everything together.
Step 6: Secure the lid and press the "Yogurt" button again. Use the "+" or "-" buttons to set the incubation time (8 to 12 hours is typical).
Step 7: When the incubation cycle is complete, transfer the yogurt to a fresh container and refrigerate until cold.
Tips for Making the Best Yogurt Using Your Instant Pot
- Use the freshest dairy milk possible for the best flavor and texture.
- If you like your yogurt on the thicker side, you can strain it through cheesecloth or a yogurt strainer to remove some of the whey.
- Experiment with different incubation times to find the flavor and consistency you prefer. Longer incubation will result in a tangier, thicker yogurt.
- Don't forget to save a little bit of your homemade yogurt to use as a starter for your next batch.
Understanding the Instant Pot Yogurt Settings
If you're new to making yogurt in an Instant Pot, the various settings and options can be a bit confusing. Let's break down the different yogurt settings and what they mean.
Normal Yogurt Setting vs. Low Yogurt Setting
The Instant Pot has two different yogurt settings: "Normal" and "Low." The normal setting is used for making regular yogurt, while the low setting is used for making a milder, less tangy yogurt.
The main difference between the two is the incubation temperature. As mentioned earlier, the low setting maintains a temperature between 110°-115°F (43°-46°C), while the normal setting is slightly higher, around 120°-125°F (49°-52°C).
If you prefer a tangier, more traditional yogurt flavor, the normal setting is the way to go. But if you like a milder, less acidic yogurt, the low setting might be more your speed.
Boil Setting for Yogurt Making
Before starting the incubation process, you need to boil milk to denature the proteins and create a thicker, creamier texture. That's where the "Boil" setting comes in.
When you select the "Boil" setting, the Instant Pot will heat milk to around 180°F (82°C), which is the ideal temperature for preparing the milk for yogurt making. Once the boiling cycle is complete, you'll need to let the milk cool down to around 110°F (43°C) before adding your starter culture.
Also read: How To Make Yogurt In Instant Pot Without Yogurt Button
Other Instant Pot Settings to Know
In addition to the yogurt settings, there are a few other Instant Pot functions you should be familiar with when making yogurt:
- "Keep Warm" Setting: This setting will keep your yogurt at a constant temperature after the incubation cycle is complete. However, it's generally recommended to transfer the yogurt to the refrigerator instead to stop the fermentation process.
- "Delay Start" Setting: This setting allows you to delay the start of the yogurt-making process, which can be helpful if you want fresh yogurt ready in the morning.
- "Adjust" Button: Use this button to toggle between the different yogurt settings and adjust the incubation time.
Choosing the Right Milk for Instant Pot Yogurt
The type of milk you use can have a big impact on the final texture and flavor of your homemade yogurt. Here are some things to keep in mind when selecting milk for your Instant Pot yogurt.
Whole Milk vs. Skim Milk for Yogurt
Whole milk is generally considered the best choice for making yogurt, as it results in a thicker, creamier texture and richer flavor. The higher fat content in whole milk helps the yogurt form a more stable gel structure during fermentation.
That being said, you can certainly use low fat milk like 2% or skim if you prefer. Just keep in mind that the final yogurt may be slightly thinner and less creamy than yogurt made with whole milk.
If you want to make a lower-fat yogurt that still has a thick, creamy texture, you can try adding some dry milk powder to the milk before heating it. This will increase the protein content and help create a firmer set.
Ideal Milk Temperature for Yogurt Making
As mentioned earlier, the milk needs to be heated to around 180°F (82°C) before adding the starter culture. This high temperature helps denature the proteins in the milk, creating a thicker, creamier texture in the final yogurt.
After heating the milk, it's important to let it cool down to around 110°F (43°C) - low setting, before adding the starter. If the milk is too hot, it can kill off the beneficial bacteria in the starter, resulting in a failed batch of yogurt.
You can use a meat thermometer to check the temperature of the milk, or simply use the "Boil" setting on your Instant Pot and then let the milk cool until it's just warm to the touch.
Amount of Milk to Use for Instant Pot Yogurt
The amount of milk you use will depend on the size of your Instant Pot and how much yogurt you want to make. As a rule of thumb, you can make about 1 quart (1 liter) of yogurt per ½ gallon (2 liters) of milk.
For larger Instant Pot models, you can easily double or triple the recipe to make a bigger batch. Just keep in mind that the incubation time may need to be adjusted slightly for larger batches.
It's also important not to fill your Instant Pot more than ⅔ full when making yogurt, as the milk will expand during the boiling process and can overflow if there's too much in the pot.
Selecting a Yogurt Starter for Your Instant Pot

When it comes to making homemade yogurt in Instant Pots, the yogurt starter you choose can make all the difference. Trust me, I've experimented with my fair share of starters over the years.
Using Store-Bought Yogurt as a Starter
One of the easiest options is to simply use store-bought yogurt as your starter. Look for a high-quality, plain yogurt with live active cultures.
Plain Greek yogurt works great, but regular yogurt will do the trick, too. Avoid flavored yogurts as they can mess with the final taste of your homemade batch. Vanilla yogurt might seem tempting, but plain is the way to go.
Amount of Starter to Use
You don't need much starter yogurt to get things going. Just 2 to 3 tablespoons of store-bought yogurt per half a gallon of milk will work wonders. I've found that using more starter doesn't necessarily speed up the process or make the yogurt any better. So, save that precious yogurt for parfaits and smoothies.
Choosing Between Plain, Greek, or Flavored Yogurt Starters
As I mentioned, plain yogurt is ideal for your starter. It gives you a blank canvas to work with so you can flavor your yogurt exactly how you like it.
Greek yogurt will result in an even thicker, creamier final product. So, if you're a fan of Greek-style yogurt, go ahead and use that as your starter. Flavored yogurts, while tasty on their own, can throw off the delicate balance of your homemade yogurt. Stick with plain for the best results.
Also read: Instant Pot Delay Start - Time Your Meals Perfectly!
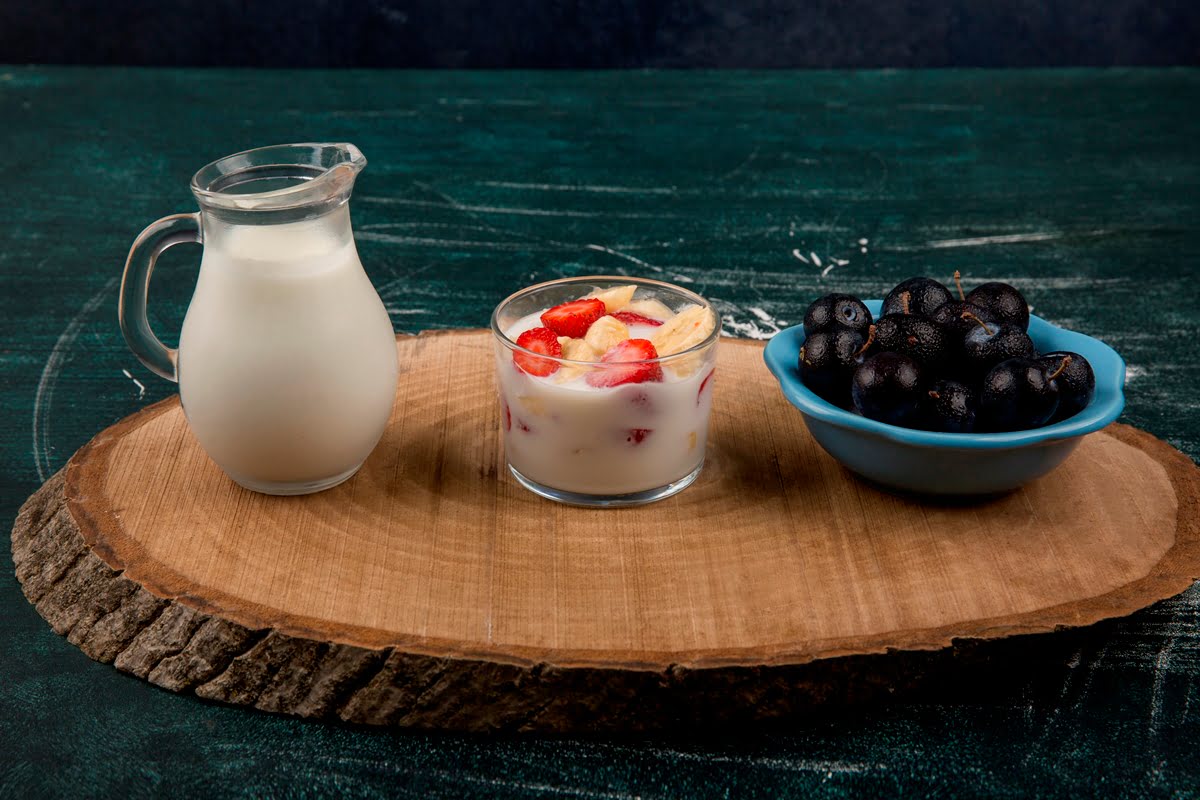
Flavoring and Sweetening Your Instant Pot Yogurt
What makes yogurt fun to make at home is the fact that you can flavor it exactly how you like it. The possibilities are endless, but here are a few of my favorite mix-ins.
Adding Vanilla Extract to Yogurt
Vanilla yogurt is a classic for a reason. To make your own, simply stir in a teaspoon or two of pure vanilla extract into your finished yogurt. Start with a little and add more to taste.
For an extra fancy twist, try using vanilla bean paste or scraping the seeds from a whole vanilla bean. The flecks of vanilla add a gourmet touch.
Sweetening Yogurt with Maple Syrup
Maple syrup is my go-to sweetener for homemade yogurt. It dissolves easily and adds a subtle, caramel-like flavor that pairs perfectly with the tangy yogurt. Start with a tablespoon of maple syrup per one cup of yogurt and adjust to your liking. Honey works great too if that's more your jam.
Topping Yogurt with Homemade Granola
Okay, this is more of a topping than a mix-in, but hear me out. Homemade granola takes your yogurt game to the next level.
Whip up a batch of your favorite granola recipe (or try this one from Love & Lemons) and sprinkle it over your yogurt for a satisfying crunch in every bite. Customize it with your favorite nuts, seeds, and dried fruit.
Storing and Serving Your Homemade Instant Pot Yogurt
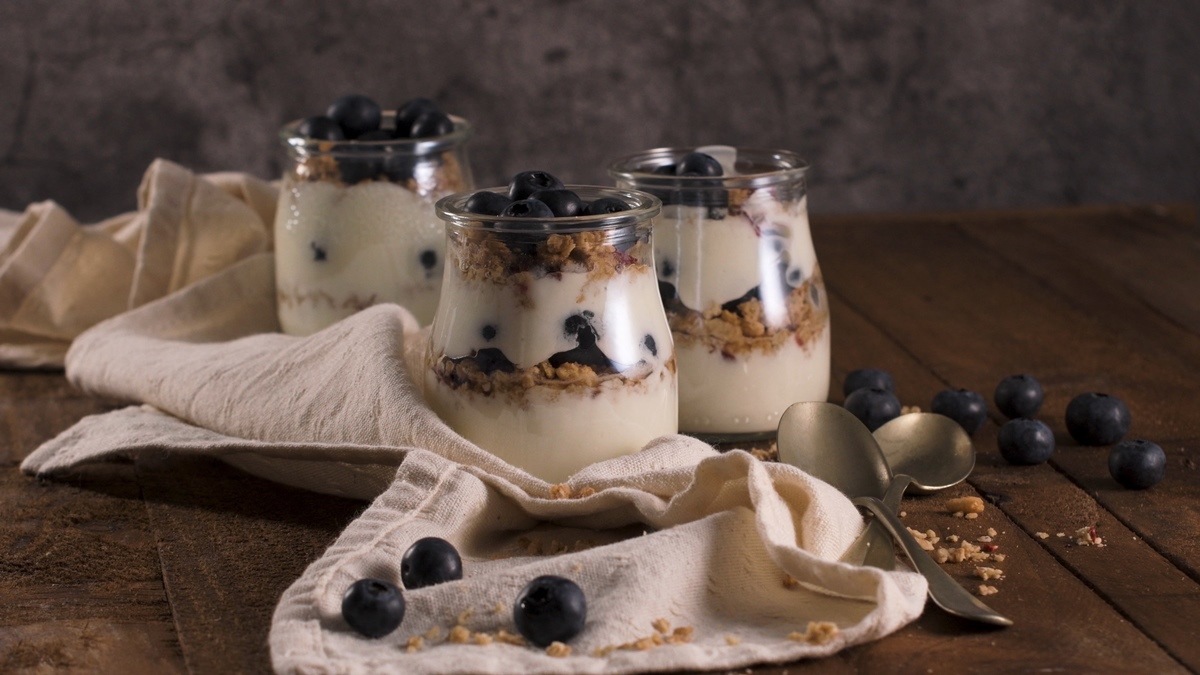
You've put in the work to make your own yogurt, now it's time to enjoy the fruits of your labor. Here's how to store and serve it for maximum deliciousness.
Transferring Yogurt to Glass Jars for Storage
Once your yogurt is finished, transfer it to clean glass canning jars or a large mixing bowl for storage. I like using mason jars because they're easy to grab and go.
Make sure your jars are spotlessly clean to avoid introducing any unwanted bacteria to your fresh yogurt. Let the yogurt cool completely before putting on the lids and refrigerating.
Straining Yogurt for Thicker Consistency
If you prefer a thicker, Greek-style yogurt, you can strain your homemade yogurt to remove some of the whey.
To do this, line a strainer with cheesecloth or coffee filters and set it over a large bowl. Pour in the yogurt and let it strain in the fridge overnight. In the morning, you'll have delightfully thick and creamy yogurt.
Freezing Yogurt in Cubes for Later Use
If you find yourself with more yogurt than you can eat in a week, try freezing it for later. You can then thaw a few cubes at a time to use in smoothies, as a starter for your next batch, or to eat on their own.
To do this, pour the yogurt into ice cube trays and freeze until solid. Once frozen, pop out the yogurt cubes and store them in a freezer-safe bag or container.
Using Your Instant Pot as a Yogurt Maker
So, there you have it. The low yogurt setting on your Instant Pot should be right around 110°F (43°C). That's the sweet spot for incubating those delightful little yogurt cultures, giving you the creamiest, dreamiest yogurt you've ever tasted.
But hey, don't just take my word for it. Give it a whirl! Experiment with different temperatures in that 110-115°F range and find what works best for you. Because when it comes to homemade yogurt, it's all about finding your perfect balance.
Trust me, once you've nailed that low yogurt setting temperature, you'll never go back to store-bought again. You'll be the yogurt master, the Instant Pot pro, the... well, you get the idea.
So go forth and conquer that yogurt, my friend. With the right temperature and a little bit of love, you'll be whipping up batches of pure, creamy goodness in no time. Happy yogurt-making!


Lena
These are totally different temperatures than I have seen listed anywhere else. Why is there absolutely no consensus about what temperature each setting produces?